18.3. WireGuard
WireGuard implements virtual private network (VPN) techniques to create secure point-to-point or site-to-site connections.
WireGuard uses state-of-the-art cryptography, like the Noise protocol framework, Curve25519, ChaCha20, Poly1305, BLAKE2, SipHash24, HKDF, and secure trusted constructions. It makes conservative and reasonable choices and has been reviewed by cryptographers.
It also aims at having a better performance and a lower power consumption than IPsec and OpenVPN have while being easier to set up.
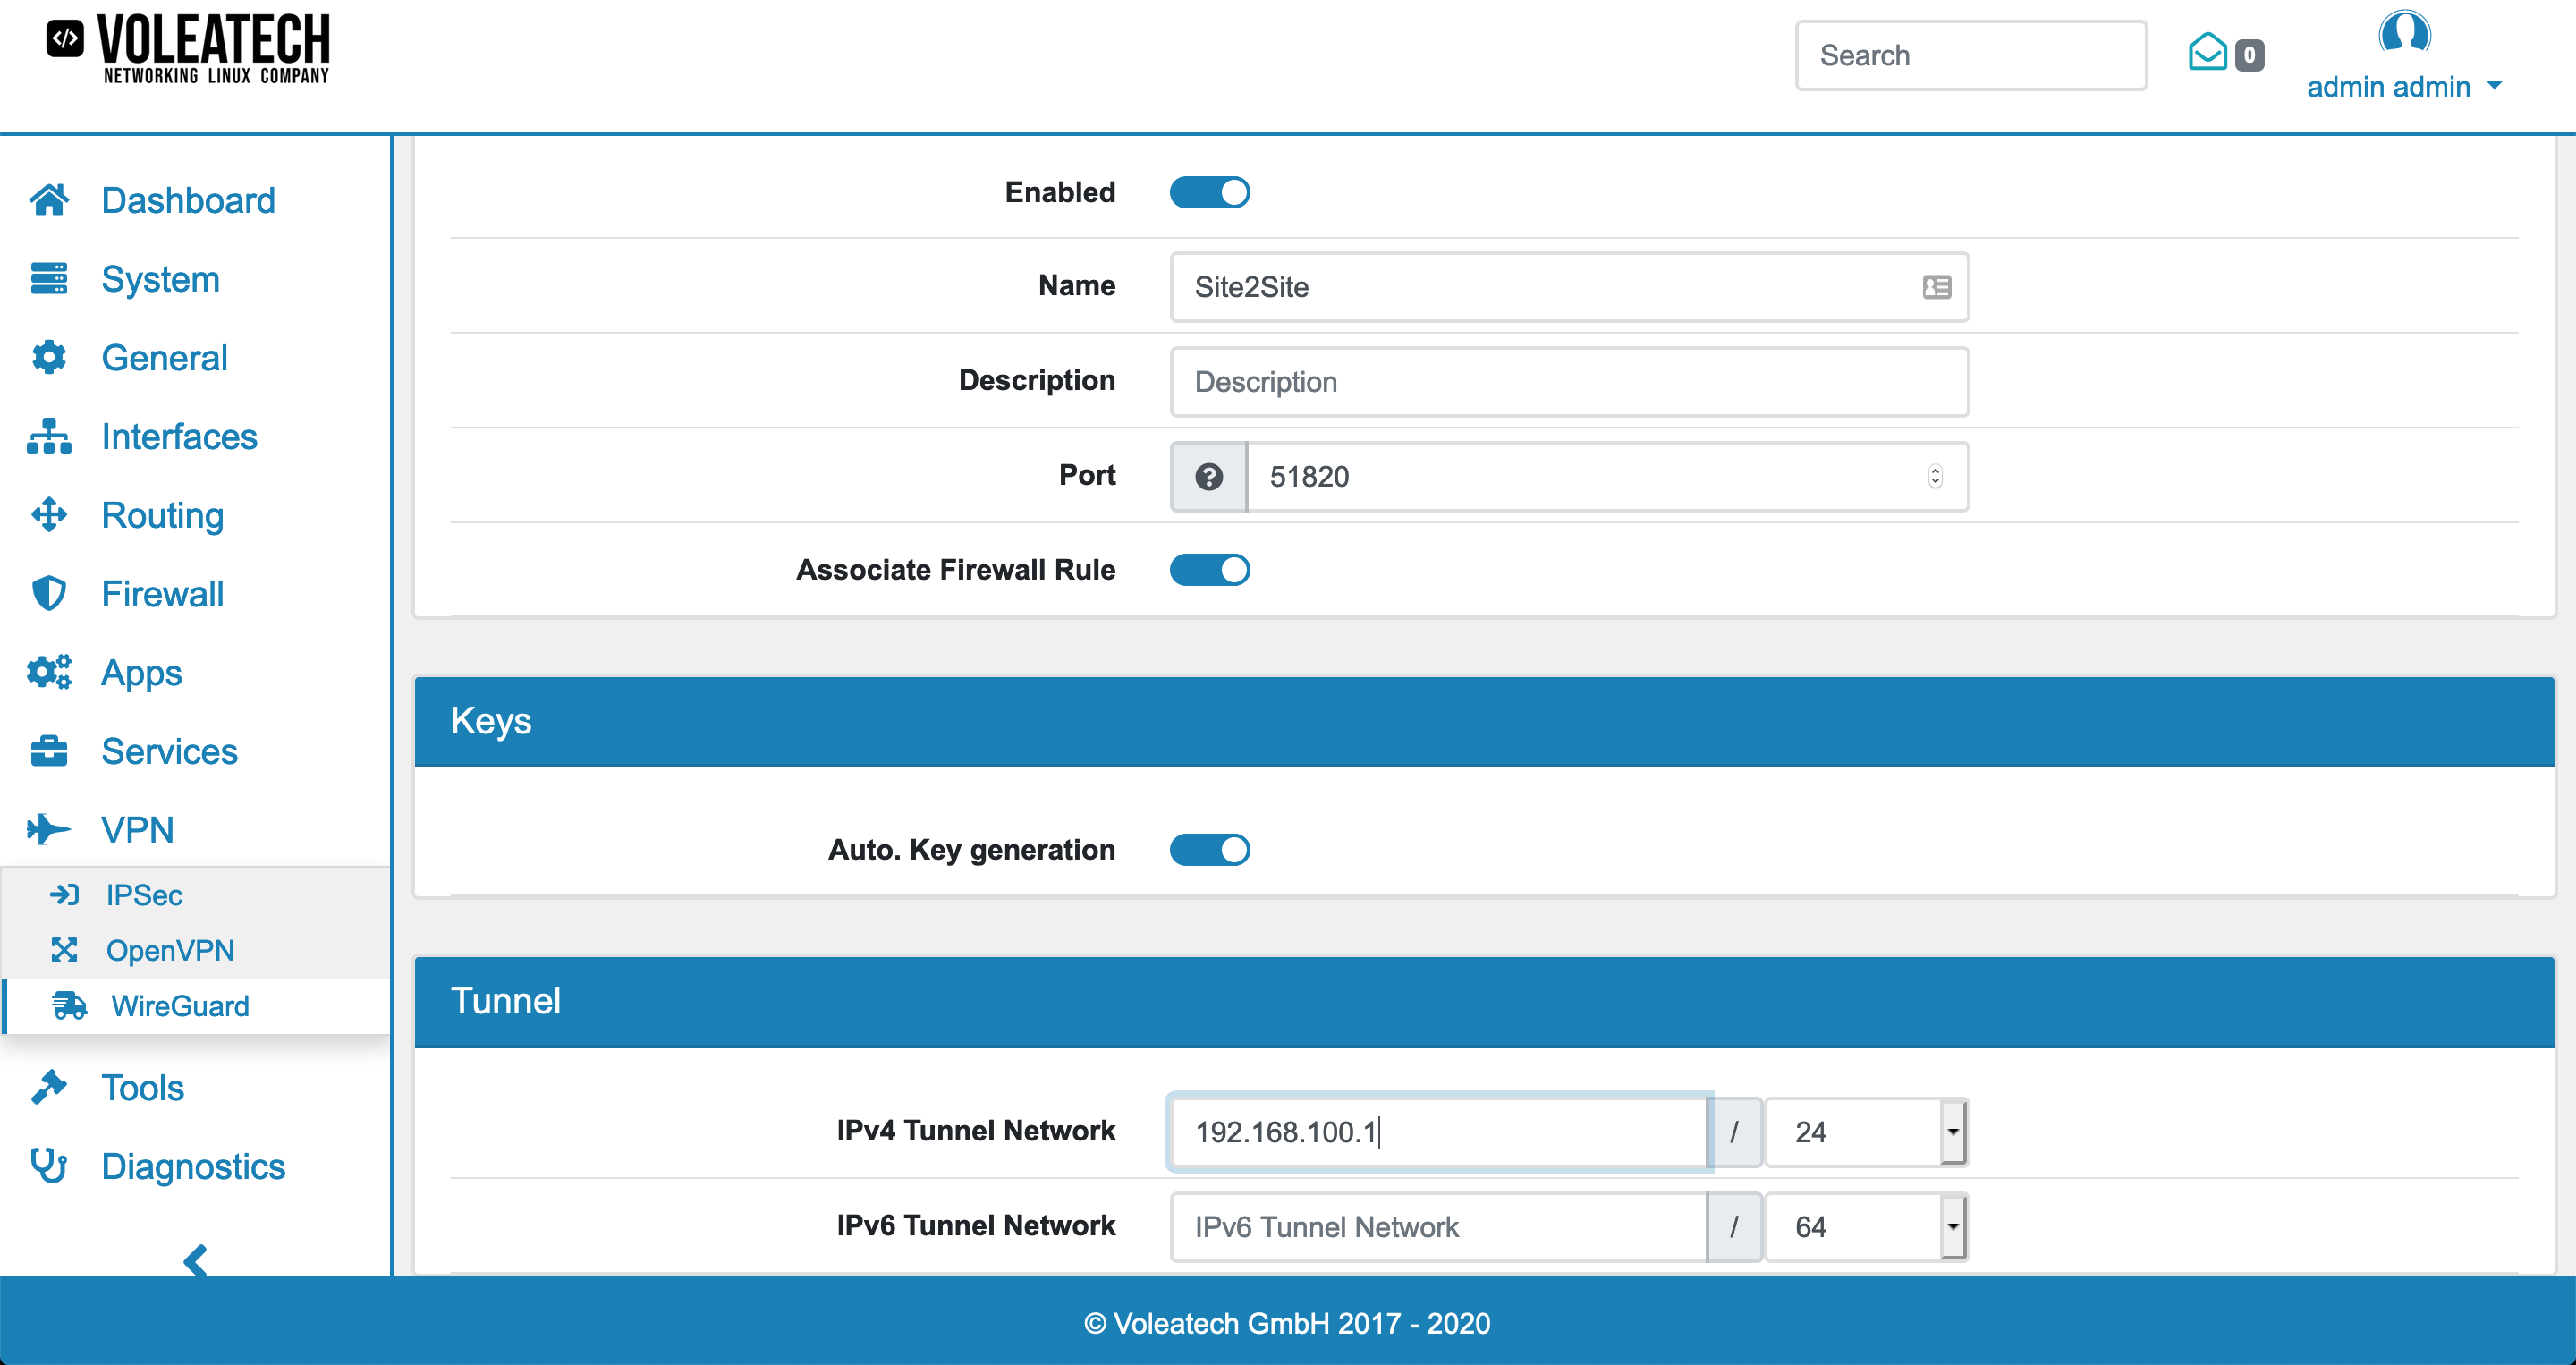
18.3.1. Settings
Port each WireGuard connection needs a unique port.
Private Key is the private key of the VT AIR. Never give it to another party.
Public Key is the public key of the VT AIR and must be given to the remote peer.
Tunnel IP is the local IP Address of the WireGuard connection and the netmask must be set to the entire network. The Tunnel IP can be IPv4 and/or IPv6.
DNS Server can be an IP Address of a DNS Server.
MTU is the Maximum Transmission Unit and 1420 by default. If you have a PPPoE connection you need to set it to 1412.
Associate Firewall Rule can be enabled so an OpenVPN associated Firewallrule will be created and updated.
Routing Table can be changed and uses the Main routing table by default. The peer remote networks will be added to this routing table.
Master Only Only start WireGuard if the VT AIR is the network master in a HA setup.
Additional Tunnel IPs are additional IP addresses on the local server or peers.
You can export the settings in the top right corner as an Excel spreadsheet.
18.3.2. Export Settings
The export settings will set basic options for peer exports.
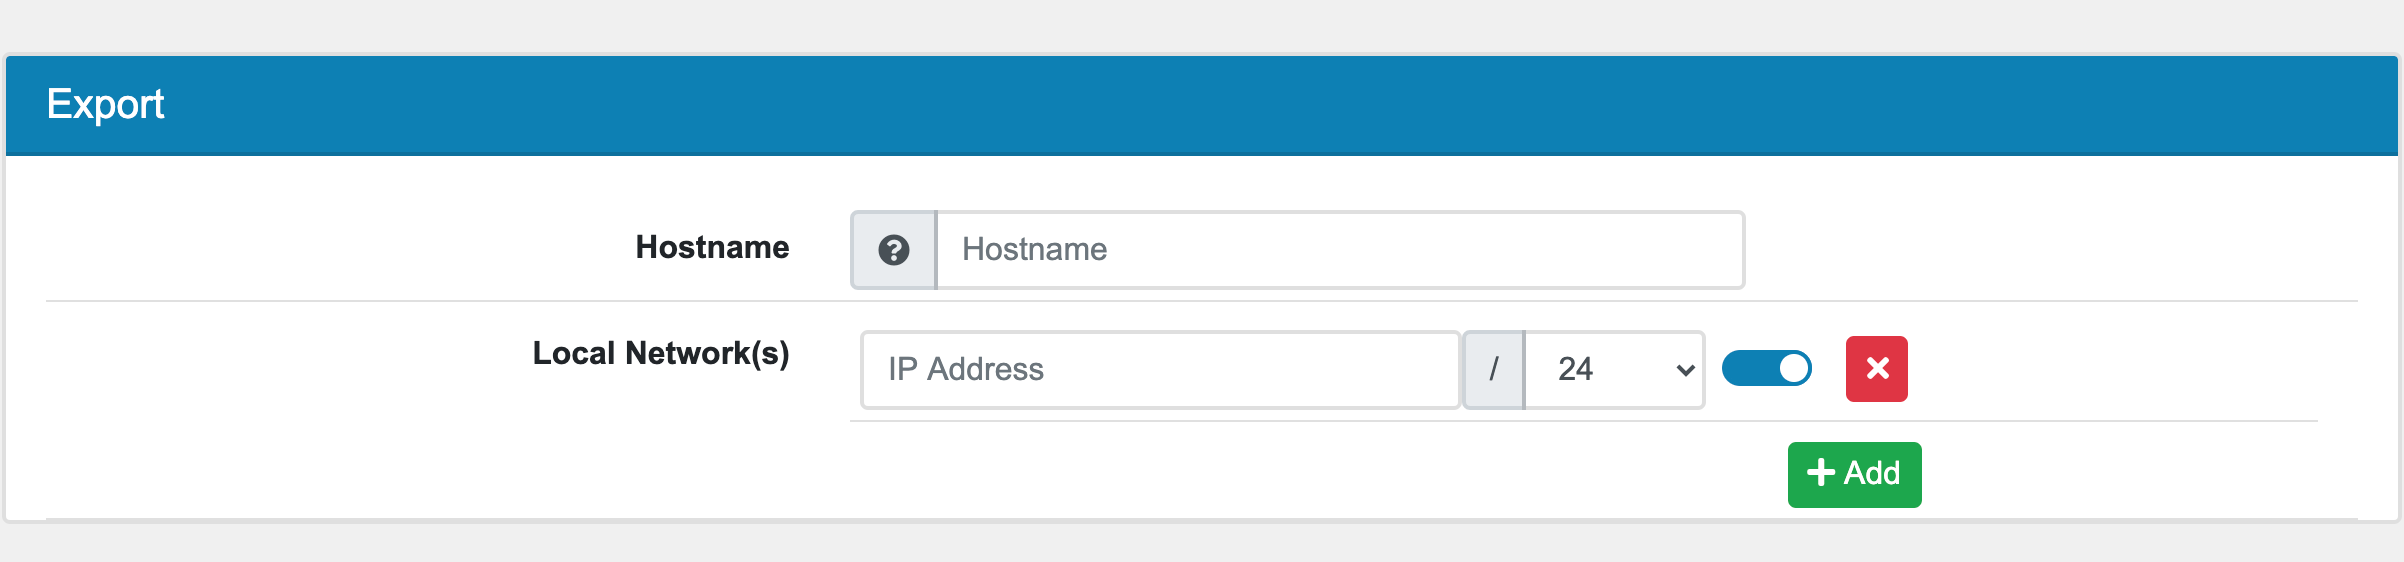
Enter the hostname where the WireGuard server is accessible over the internet to your Peers. It can be a hostname or IP Address.
The Local Network(s) are all networks that should be accessible from the peer. Usually you enter the networks behind the WireGuards server the Peer should access.
Note
If you want to enable Peer to Peer communication, also Enter the IPv4 Tunnel Network to the Local Network(s) All Local Network(s) are added to the Additional IPs configuration setting.
18.3.3. Peer
A Peer is a remote device and it can be a site or a client. There is no difference, every remote endpoint is a peer.
Keep Alive can be sent every few seconds to make sure that the connection is up.
Private Key is the private key of the Peer and not required for the connection. You have the option to generate a Key Pair here if your Peer can not do so. In that case it will be shown here.
Public Key is the public key of the Peer and required for the connection.
Preshared Key is optional and can be added as a secondary authentication.
Tunnel IP is the remote IP Address of the WireGuard connection. The Tunnel IP can be IPv4 and/or IPv6 and must be in the Settings Tunnel IP Range.
Endpoint Address can be an IP or Hostname of the Peer.
Endpoint Port is the remote port of the Peer.
Remote Networks are networks that are reachable behind that peer.
Additional Tunnel IPs are additional IP addresses on the local server or peers.
18.3.4. Export
If you created a peer you can export the peer config. You can find the export at the quick edit at the bottom of the corresponding wireguard edit page.
18.3.5. QR Code
Once a peer is created a QR code is available. It contains the peer config. You can find it at the quick edit at the bottom of the corresponding wireguard edit page.
18.3.6. Import Config
Instead of creating a new WireGuard you can import settings from an existing WireGuard config. You can find the Import Config button at the bottom right corner of the WireGuard management page. The VT AIR will create the data structure and try to import almost all settings from the config.
18.3.7. Example WireGuard Configuration
Go to VPN → WireGuard and click Add. The address and address range you define under Tunnel Network are the addresses assigned to the VPN clients. Choose an address range that is unused by the rest of your local network. If you have only a single client connected to your VPN choose single IP address (range 30).
When creating peers (clients) pay special attention that in WireGuard it is only possible to have as many peers as you have manually configured since every peer is assigned a unique static Tunnel IP address. You also cannot log in with the same peer multiple times concurrently.
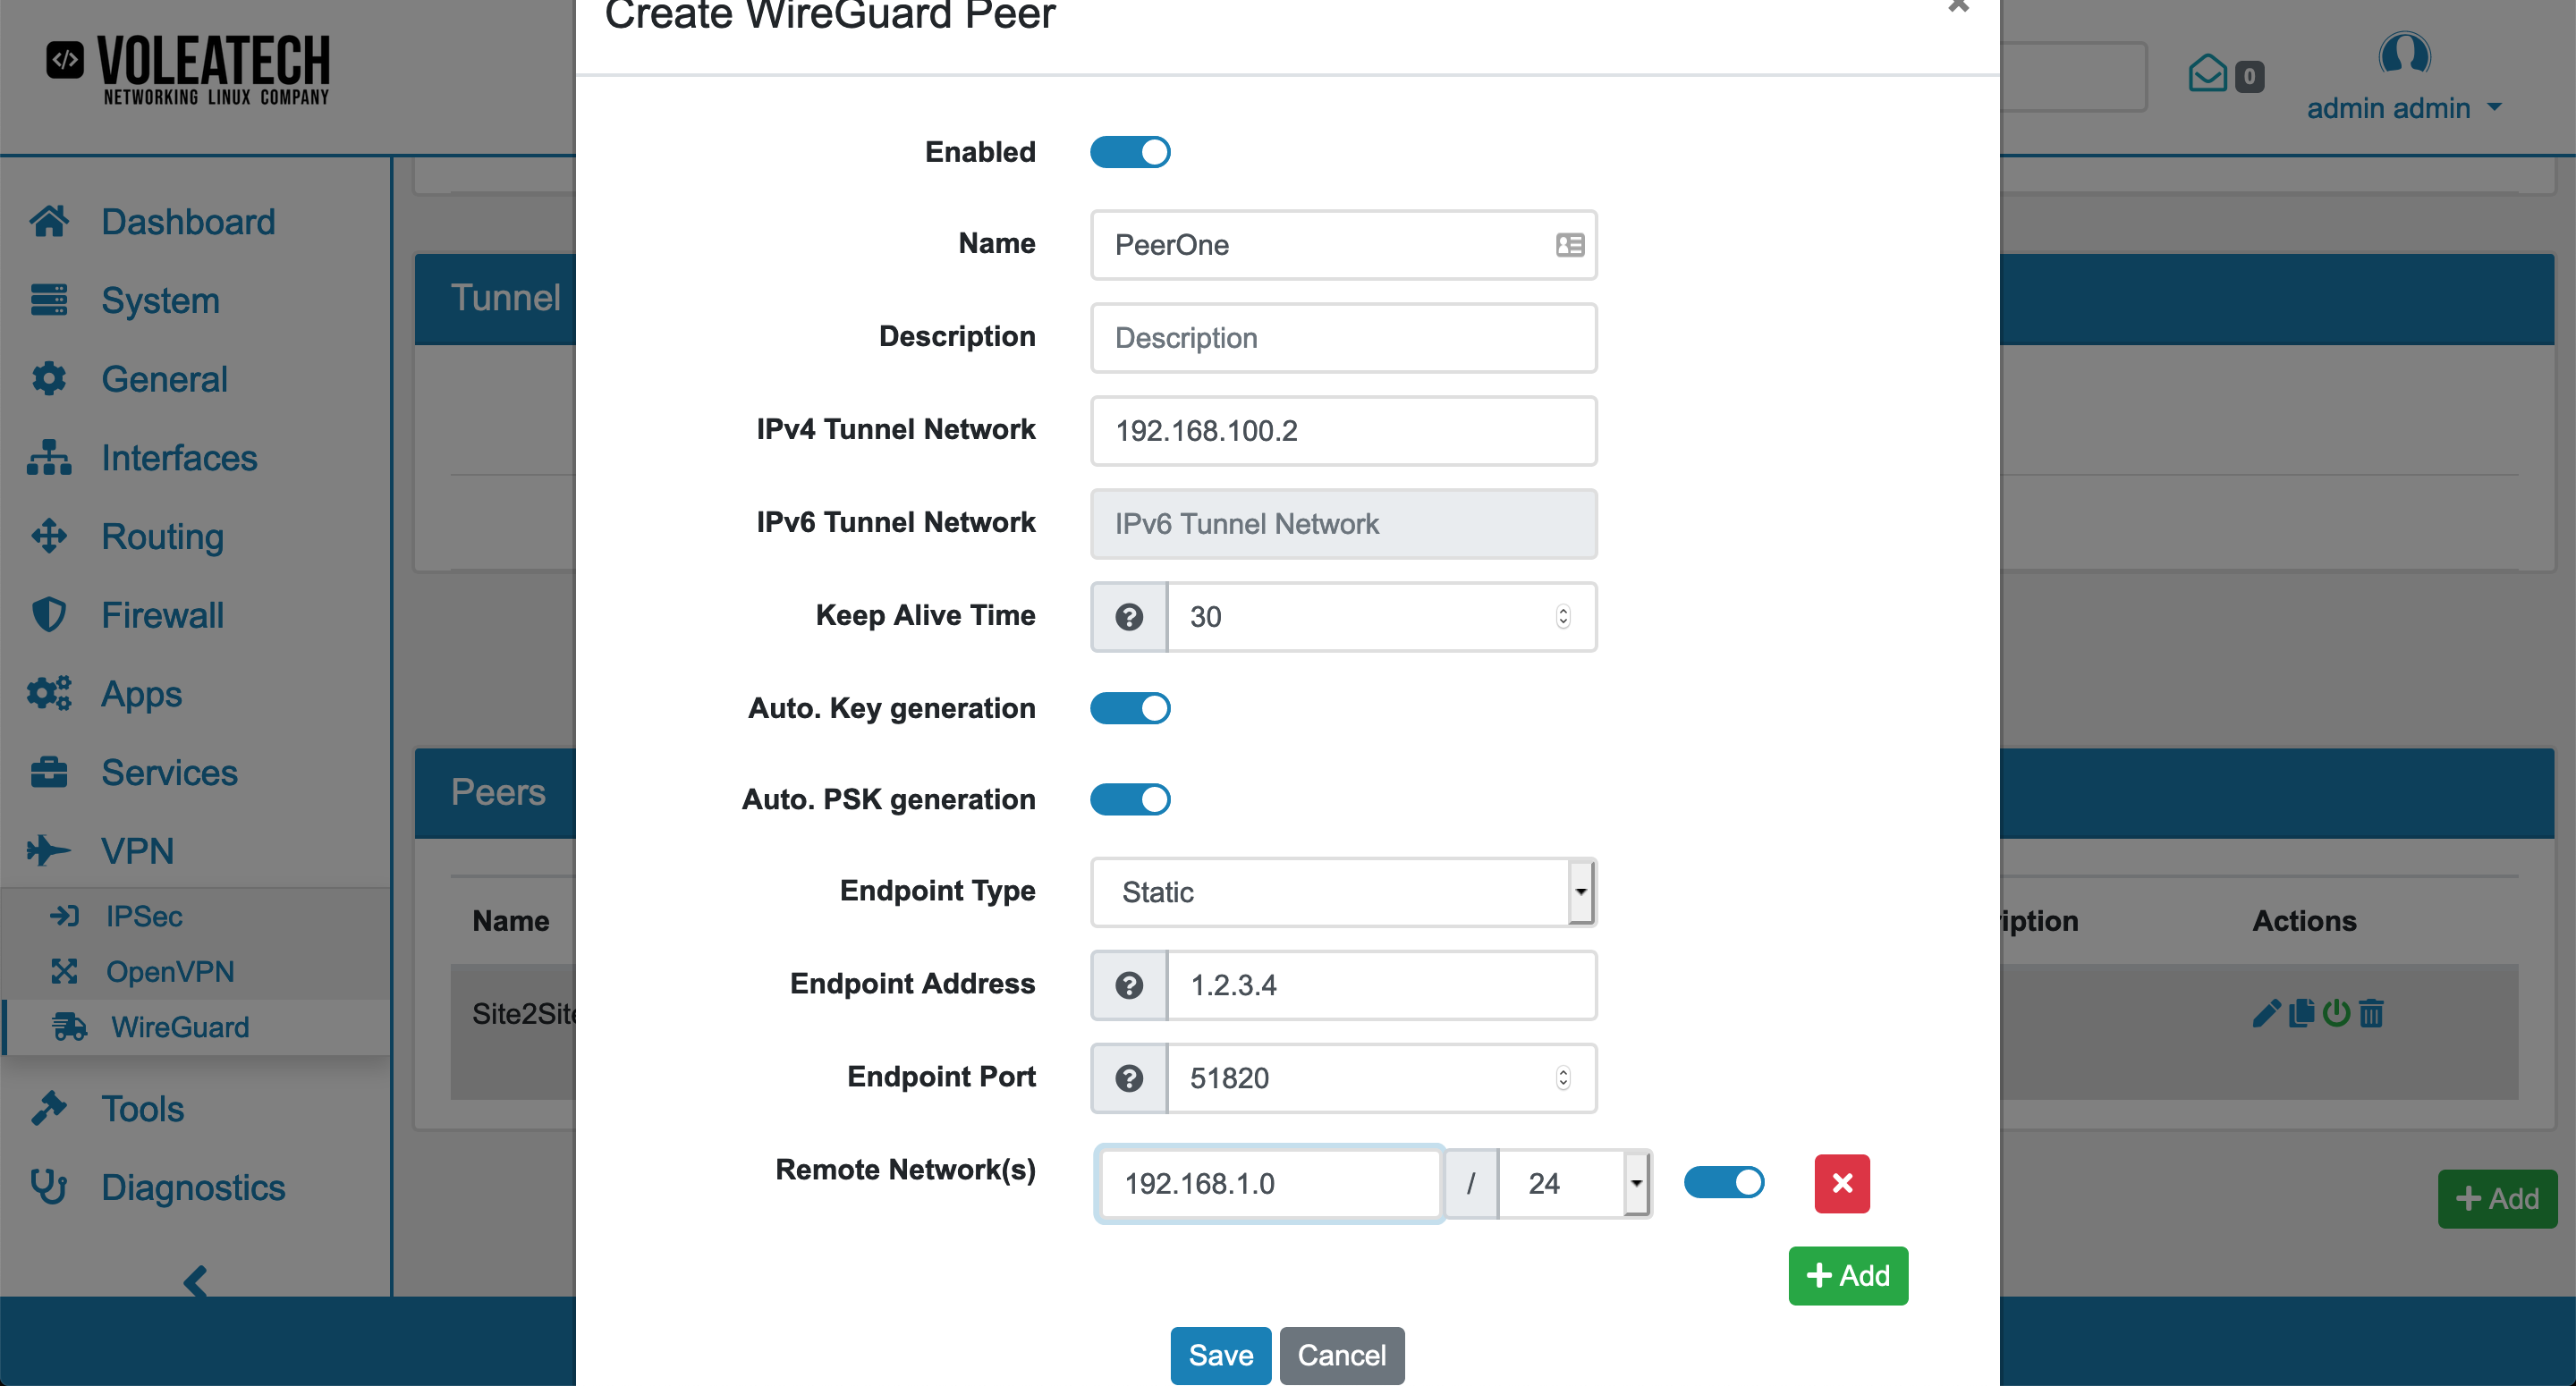
Click Add to create a new peer. Enter an Tunnel IP address that is not used by any other peer and within the range that you specified in your server’s configuration. You can also specify additional Tunnel IP addresses under Additional Tunnel IPs.
Auto PSK Generation automatically creates a secure Pre-Shared Key that your peer can use for connecting. The PSK is optional and gives a second layer of authentication besides the key.
If you choose Endpoint Type Static you can specify your server’s public IP address and the port that you entered in your WireGuard configuration. Under Remote Networks you can specify which local networks are available behind the peer. The remote networks will then be reachable from the server. If you do not want to access any network behind the peer, leace the Remote Networks empty.
The Local Network(s) in the peer can be used to have specific Networks that should be reachable only for this Peer. They are in addition to the global Local Network(s).
Click Save to save the peer and after creating all the peers click Save again to save the whole configuration.
Export the peer configuration via the Export panel above the Save button.
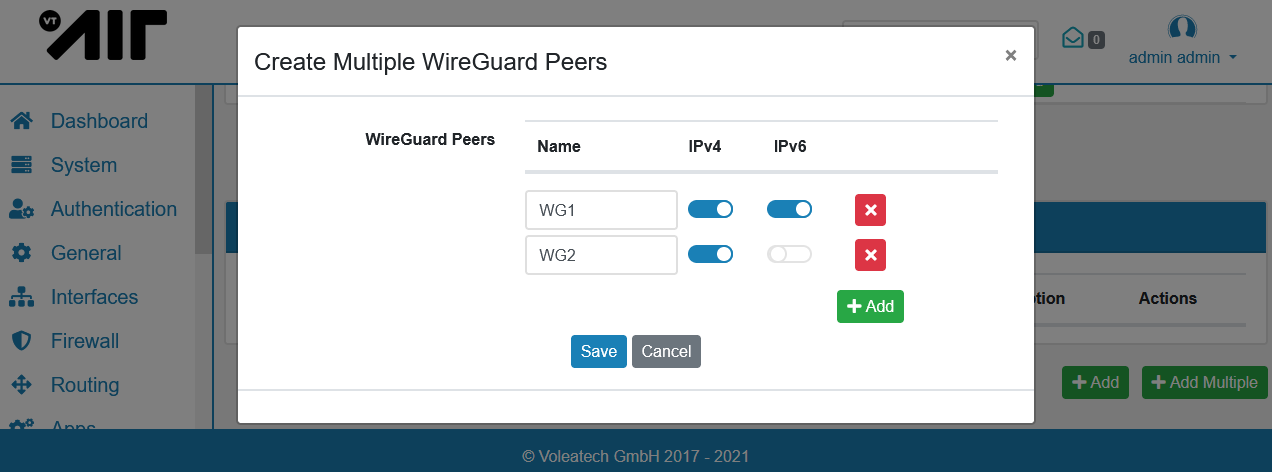
You can also click Add Multiple to easily create multiple peers at once. You only need to provide the peer name, the IP Address will be filled automatically if you do not enter one.
Note
You need to create Firewall Rules on the new Wireguard_XXX Interface in order to allow network traffic from the peers. Please have a look at Firewall Rules (Forward and Input) for a detailed explanation on how to create Firewall Rules for an interface.