3.9. VT AIR Azure
VT AIR Azure brings you all VT AIR feature to Microsoft Azure Cloud.
VT AIR Azure can be run in any region where Azure offers service on various sizes of instance. VT AIR for Azure is available in the Azure Marketplace.
All features are available in the Azure Version and you can use VT AIR as a firewall to protect your Virtual Machines or as a VPN server to connect via IPSec, OpenVPN or WireGuard.
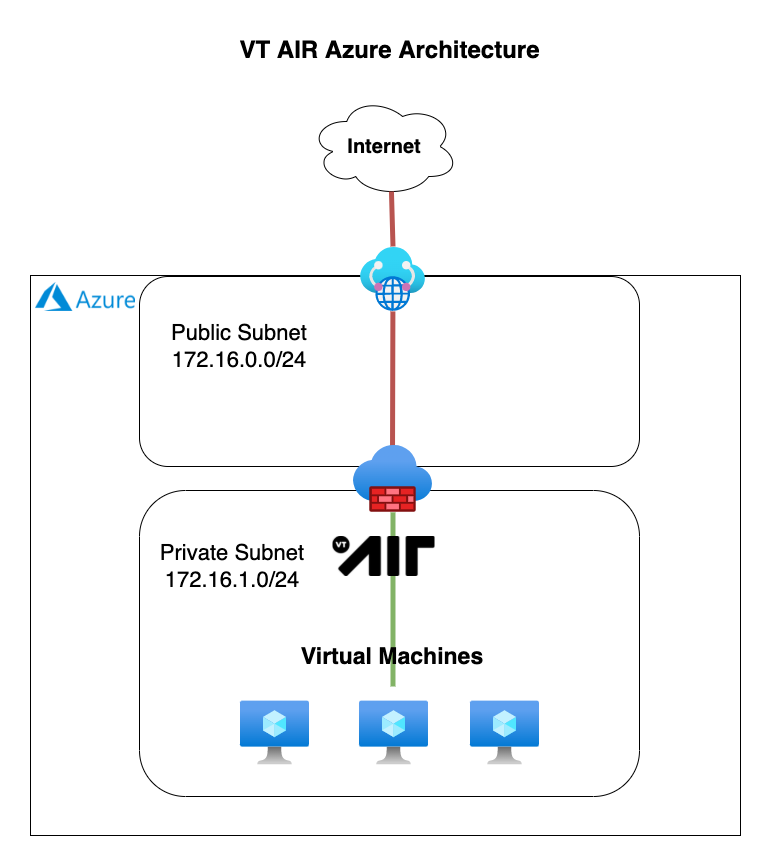
In order to configure your Azure environment to utilize VT AIR as a firewall in front of other VMs, a couple of configuration steps have to be done.
Virtual Network Configuration
New Virtual Network
Public Subnet
Private Subnet
Private Routing Table
Public Network Security Group
Private Network Security Group
Private Network Interface
Enable Traffic Forwarding
Associate Private Network Security Group
Azure VT AIR Appliance
Public Network Interface (WAN)
In the Public Subnet
Public Network Security Group
Private Network Interface (LAN)
Default route pointing to VT AIR LAN interface
VT AIR configuration
Enable and set LAN Interface
Create DNAT Rules and VPN Configuration
Azure VMs
Add to the Private Network Subnet
Set Private Network Security Group
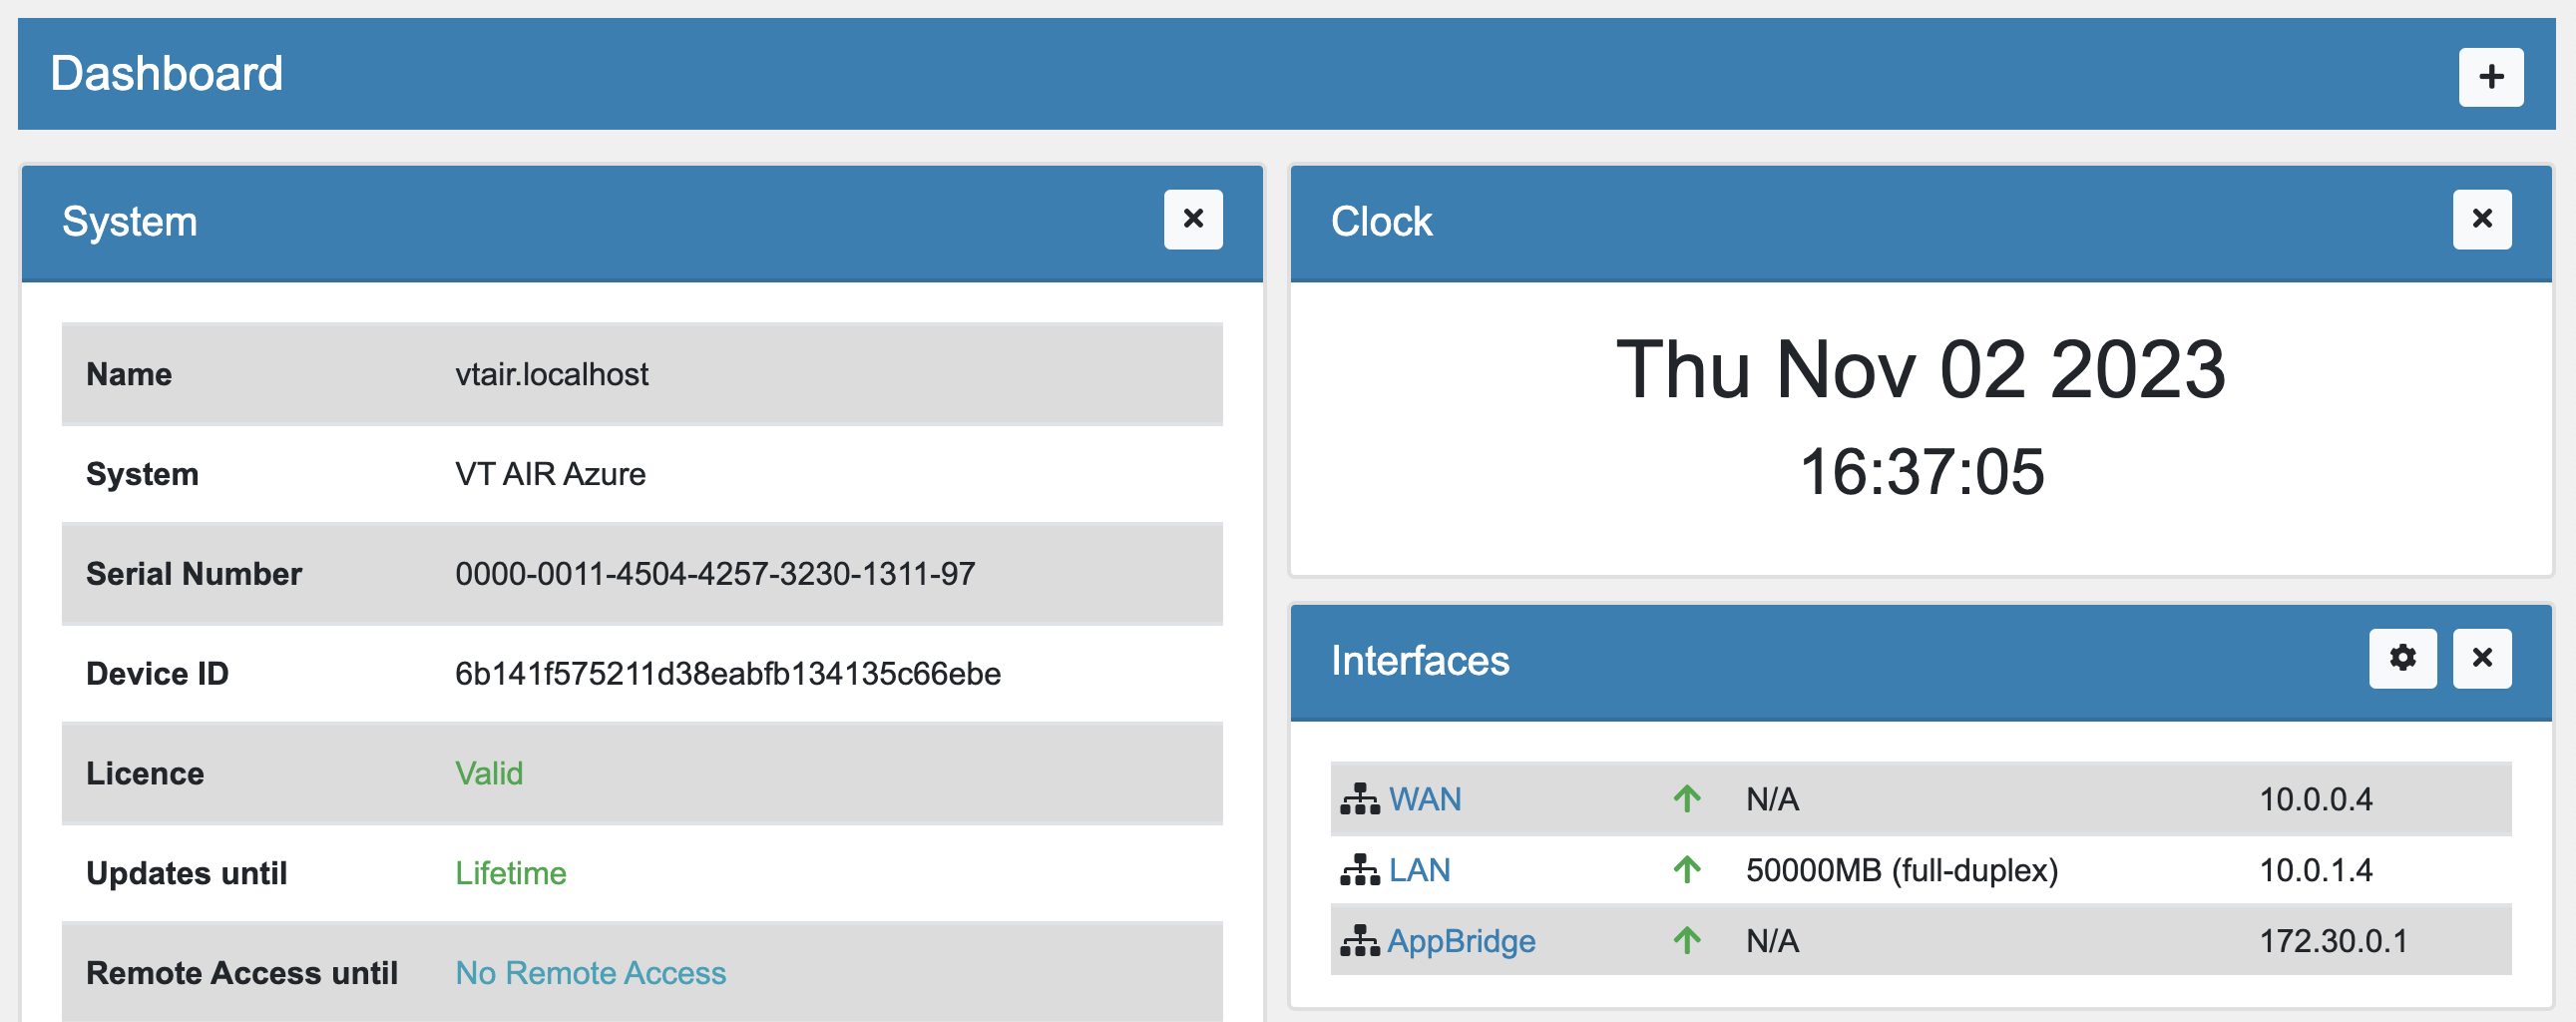
3.9.1. Default Login
Default login data for the WebGUI are user admin and the password is vtair.
3.9.2. Important Information
Be aware that not all the usual network operations are possible. There is no suport for
ARP
Multicast
Broadcast
in Azure.
3.9.3. Virtual Network Configuration
Login to your Azure Account and change to the Virtual Networks configuration page.

We have created videos to show the entire configurations.
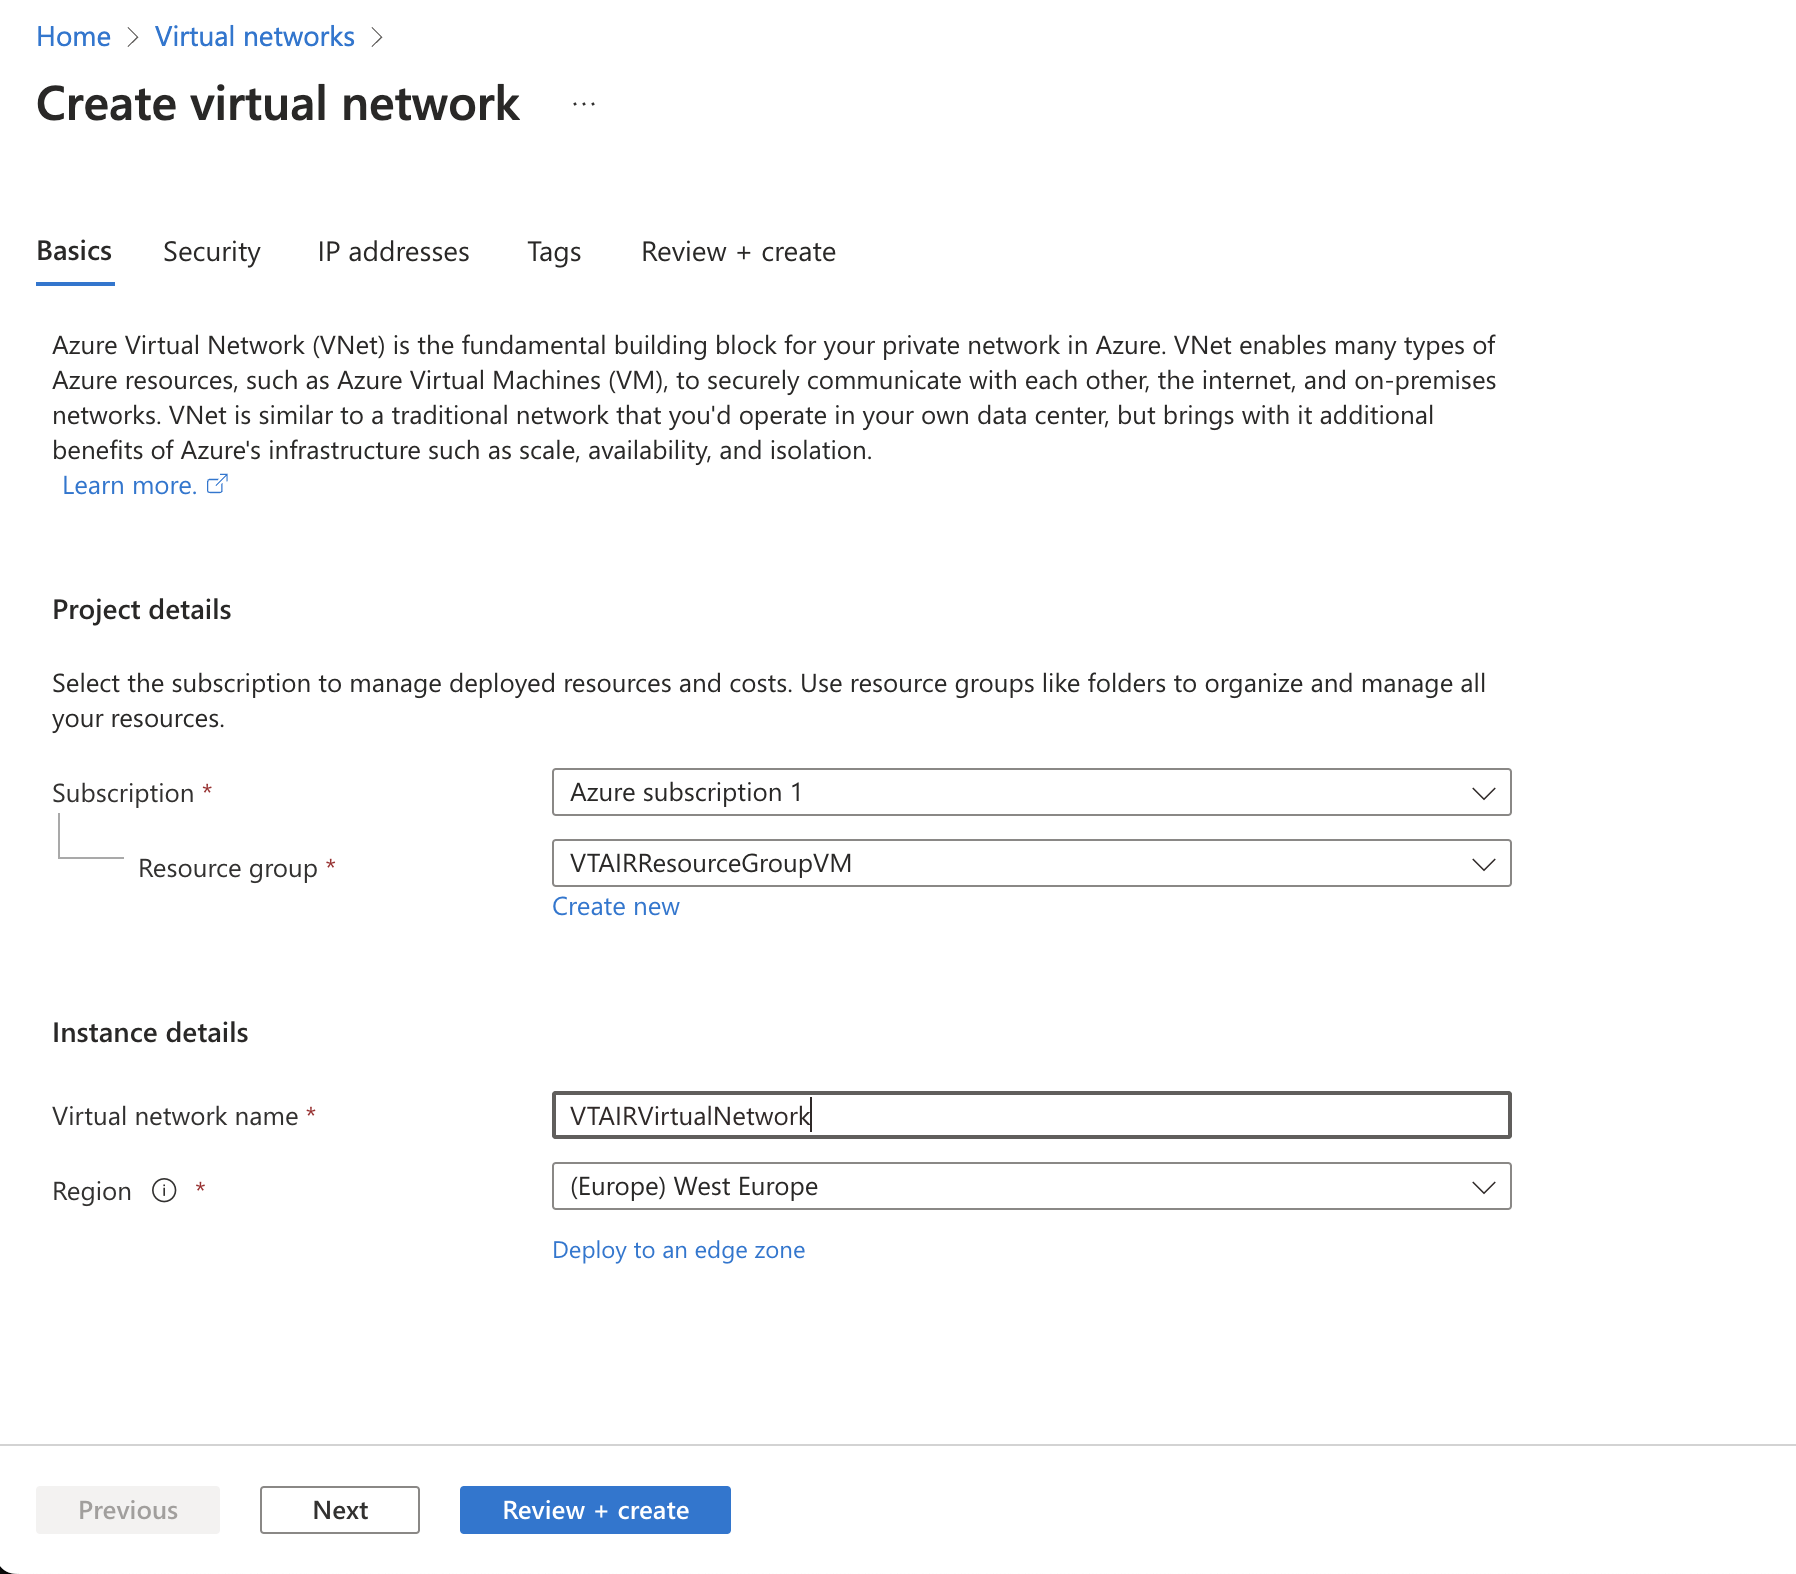
3.9.3.1. New Virtual Network
We will create a new Virtual Network for the VT AIR setup. If you already have a Virtual Network with two subnets configured, you can skip these steps.
Click on Create.
Choose your Subscription, Resource group and Region and give the Virtual Network a name, in our case we choose VTAIRVirtualNetwork.
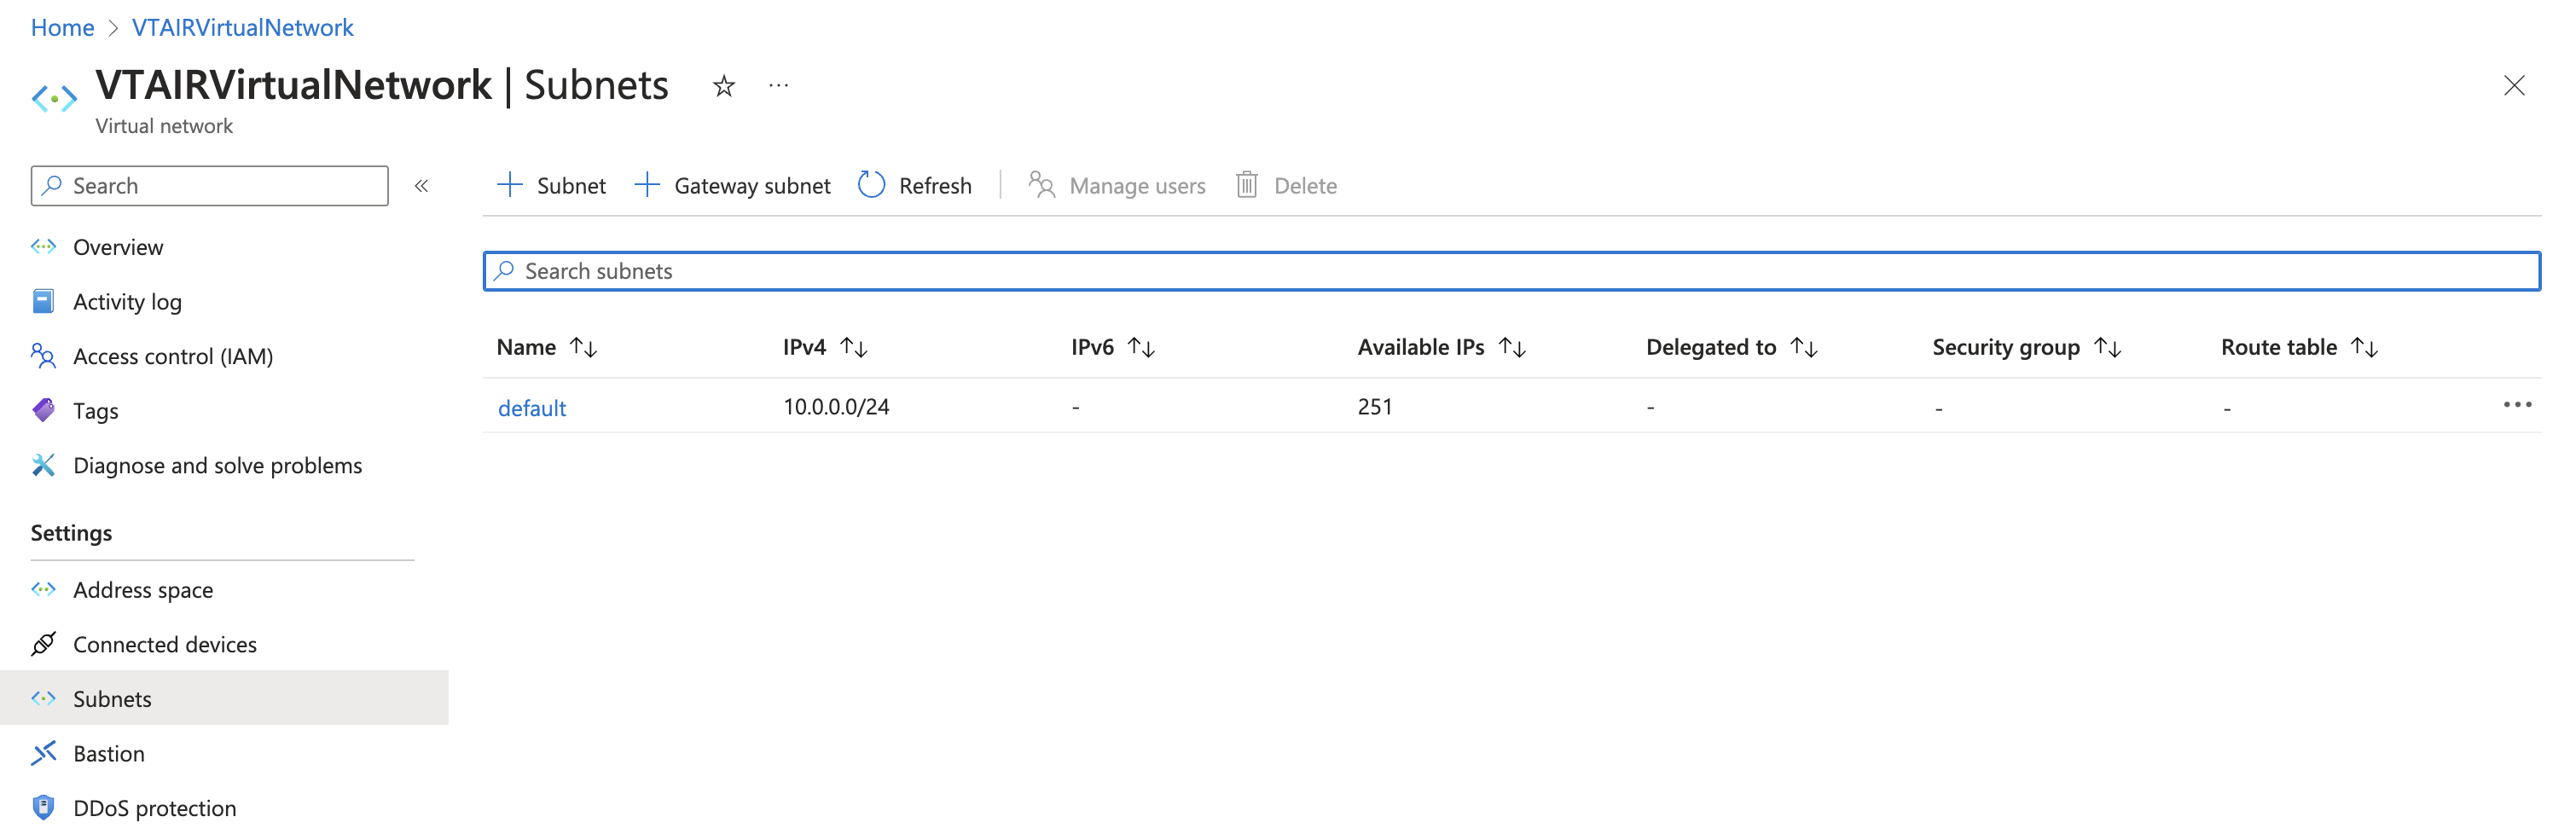
3.9.3.2. Public Subnet
A default subnet is created alongside your Virtual Network. We will use it as the public subnet, it has the ip range 10.0.0.0/24.
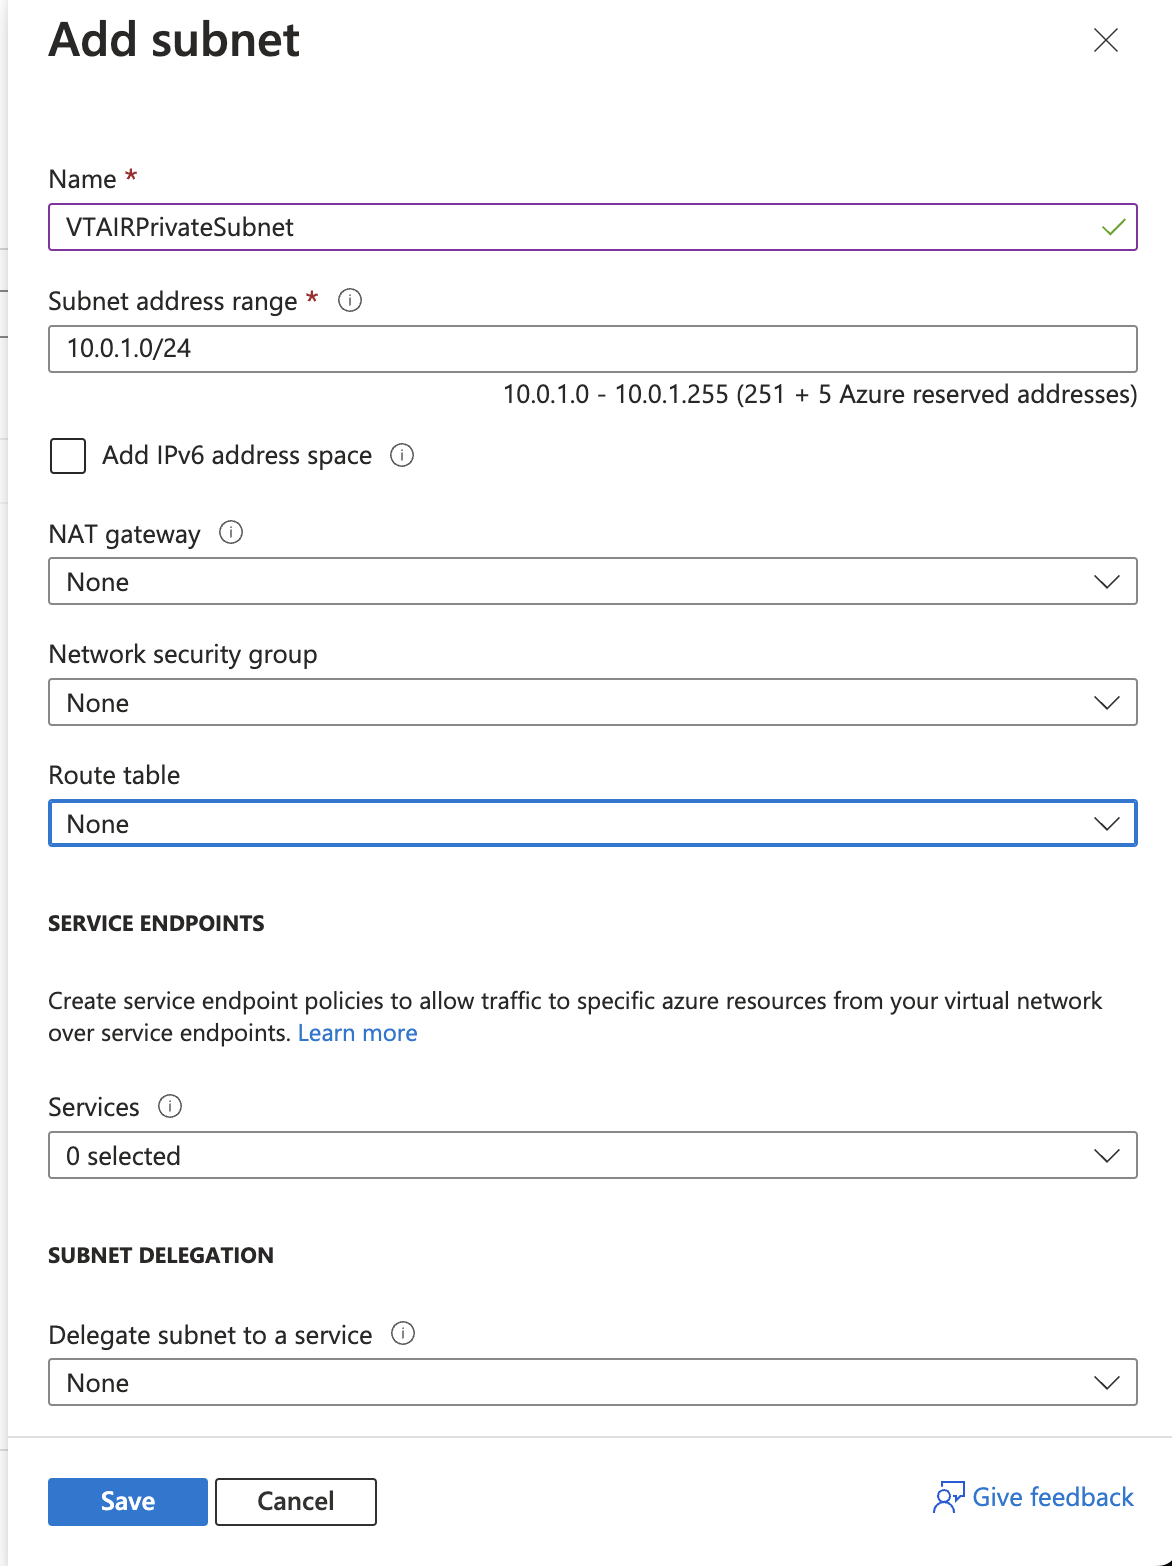
3.9.3.3. Private Subnet
Navigate to the Virtual Network and open Subnets in the Settings and click on Subnet.
Give the subnet a name. We will use VTAIRPrivateSubnet and crate the ip network 10.0.1.0/24.
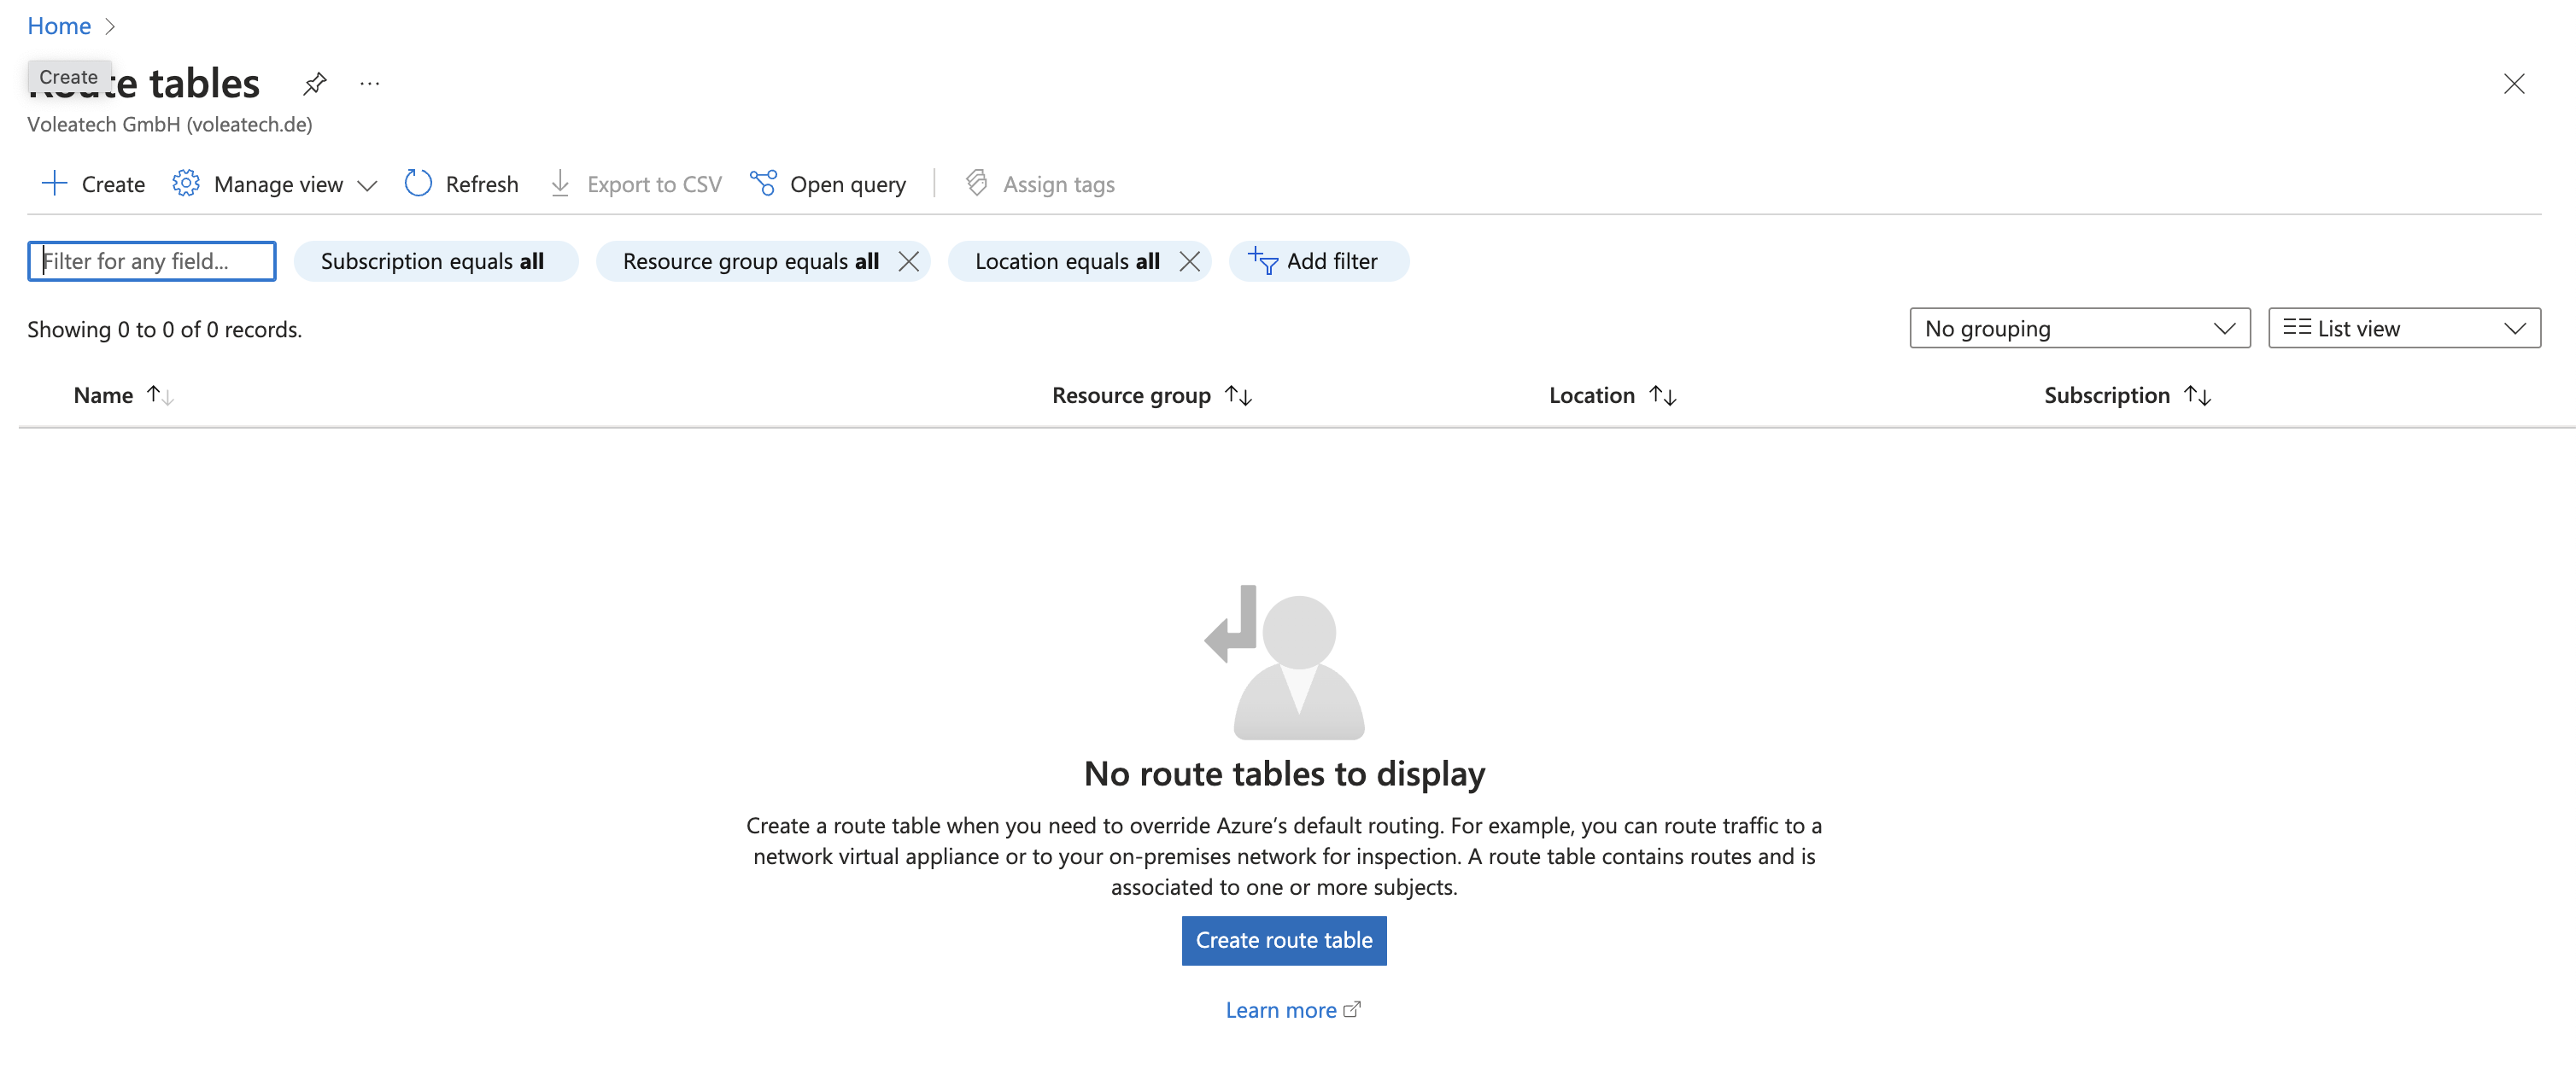
3.9.3.4. Private Routing Table
We will create a Private Routing Table that is used with the Private Subnet. It will contain the VT AIR LAN Interface that we connect to the default route of the Routing Table. This step needs to be done after the VT AIR Azure VM is up and running.
Navigate to Route tables and click on Create. Choose your Subscription, Resource group and Region and give the routing table a name. We will use VTAIRPrivateRoutingTable.
We need to connect the routing table to the Private Subnet.
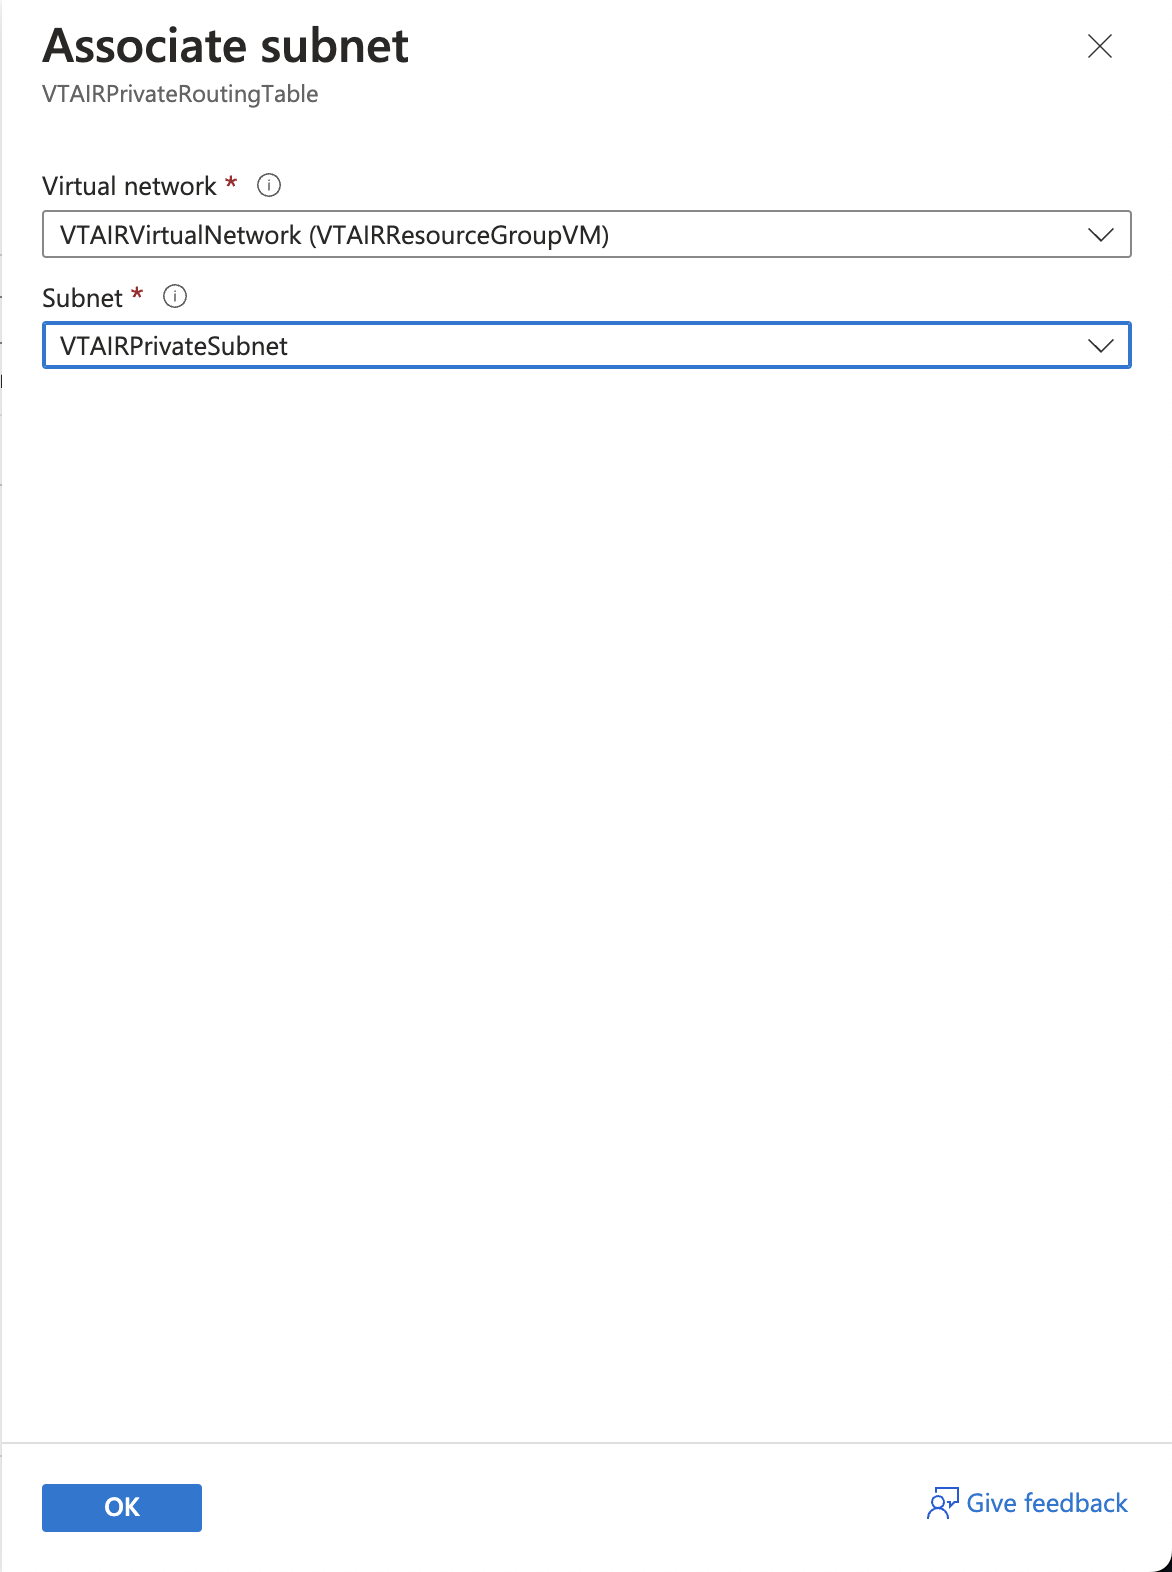
Open the newly created routing table and navigate to Subnets and click on Associate.
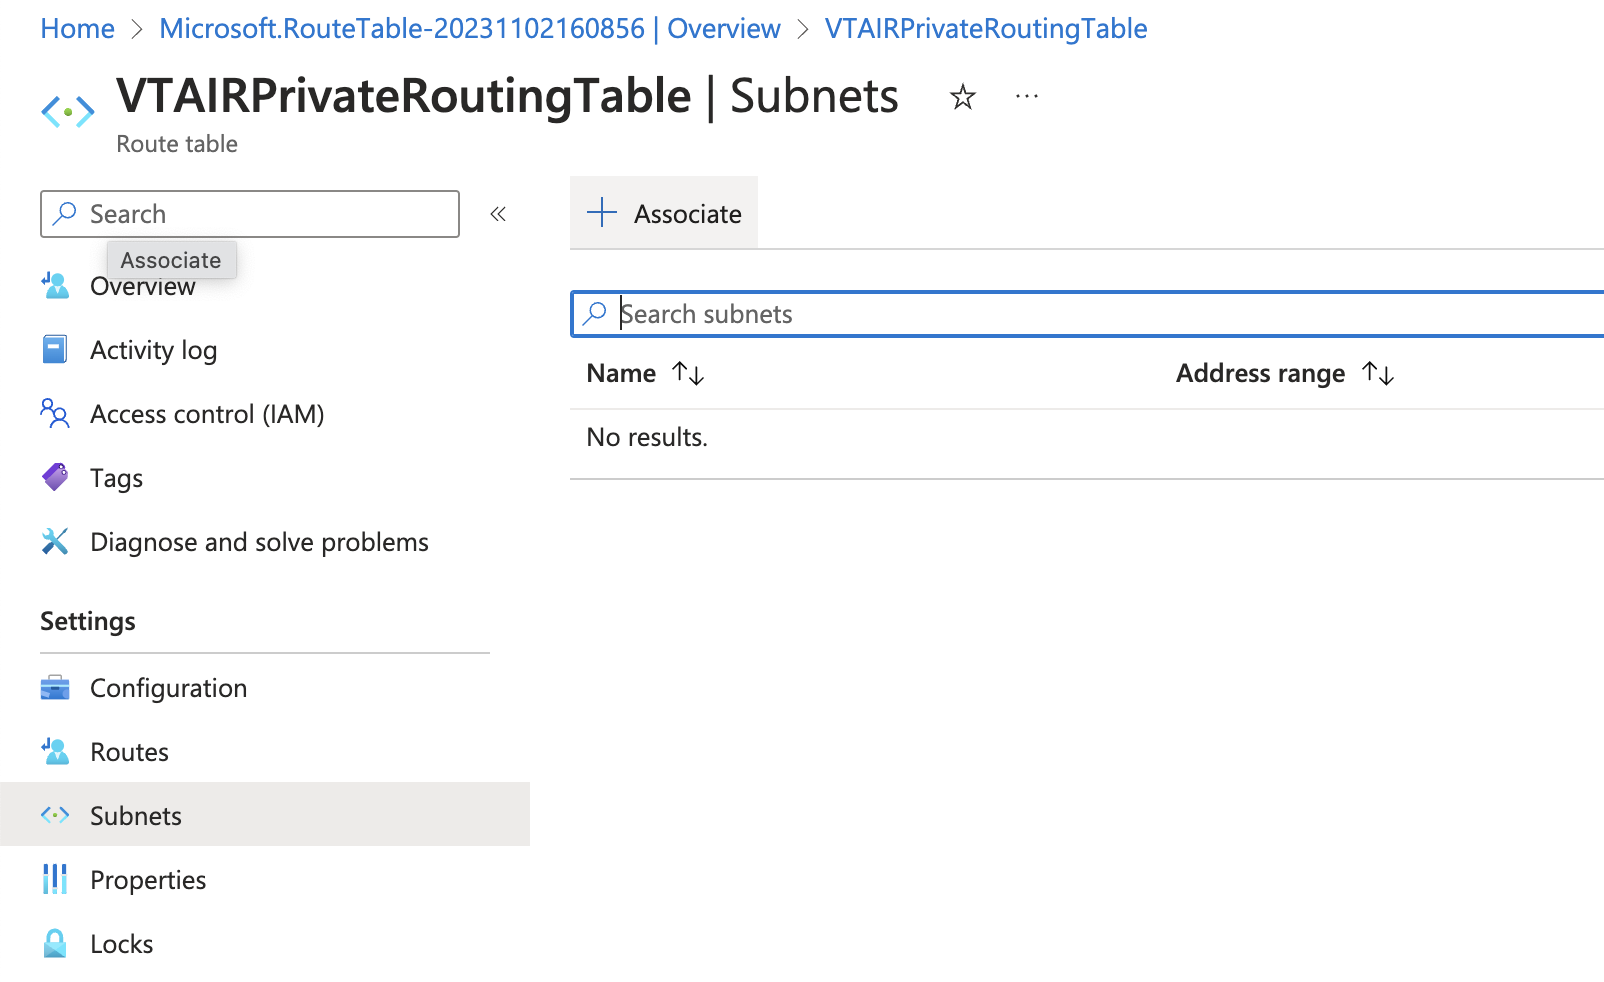
Select the virtual network VTAIRVirtualNetwork and choose the VTAIRPrivateSubnet.
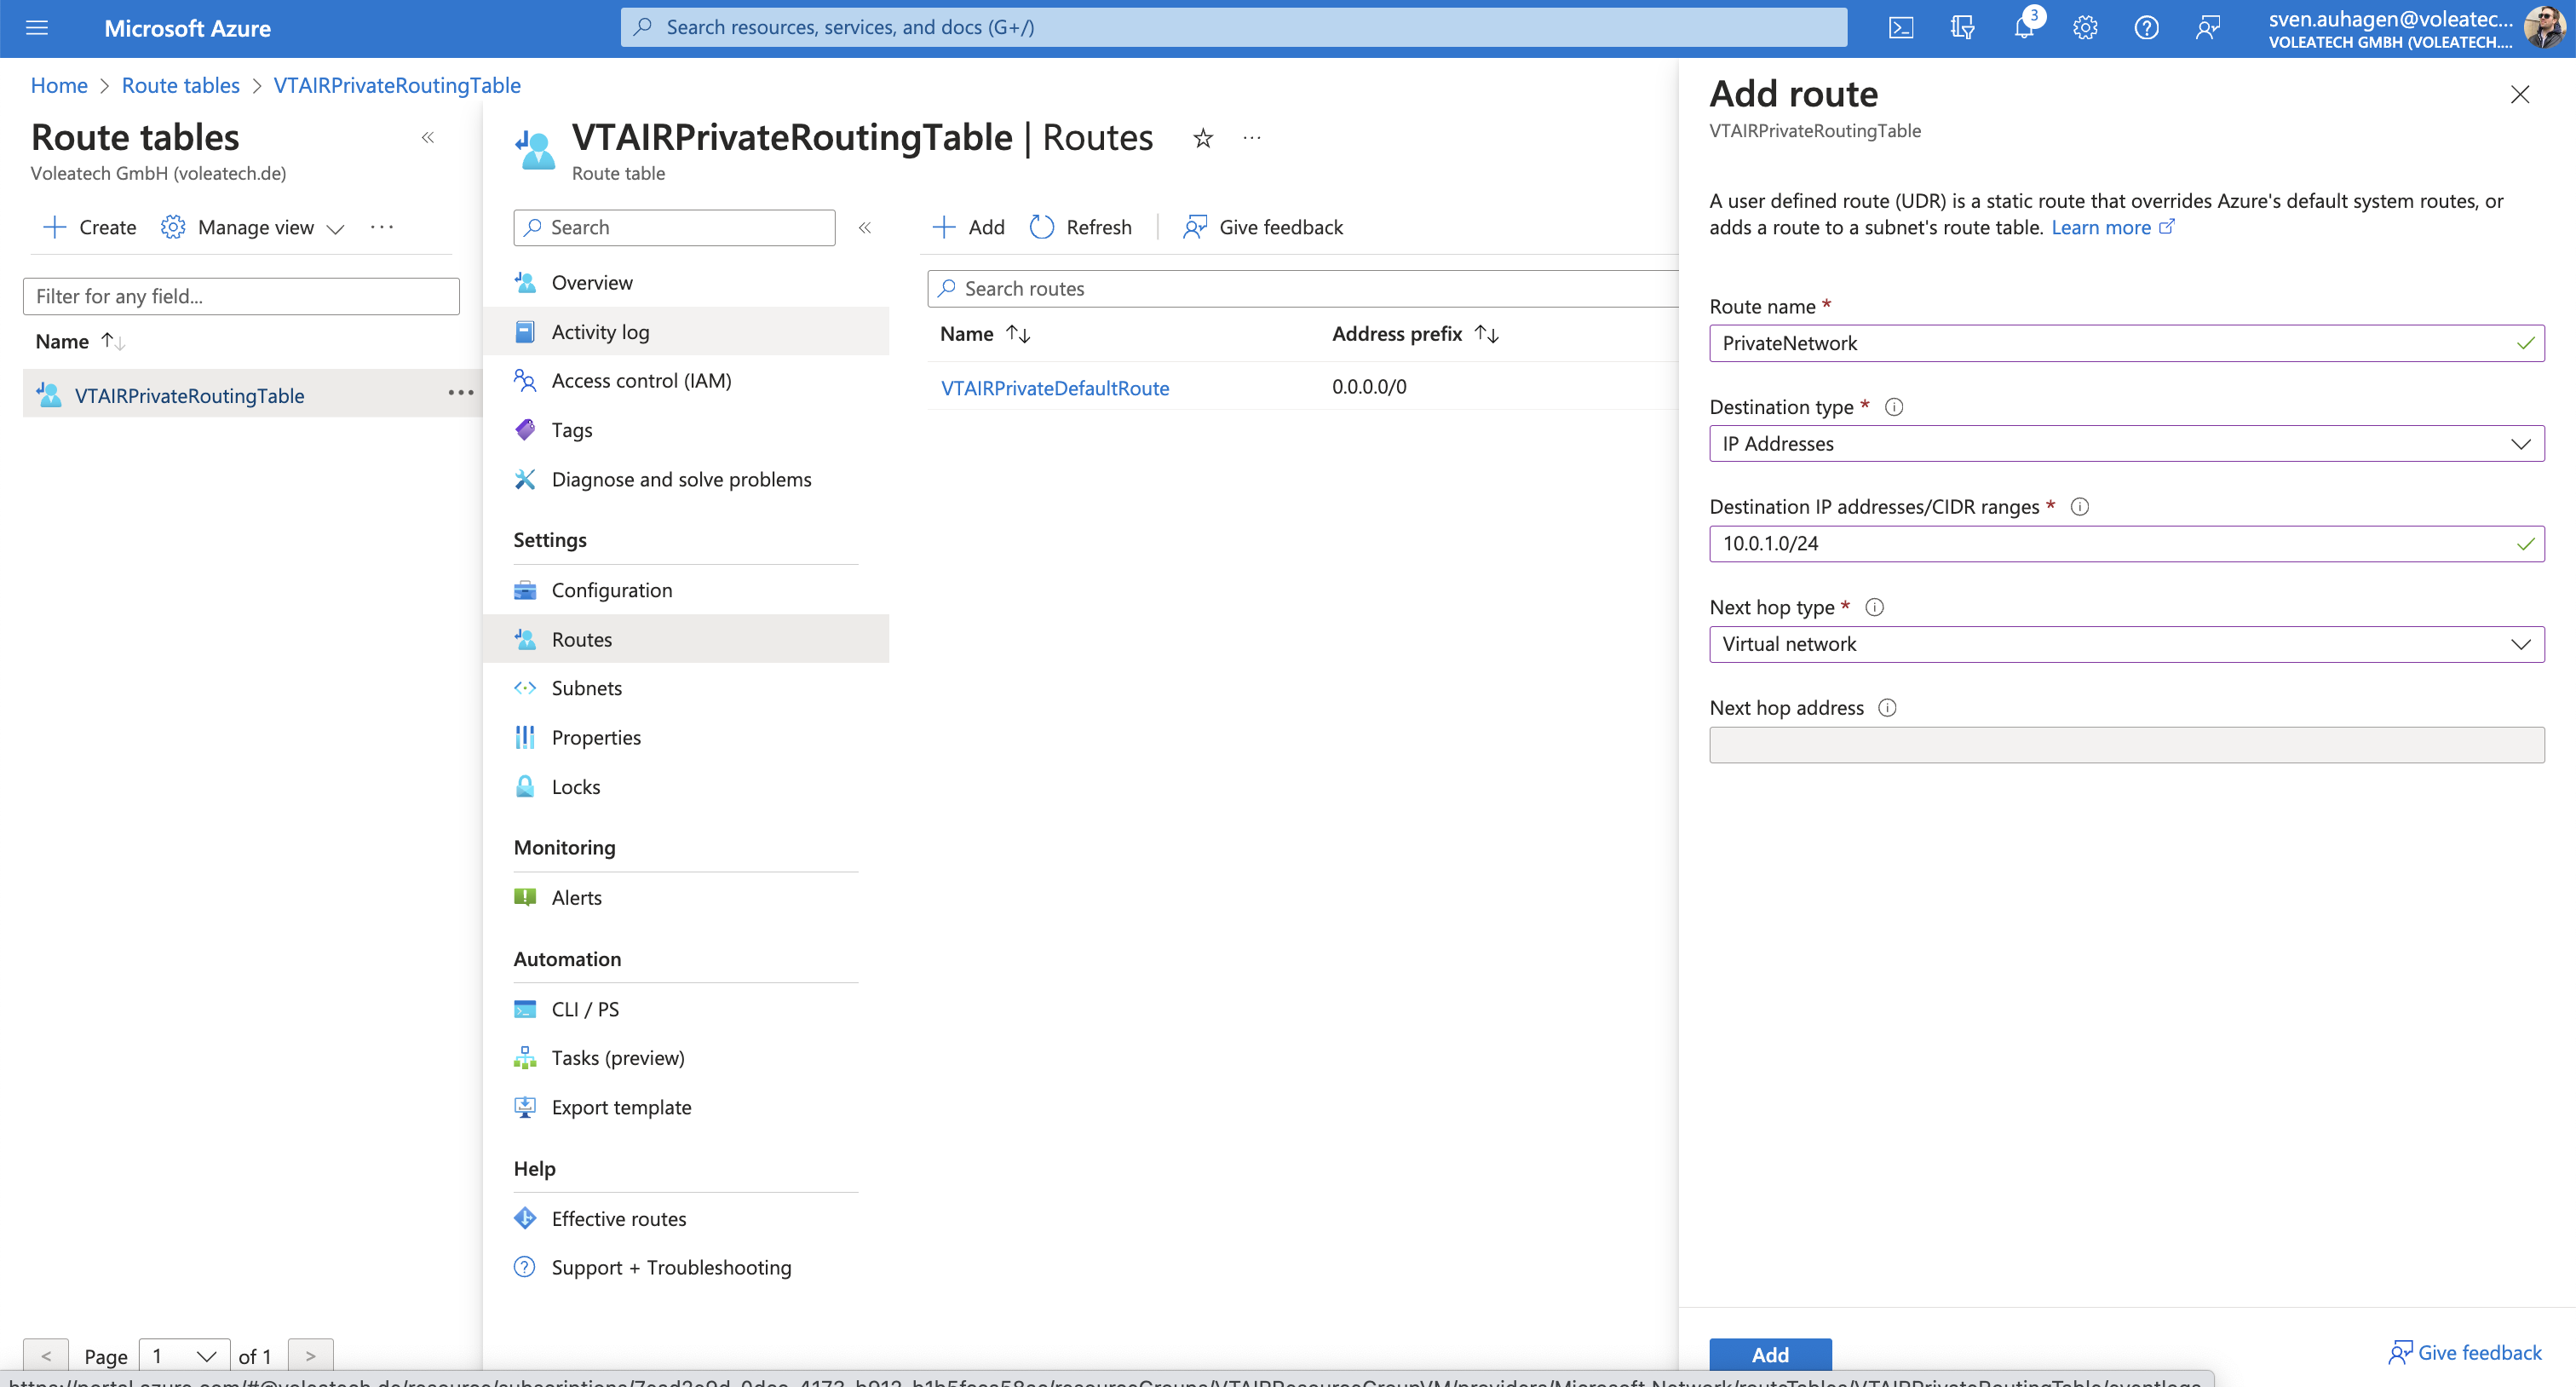
We need to add the network route to the routing table. Navigate to Routes and click on Add.
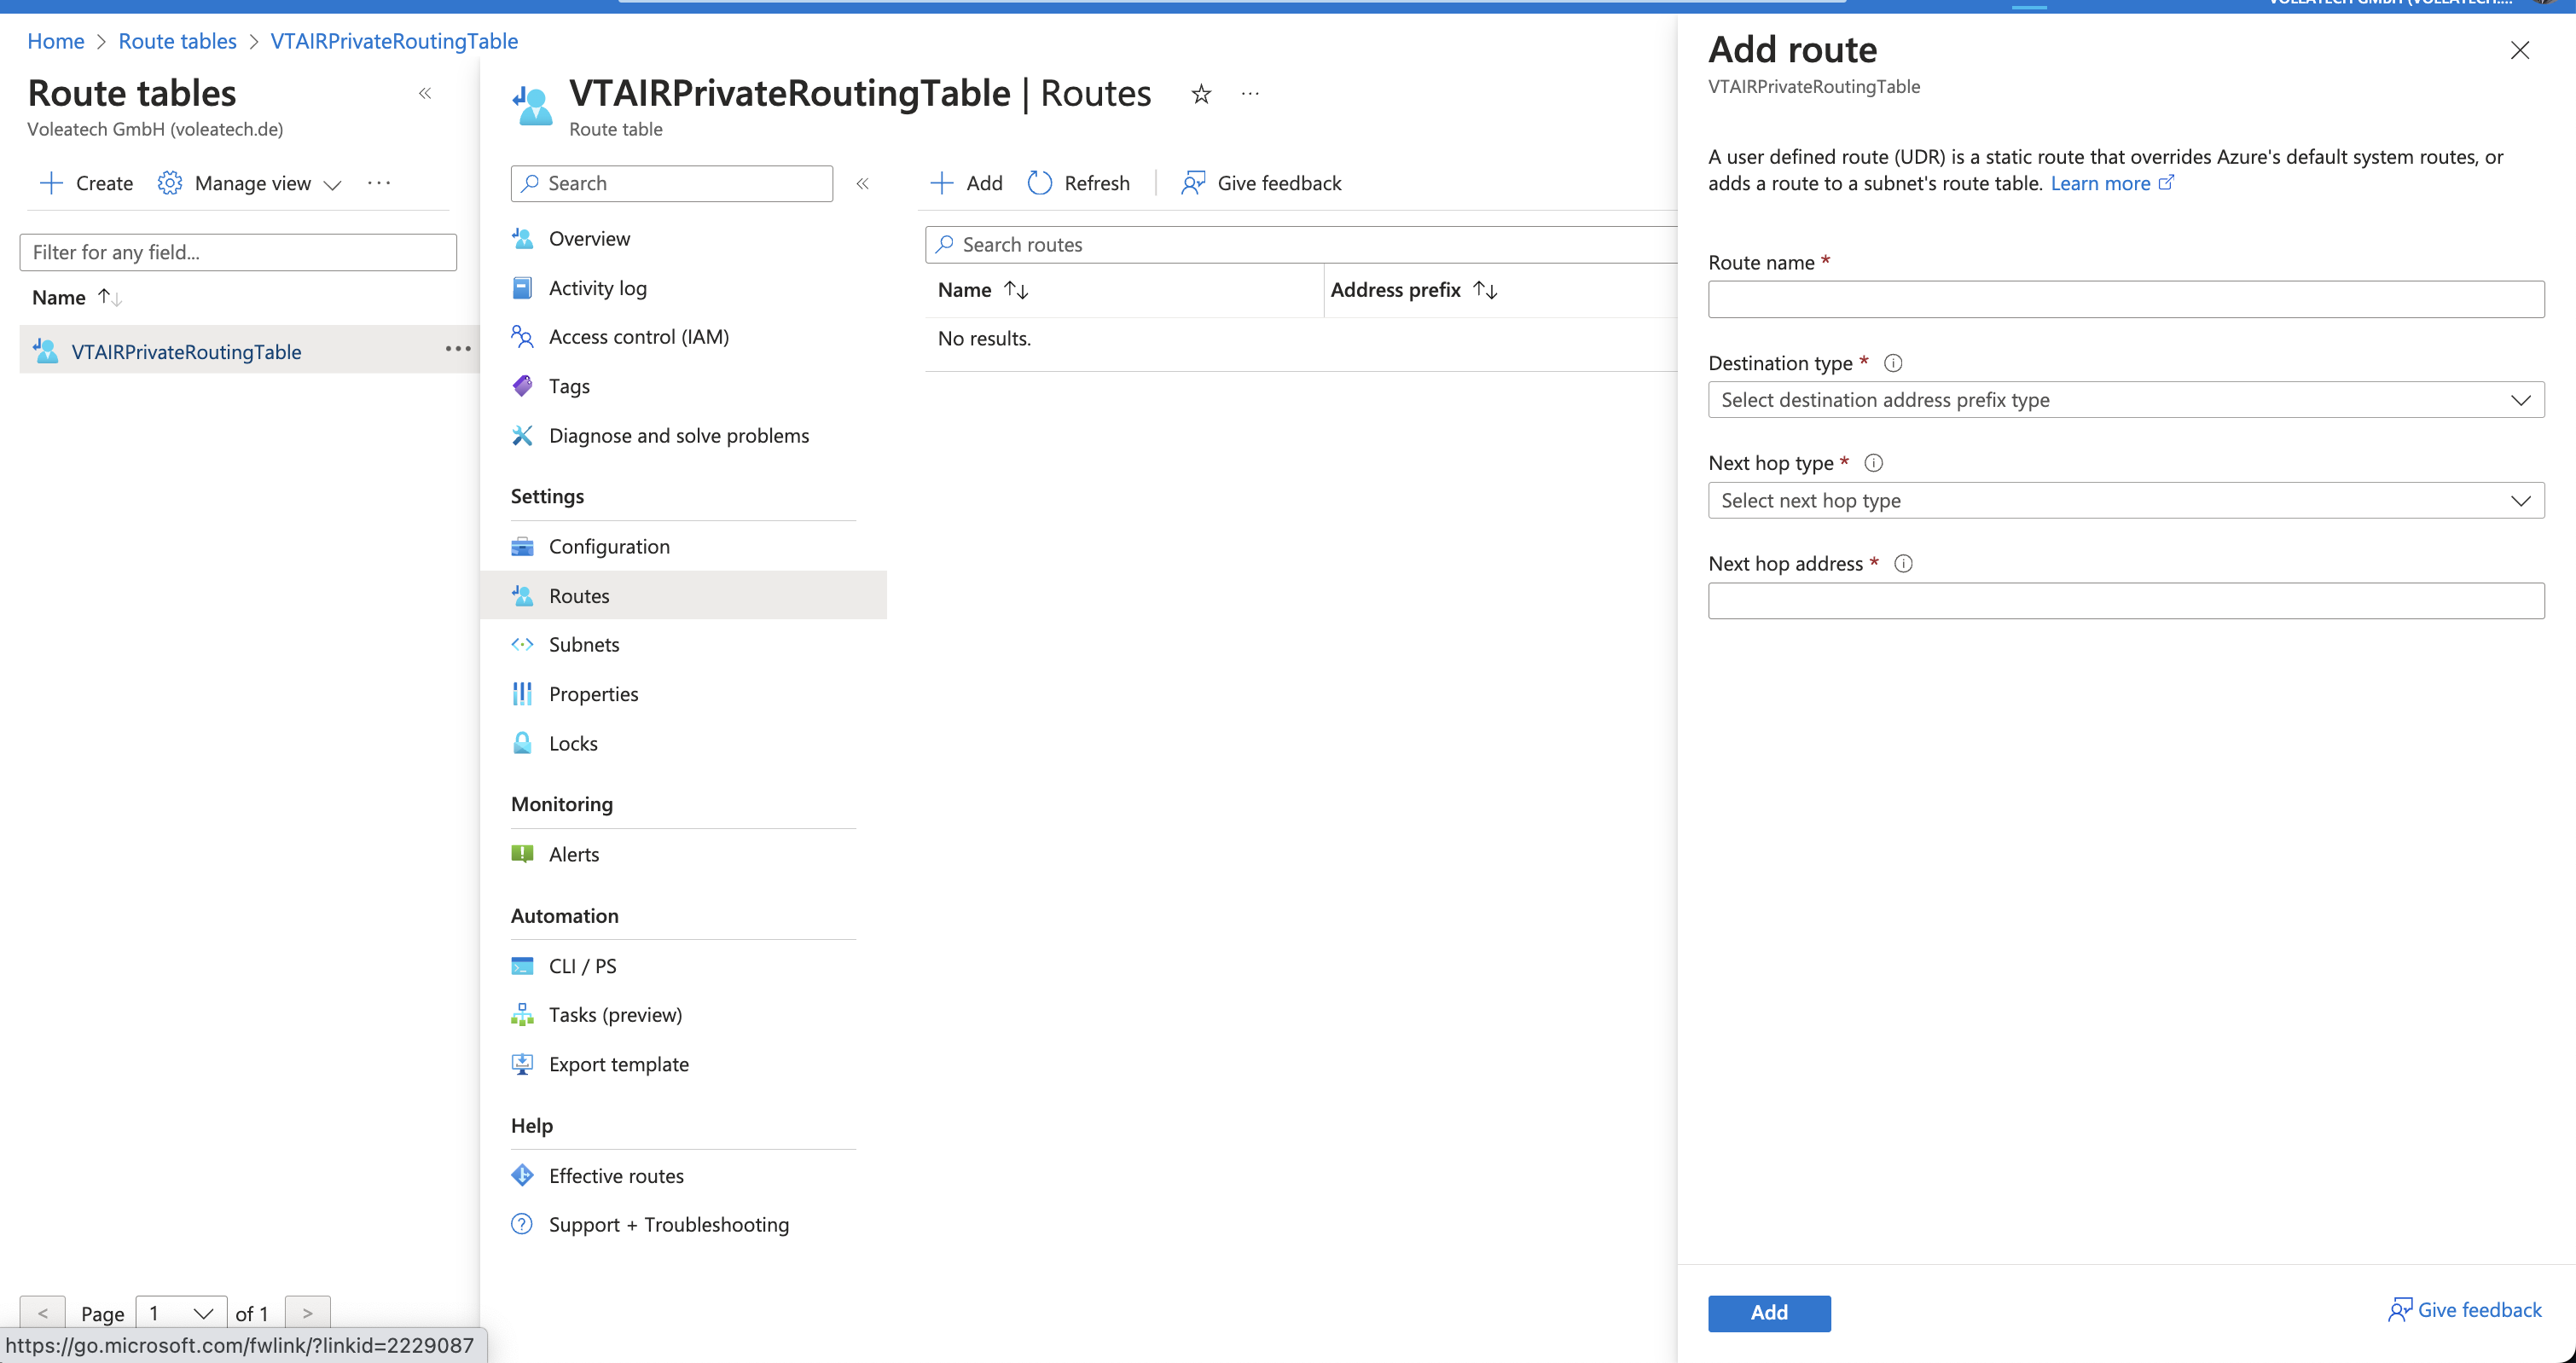
Give the route a name PrivateNetwork, the destination type is IP Addresses, the Destination is the network ip range 10.0.1.0/24 and the next hop type Virtual network.
3.9.3.5. Public Network Security Group
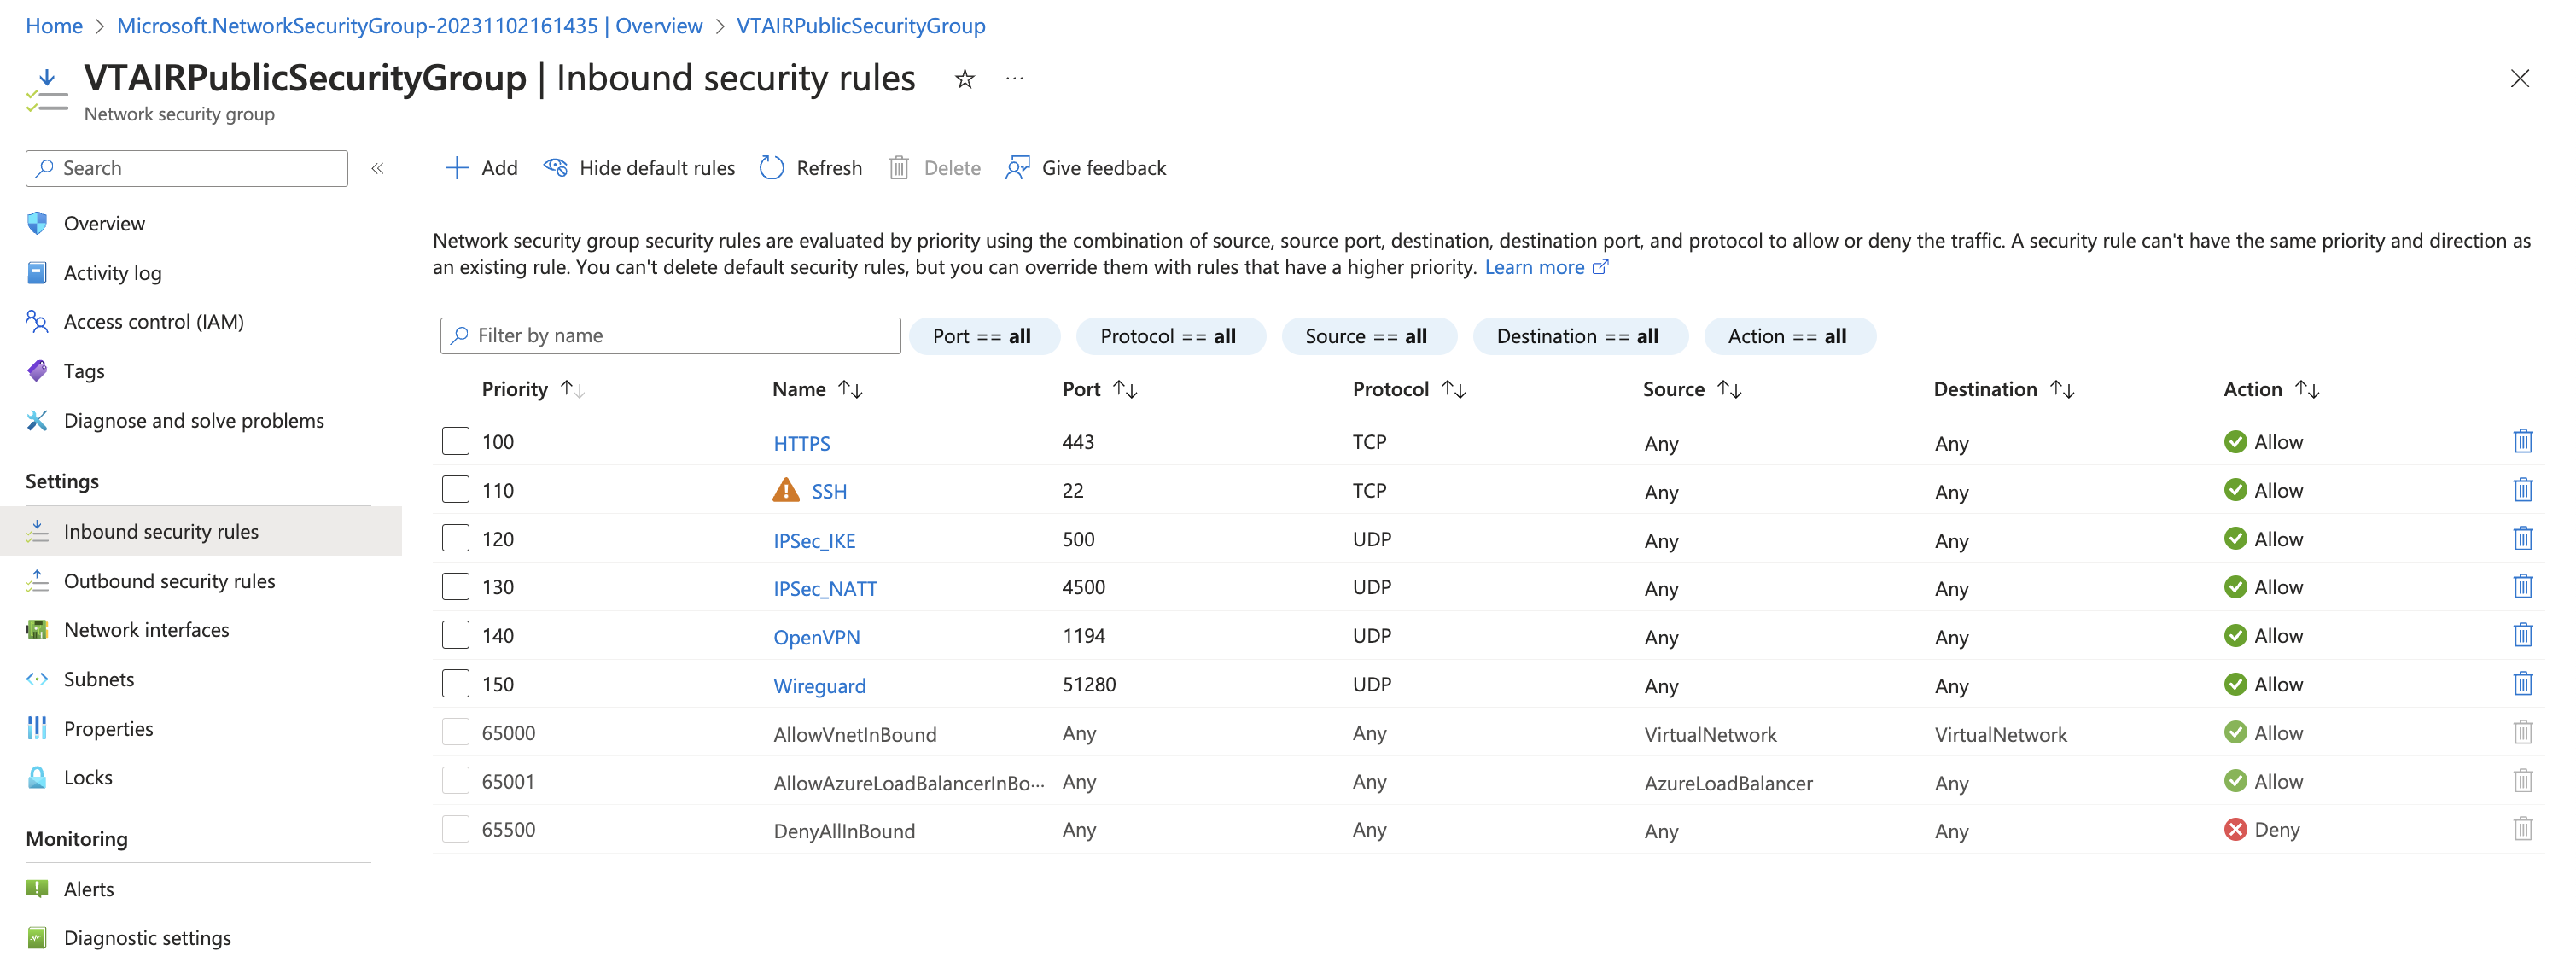
We need to create a Public Network Security Group that will be associated with the VT AIR Public Network Interface. You can customize the group to your needs, we do recommend to add at least the following entries:
Port 22 (TCP)
Port 443 (TCP)
and depending on which VPN is used:
1194 (UDP) for OpenVPN
51280 (UDP) for Wireguard
500 and 4500 (UDP) for IPSec
ESP/AH for IPSec
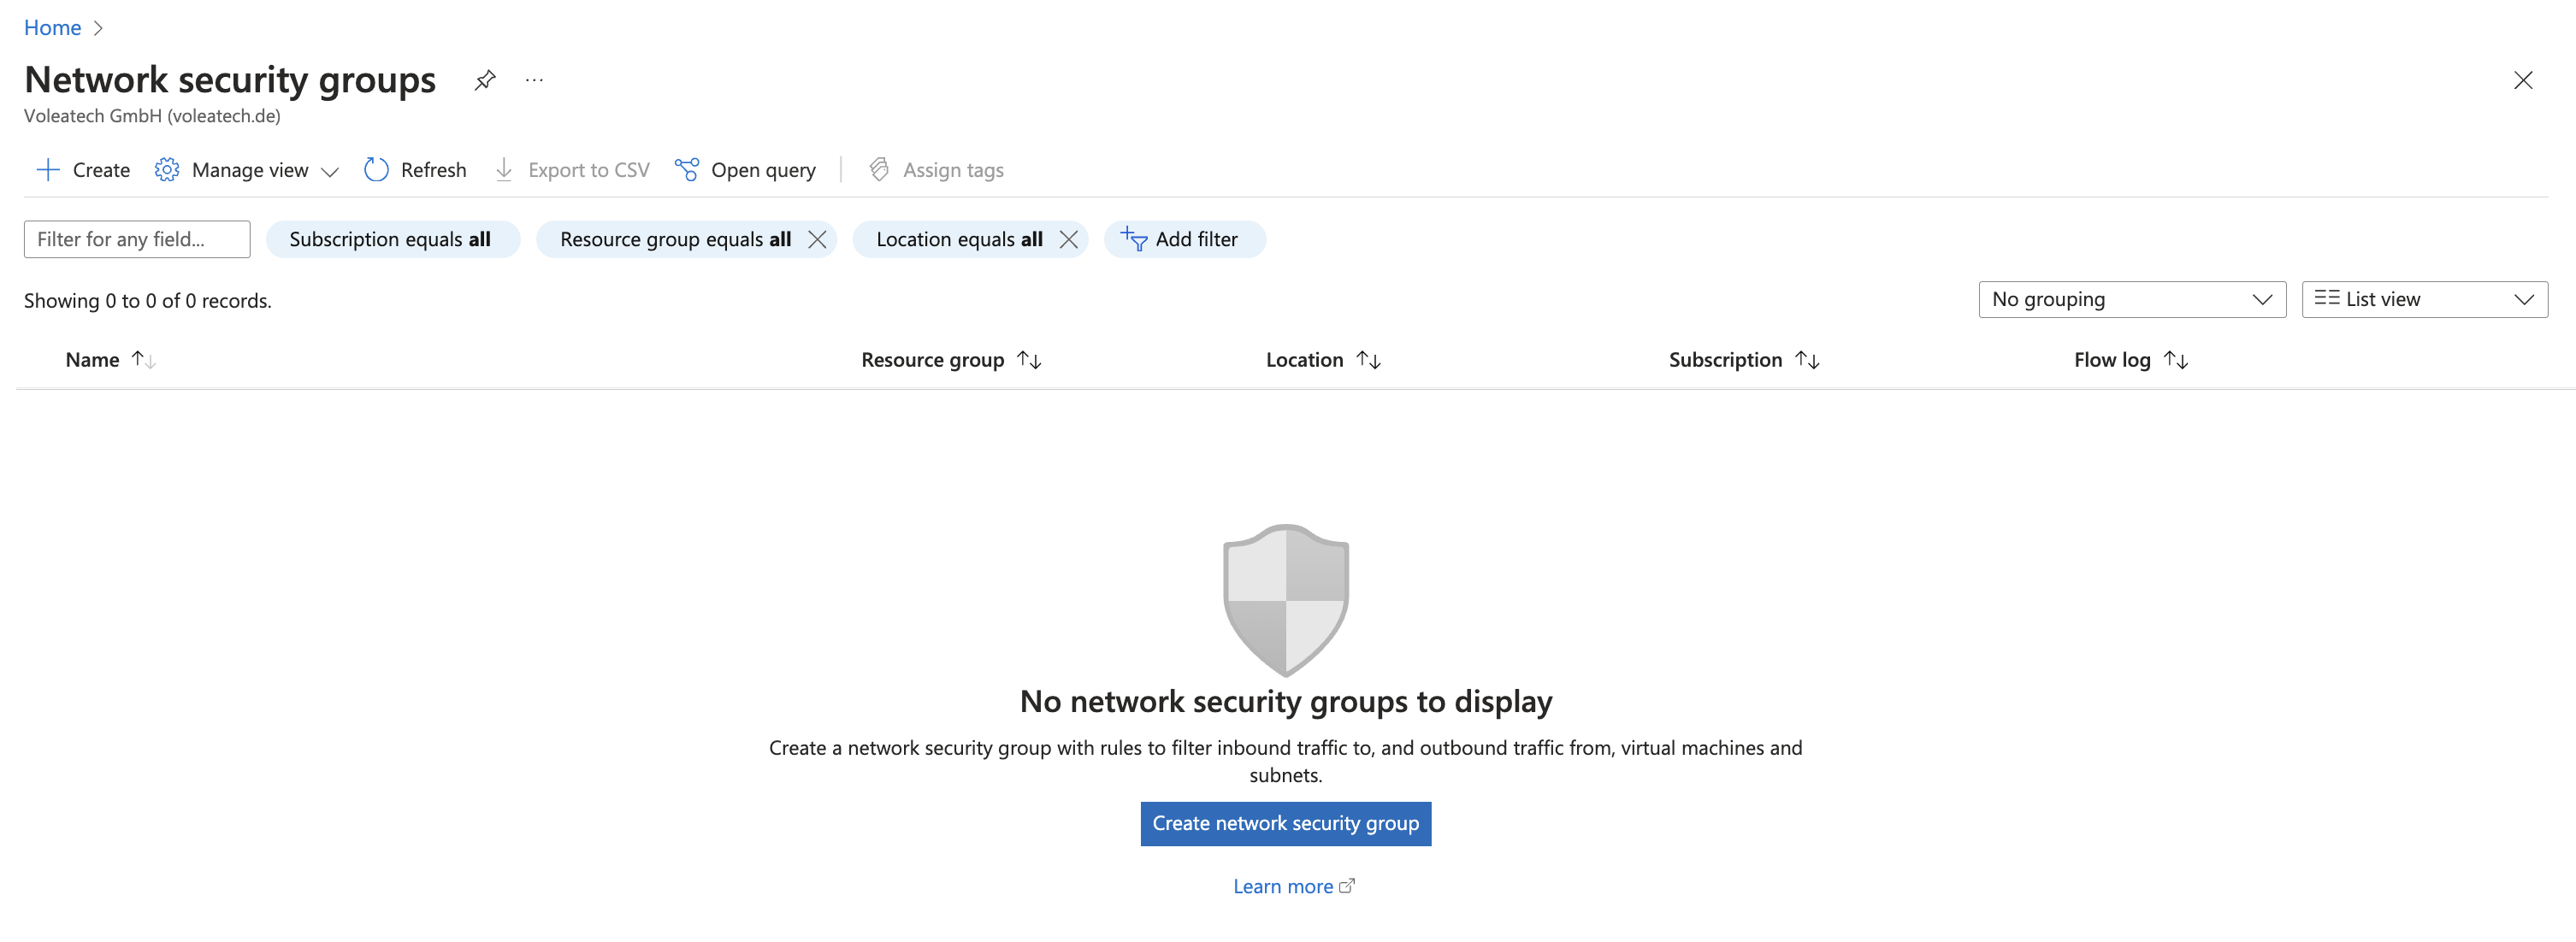
Navigate to Network security groups and click on Create.
Choose your Subscription, Resource group and Region and give the network security group a name.
We will use VTAIRPublicSecurityGroup.

For the inbound traffic we created all rules above.
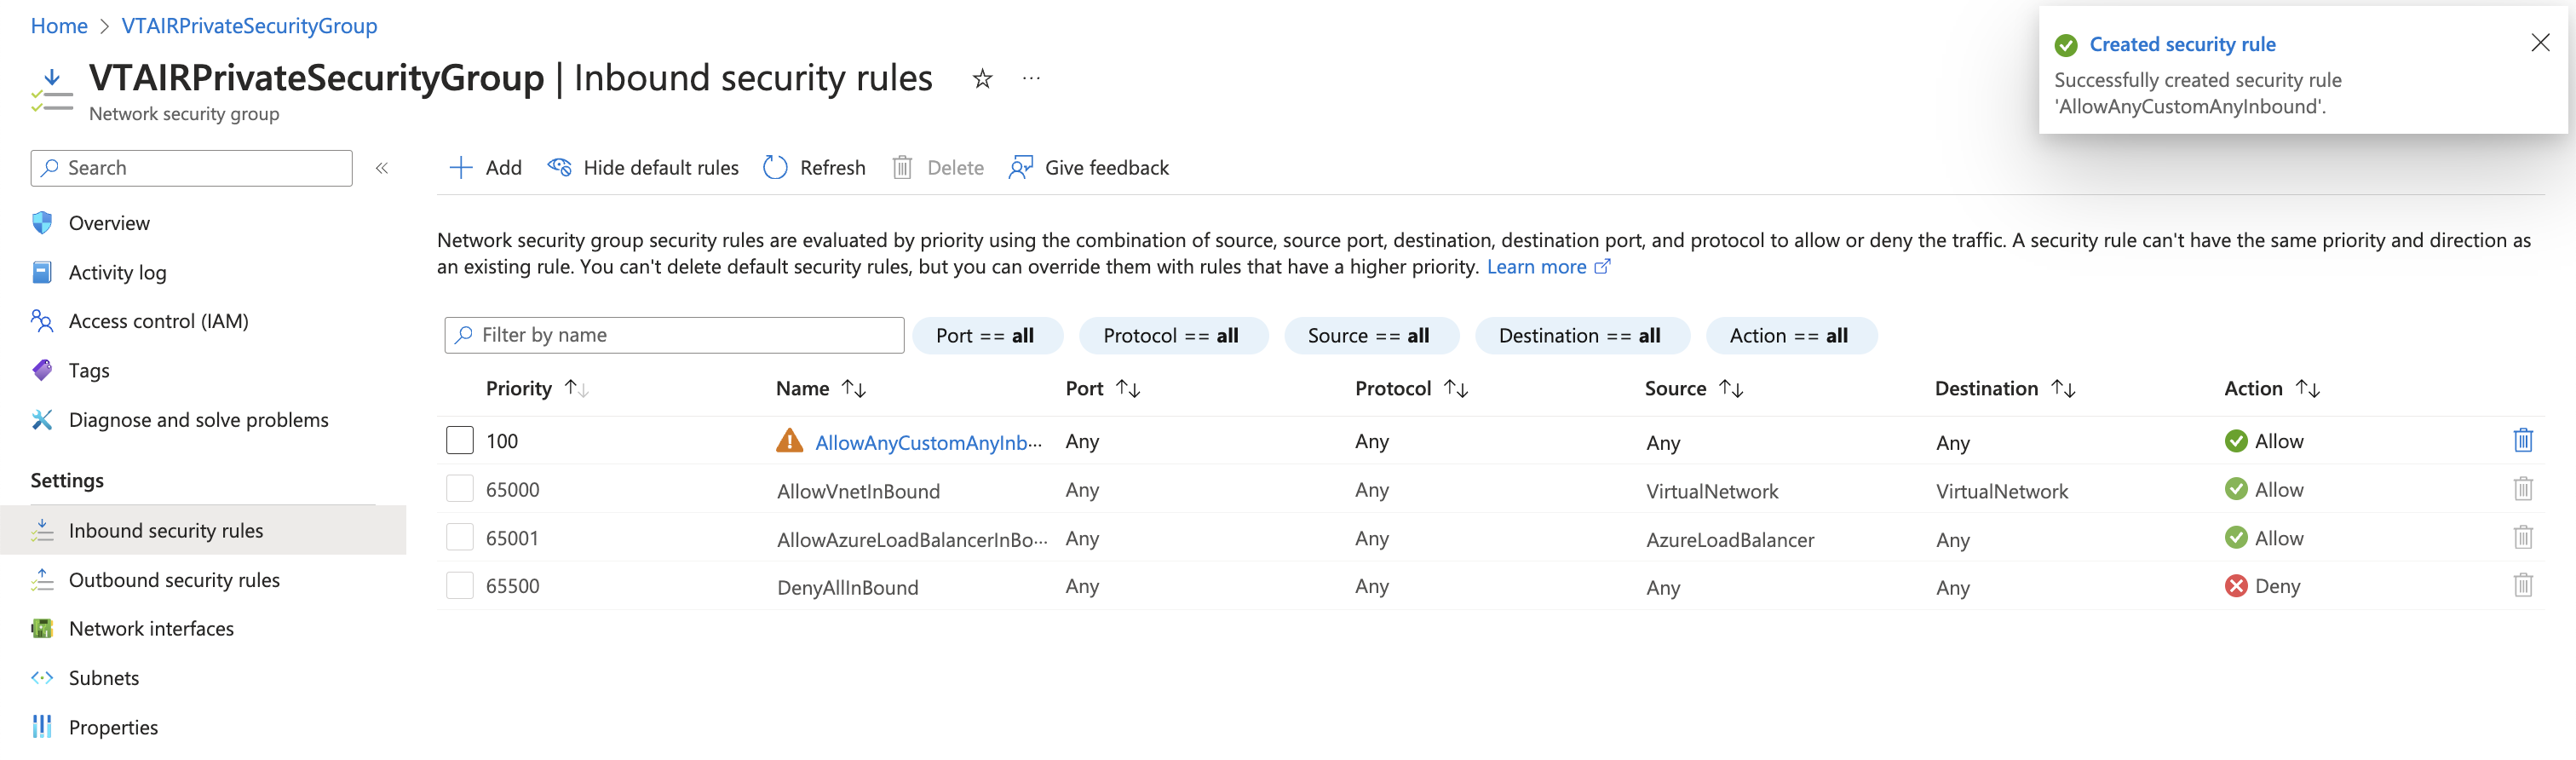
3.9.3.6. Private Network Security Group
We need to create a Private Network Security Group that will be associated with the VT AIR Private Network Interface. We will allow all traffic on the private side as it is protected by the VT AIR Firewall.
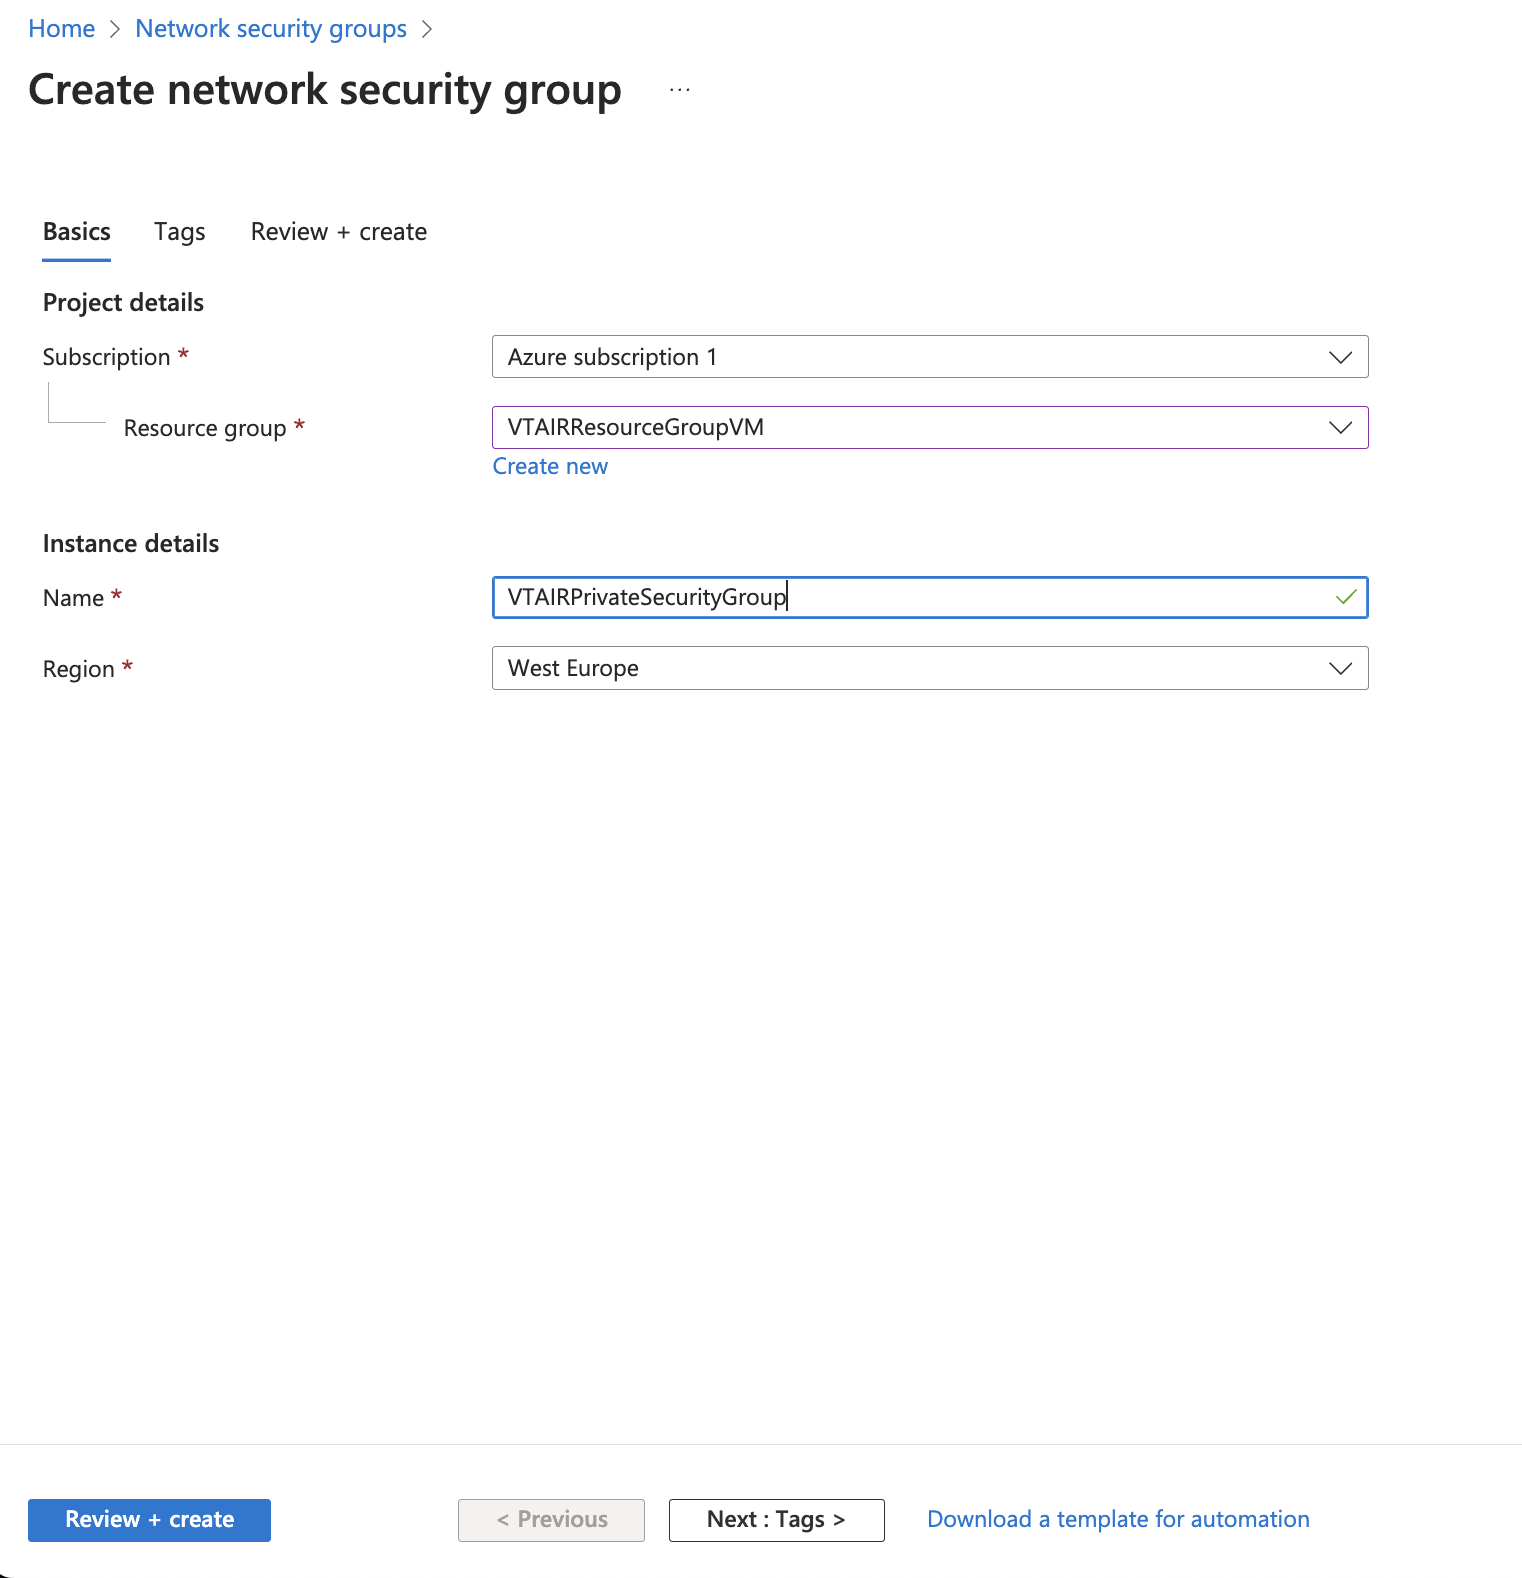
Navigate to Network security groups and click on Create. Choose your Subscription, Resource group and Region and give the network security group a name.
We will use VTAIRPrivateSecurityGroup.
For the inbound traffic we created the allow all rule.
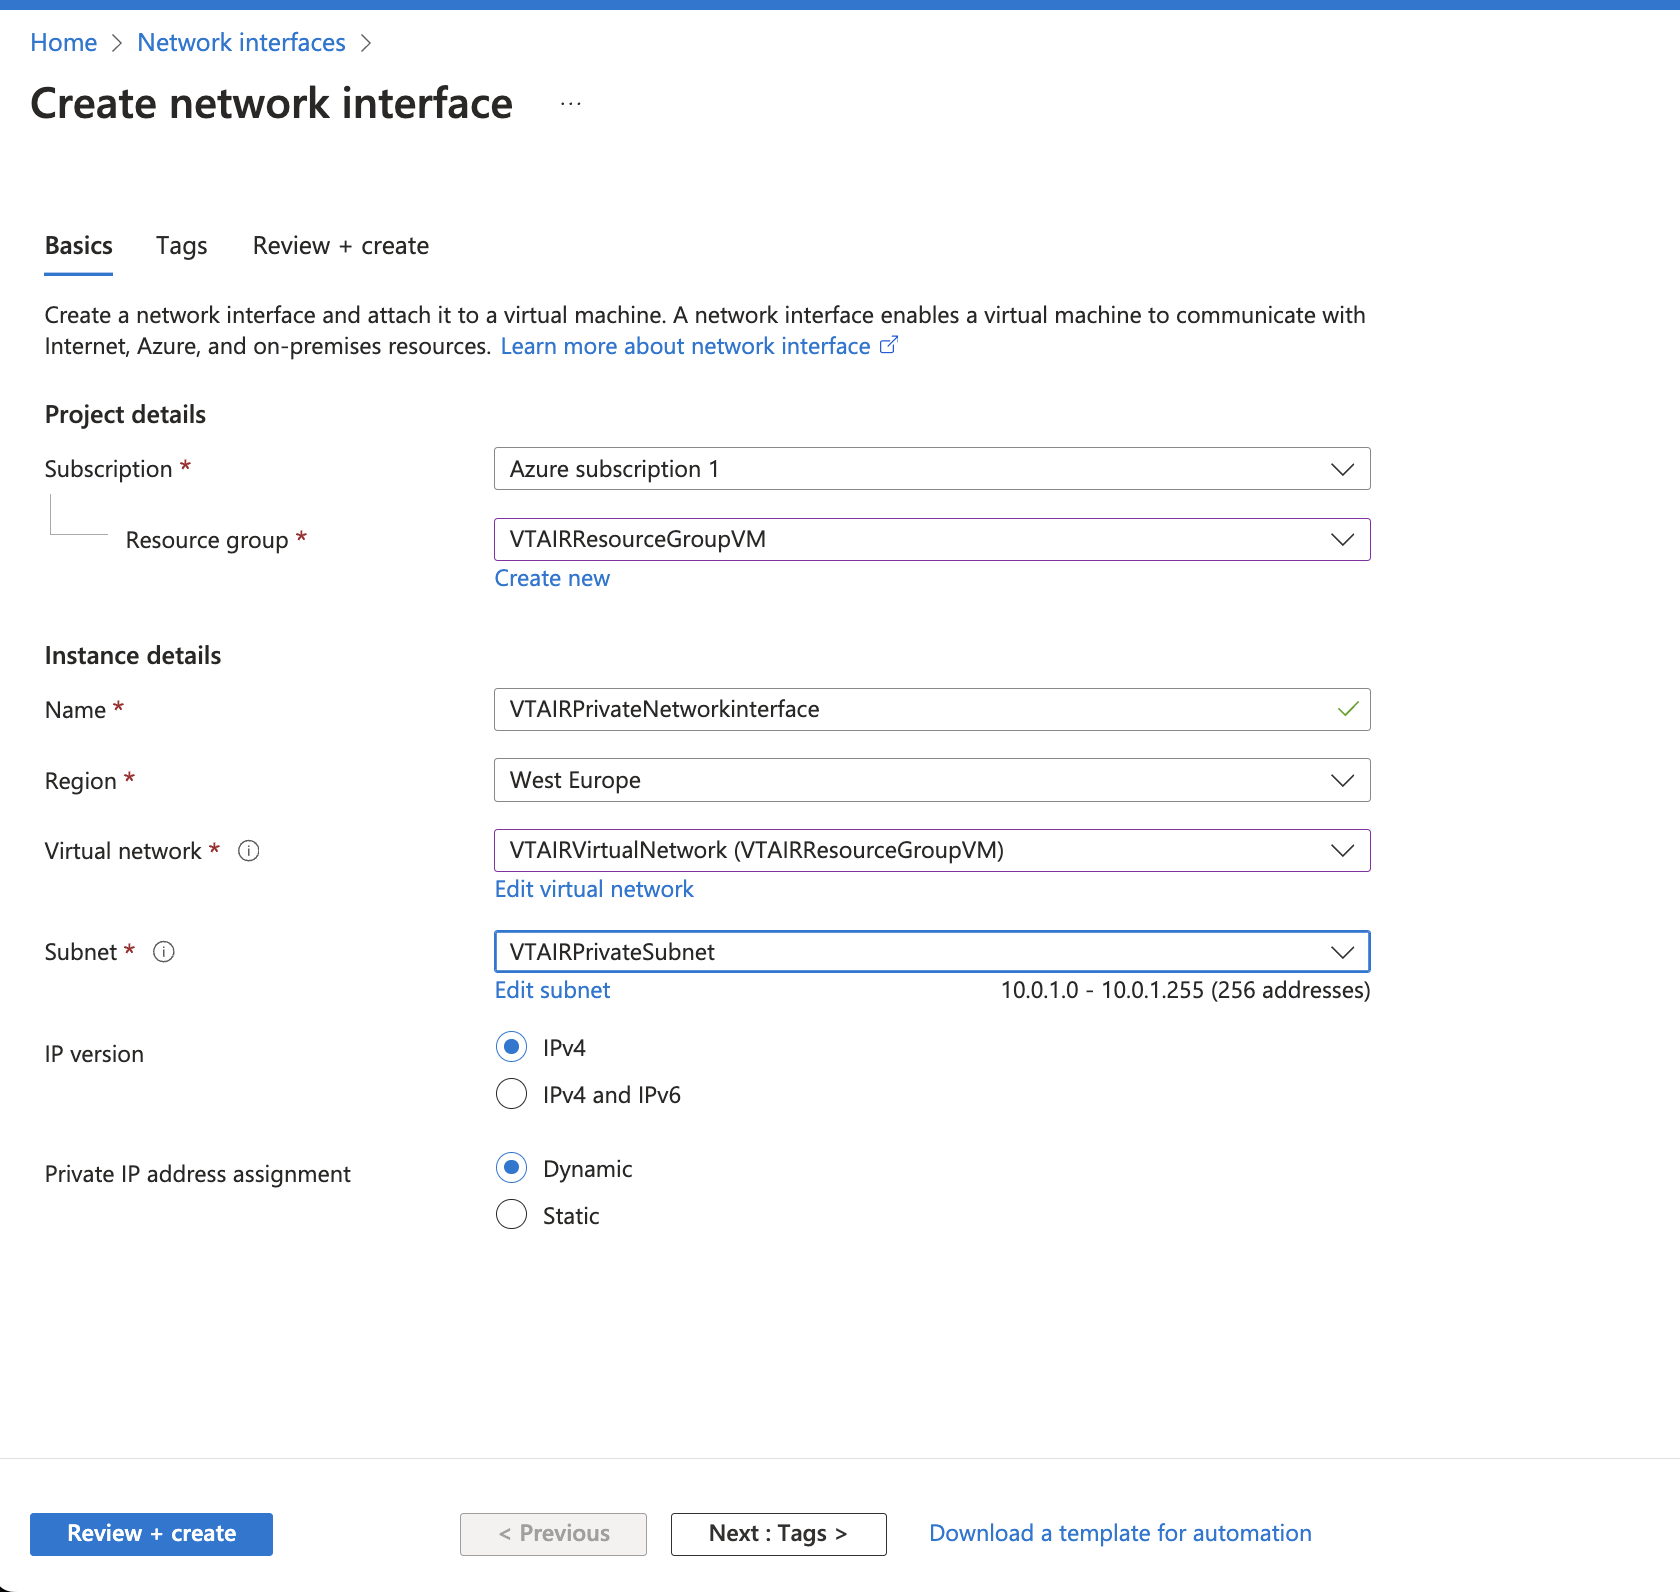
3.9.3.7. Private Network Interface
We need to create a Private Network Interface that will be associated with the VT AIR Private Network Interface. We will allow all traffic on the private side as it is protected by the VT AIR Firewall.
Navigate to Network interfaces and click on Create.

Choose your Subscription, Resource group and Region and give the network security group a name.
We will use VTAIRPrivateNetworkinterface.
Choose the Virtual Network VTAIRVirtualNetwork and the Subnet VTAIRPrivate Subnet
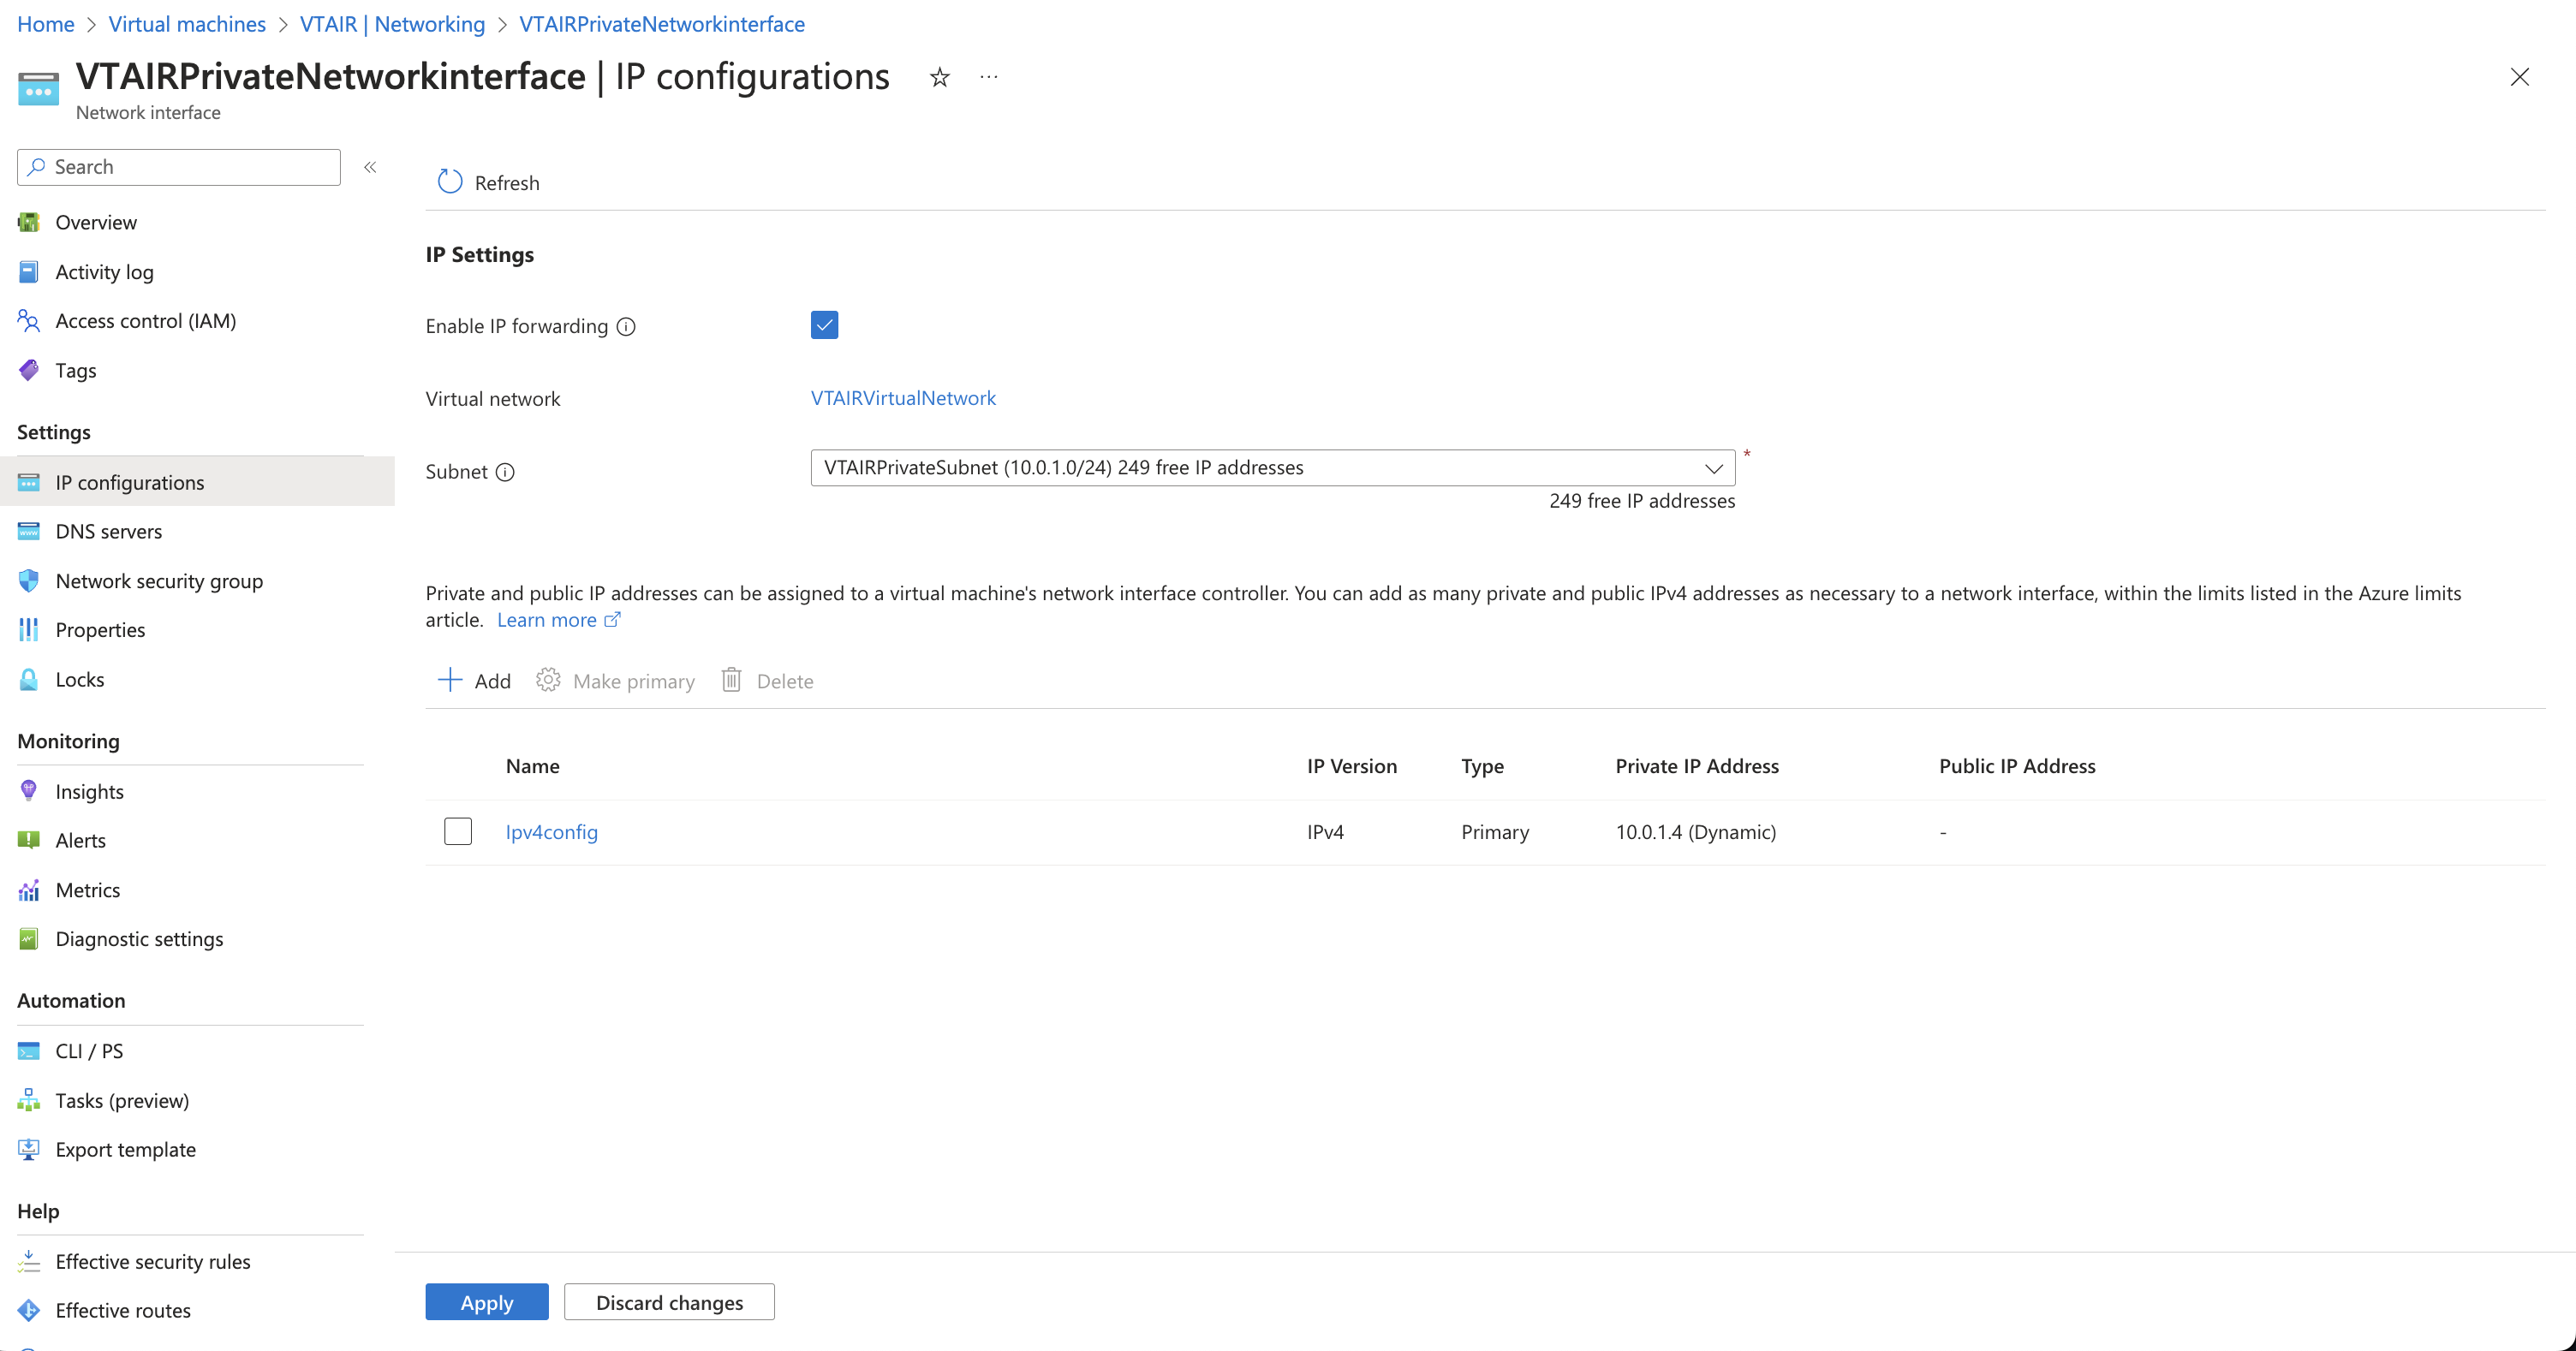
3.9.3.7.1. Enable Traffic Forwarding
We need to allow the traffic forwarding for the newly created interface. Click on the newly created interface VTAIRPrivateNetworkinterface.
Navigate to IP configurations and click on Enable IP forwarding.
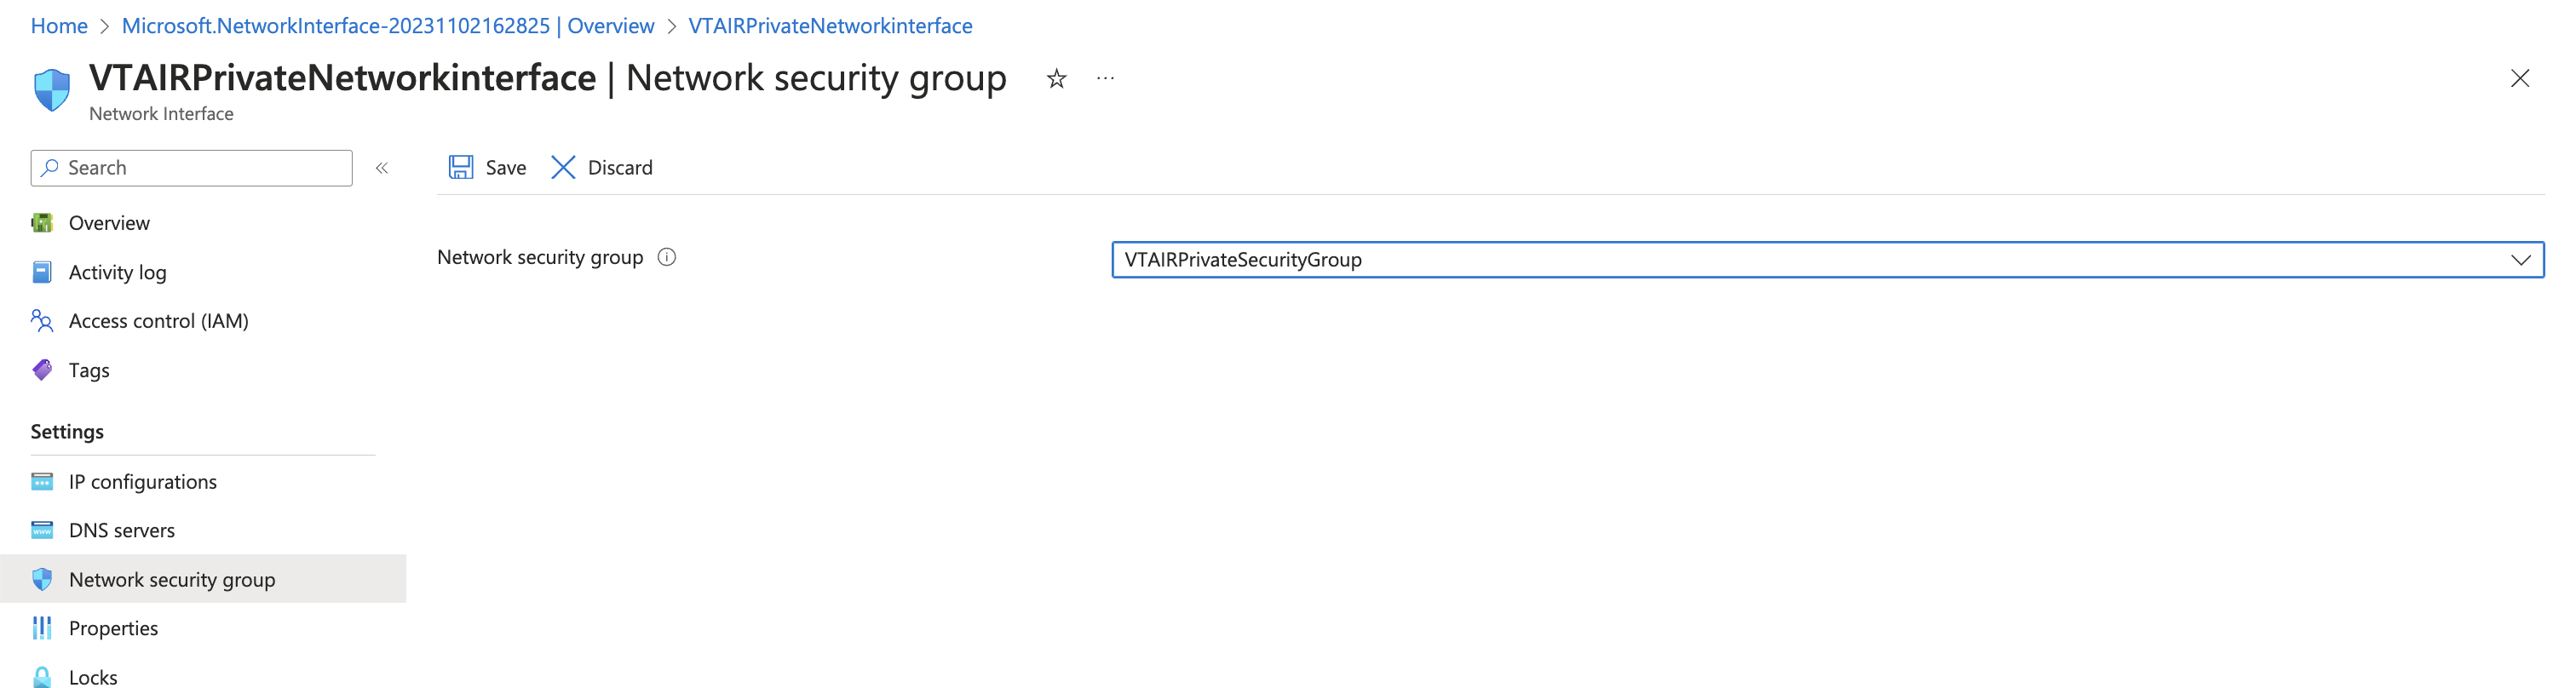
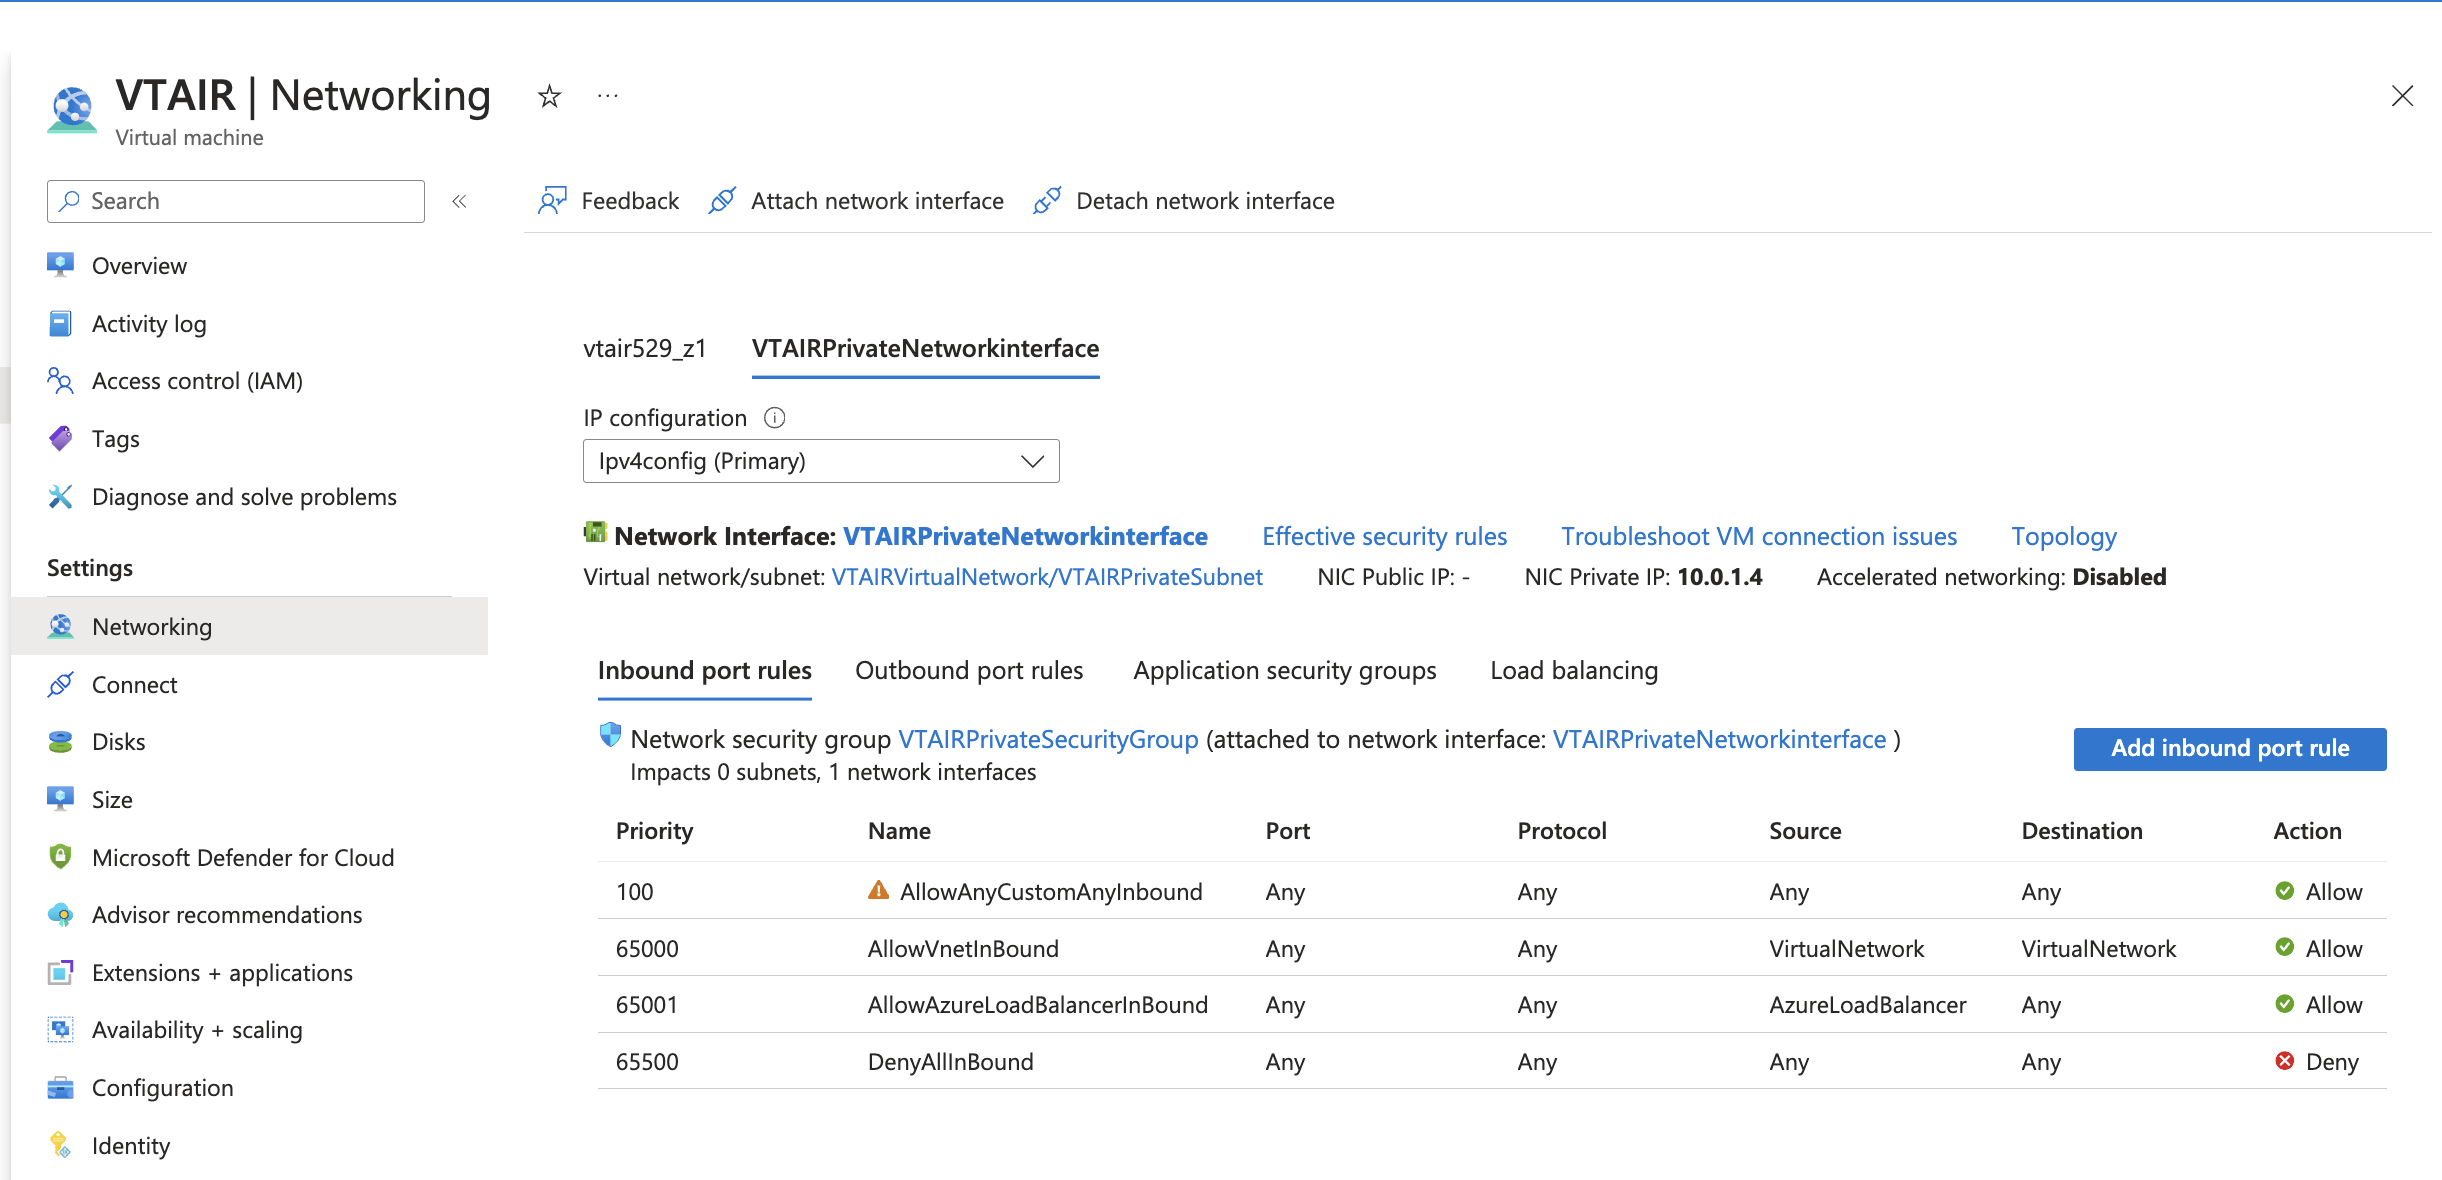
3.9.3.7.2. Associate Private Network Security Group
We need to associate the Private Network Security Group to the newly created interface. Click on the newly created interface VTAIRPrivateNetworkinterface.
Navigate to Network security group and choose VTAIRPrivateSecurityGroup.
3.9.4. Azure VT AIR Appliance
It is time to create and start the VT AIR Appliance.
We have created videos to show the entire configurations.
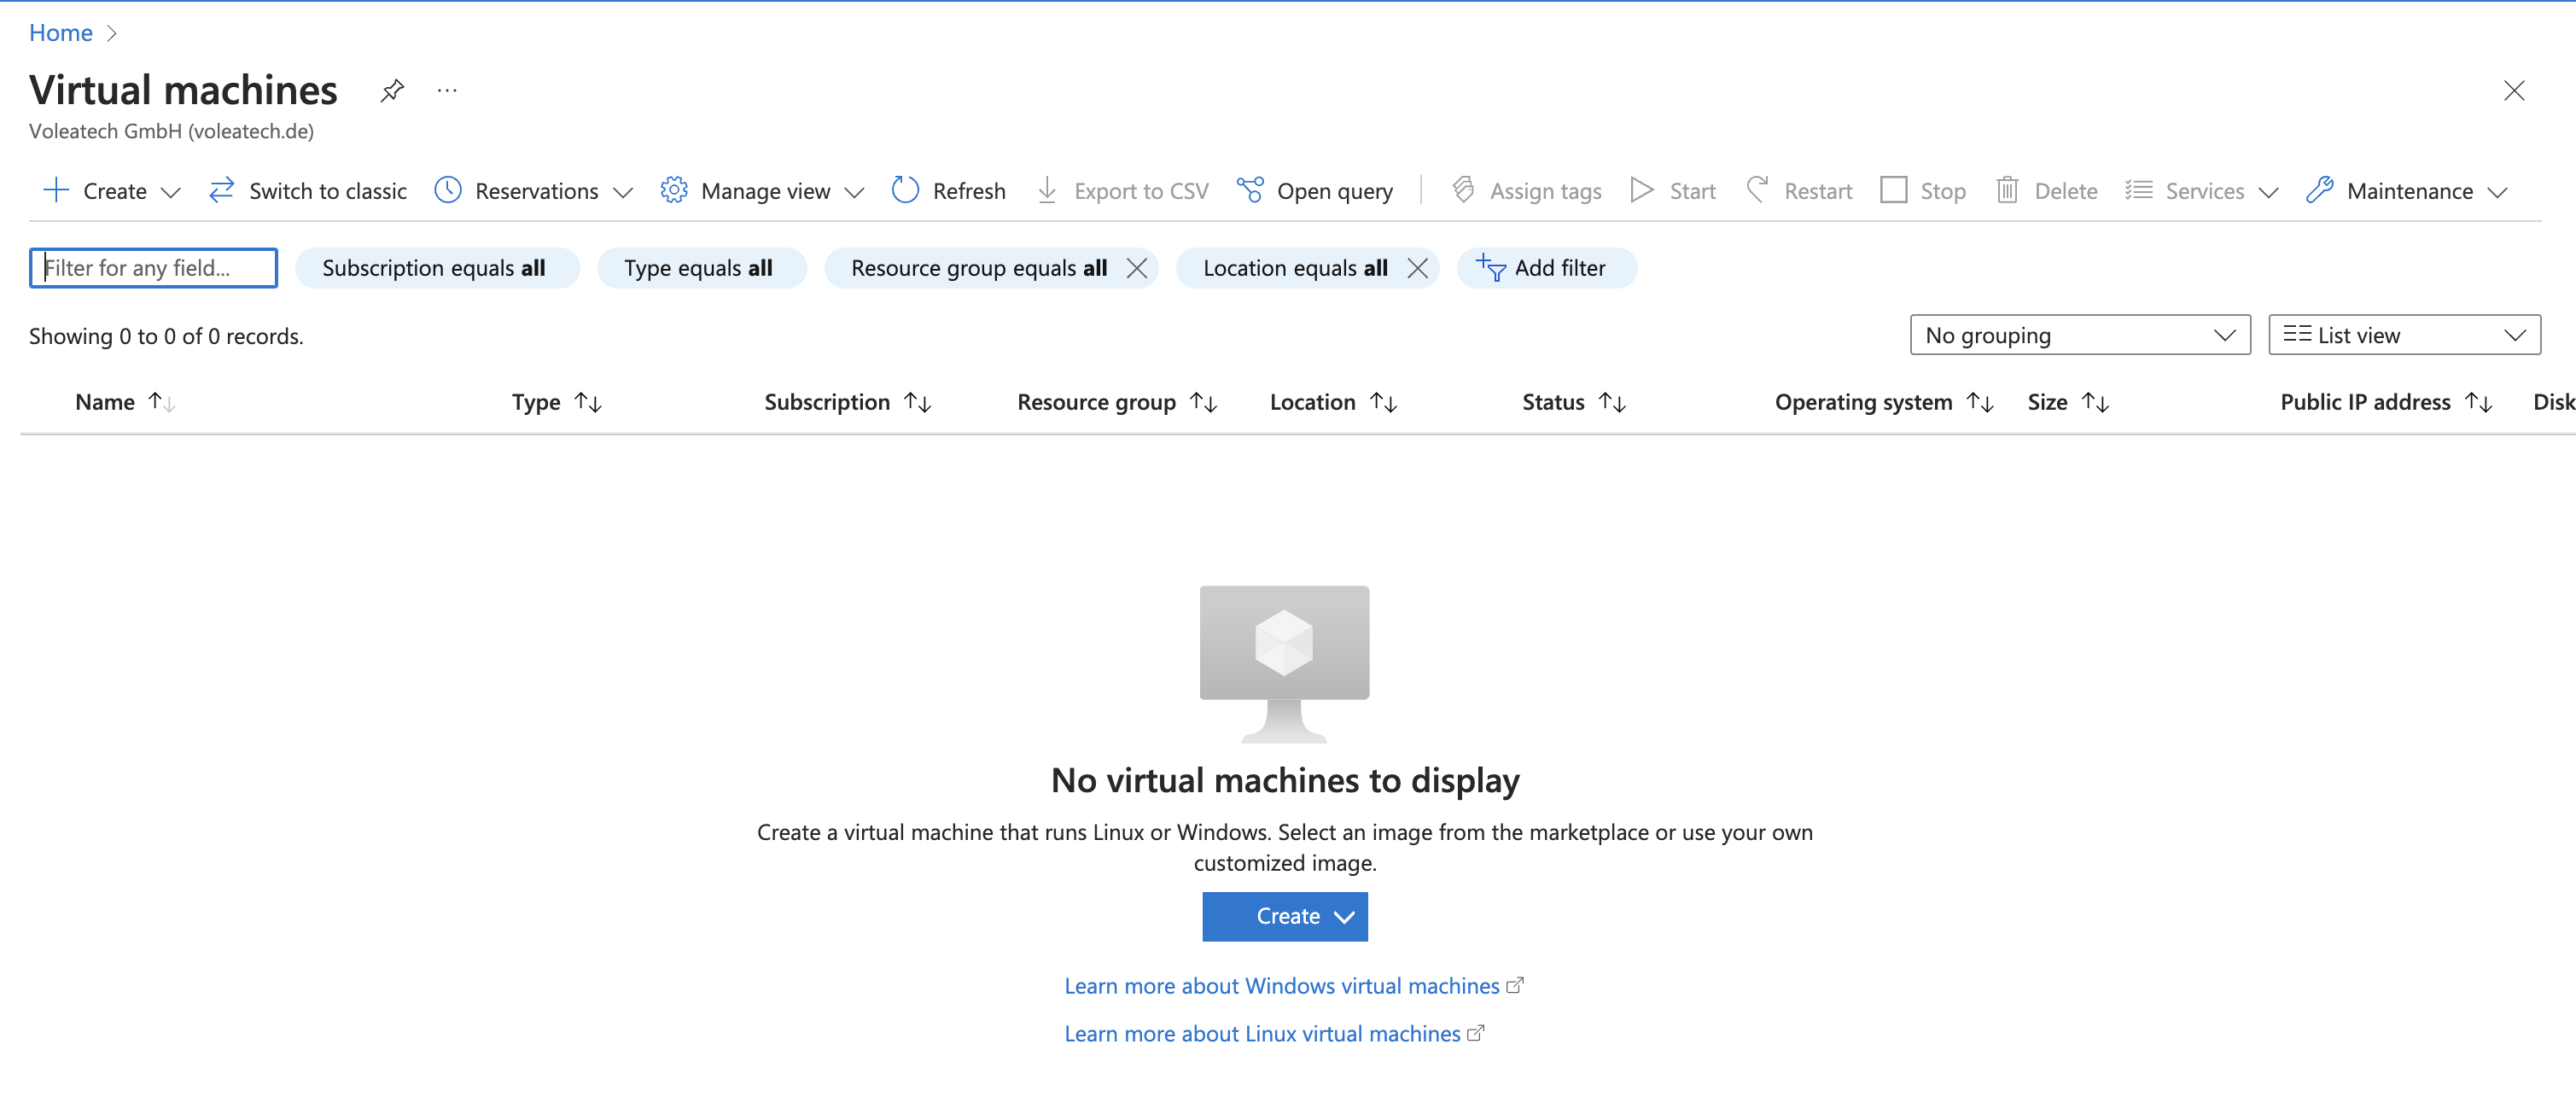
Navigate to Virtual machines and select Create and pick Azure virtual machine.
Choose your Subscription, Resource group and Region and give the virtual machine a name.
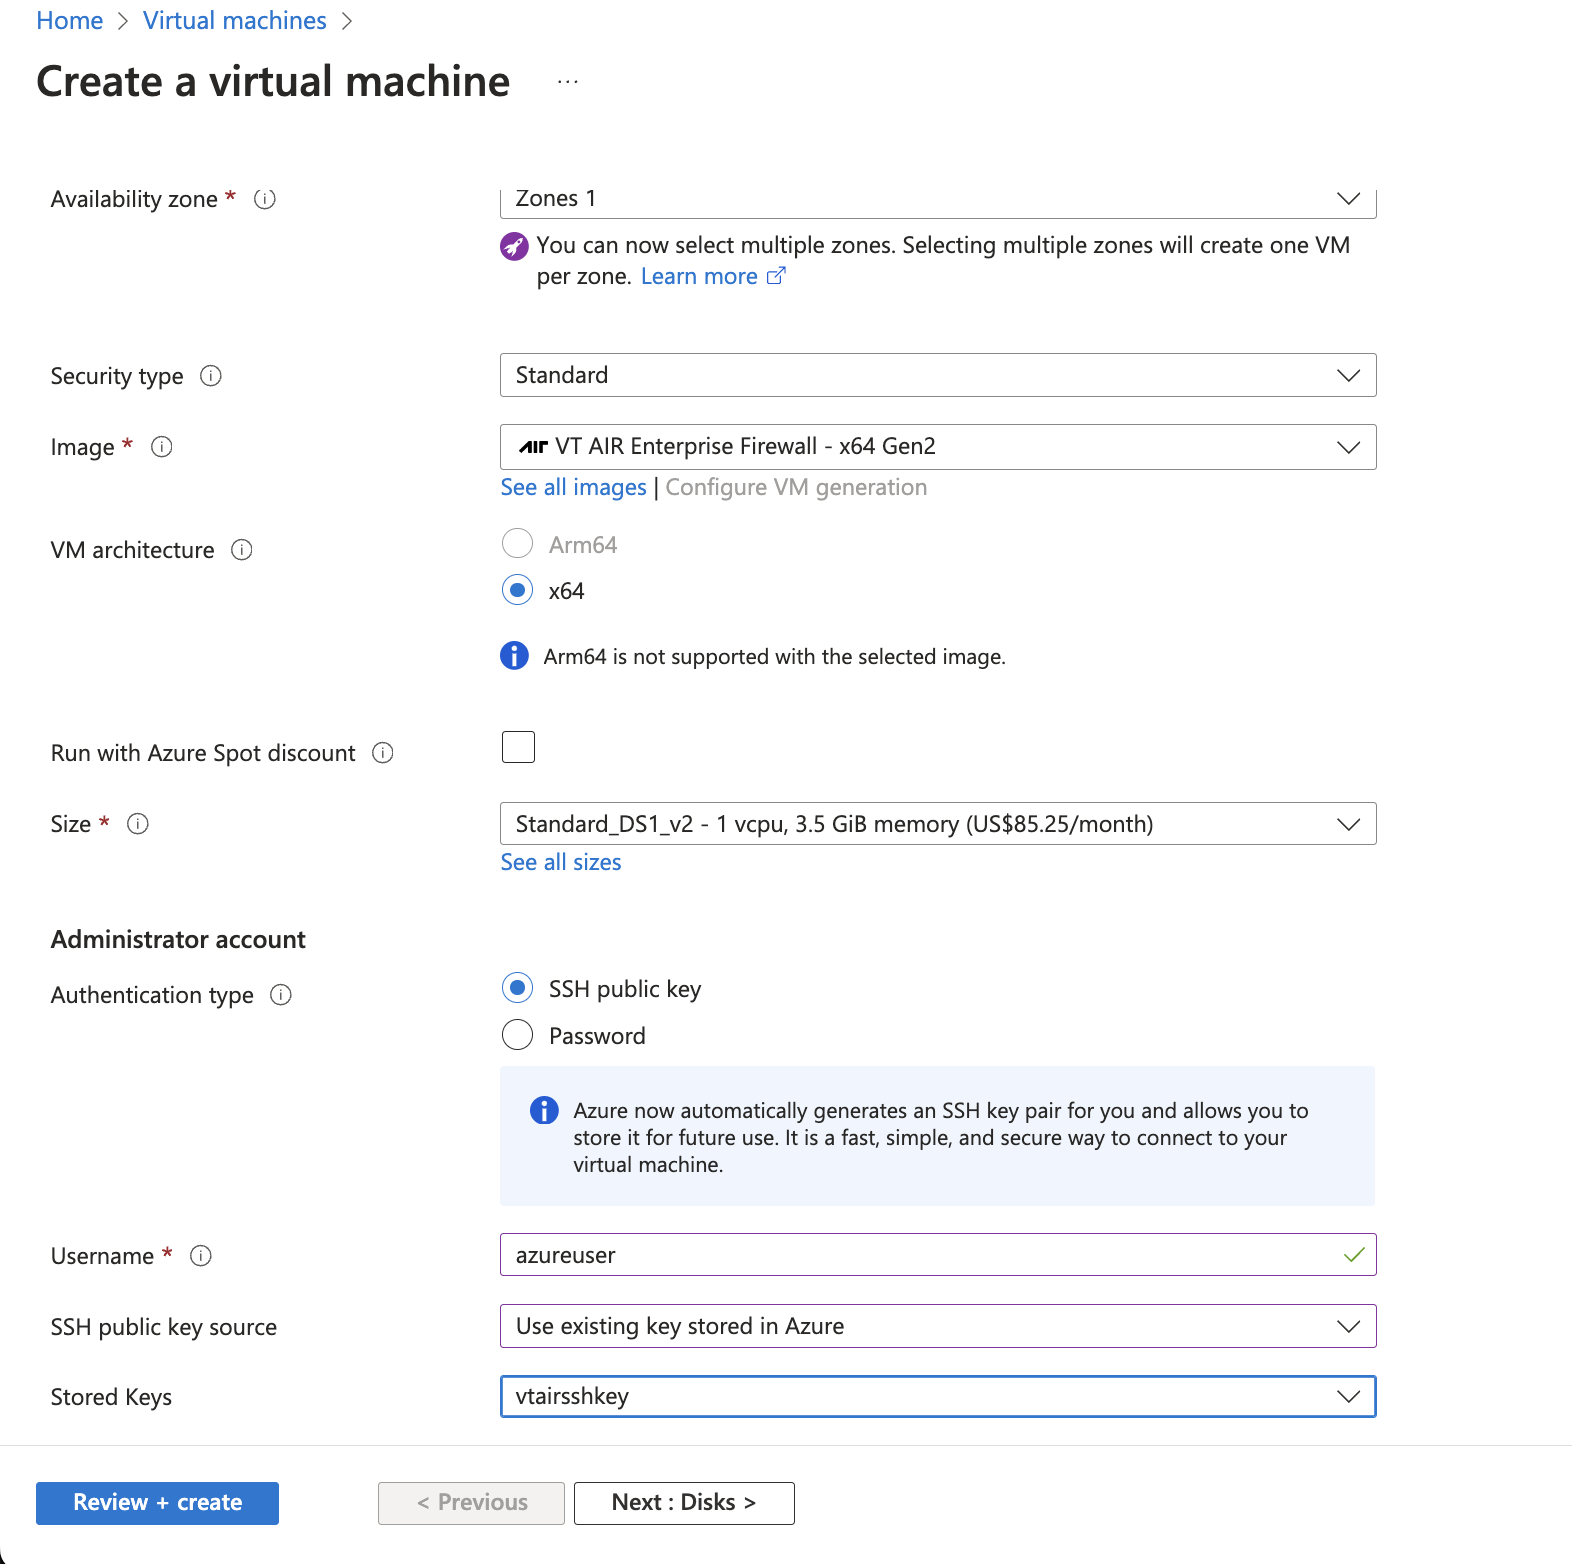
We will name the instance VTAIR. Search for VT AIR in the Azure Machine Image.
Choose your preferred Size.
Select your size and a key pair for the default SSH connection.
The instance will also be available via the webgui.
3.9.4.1. Storage
Make sure to select a large enough storage space. We recommend 30GB or more.
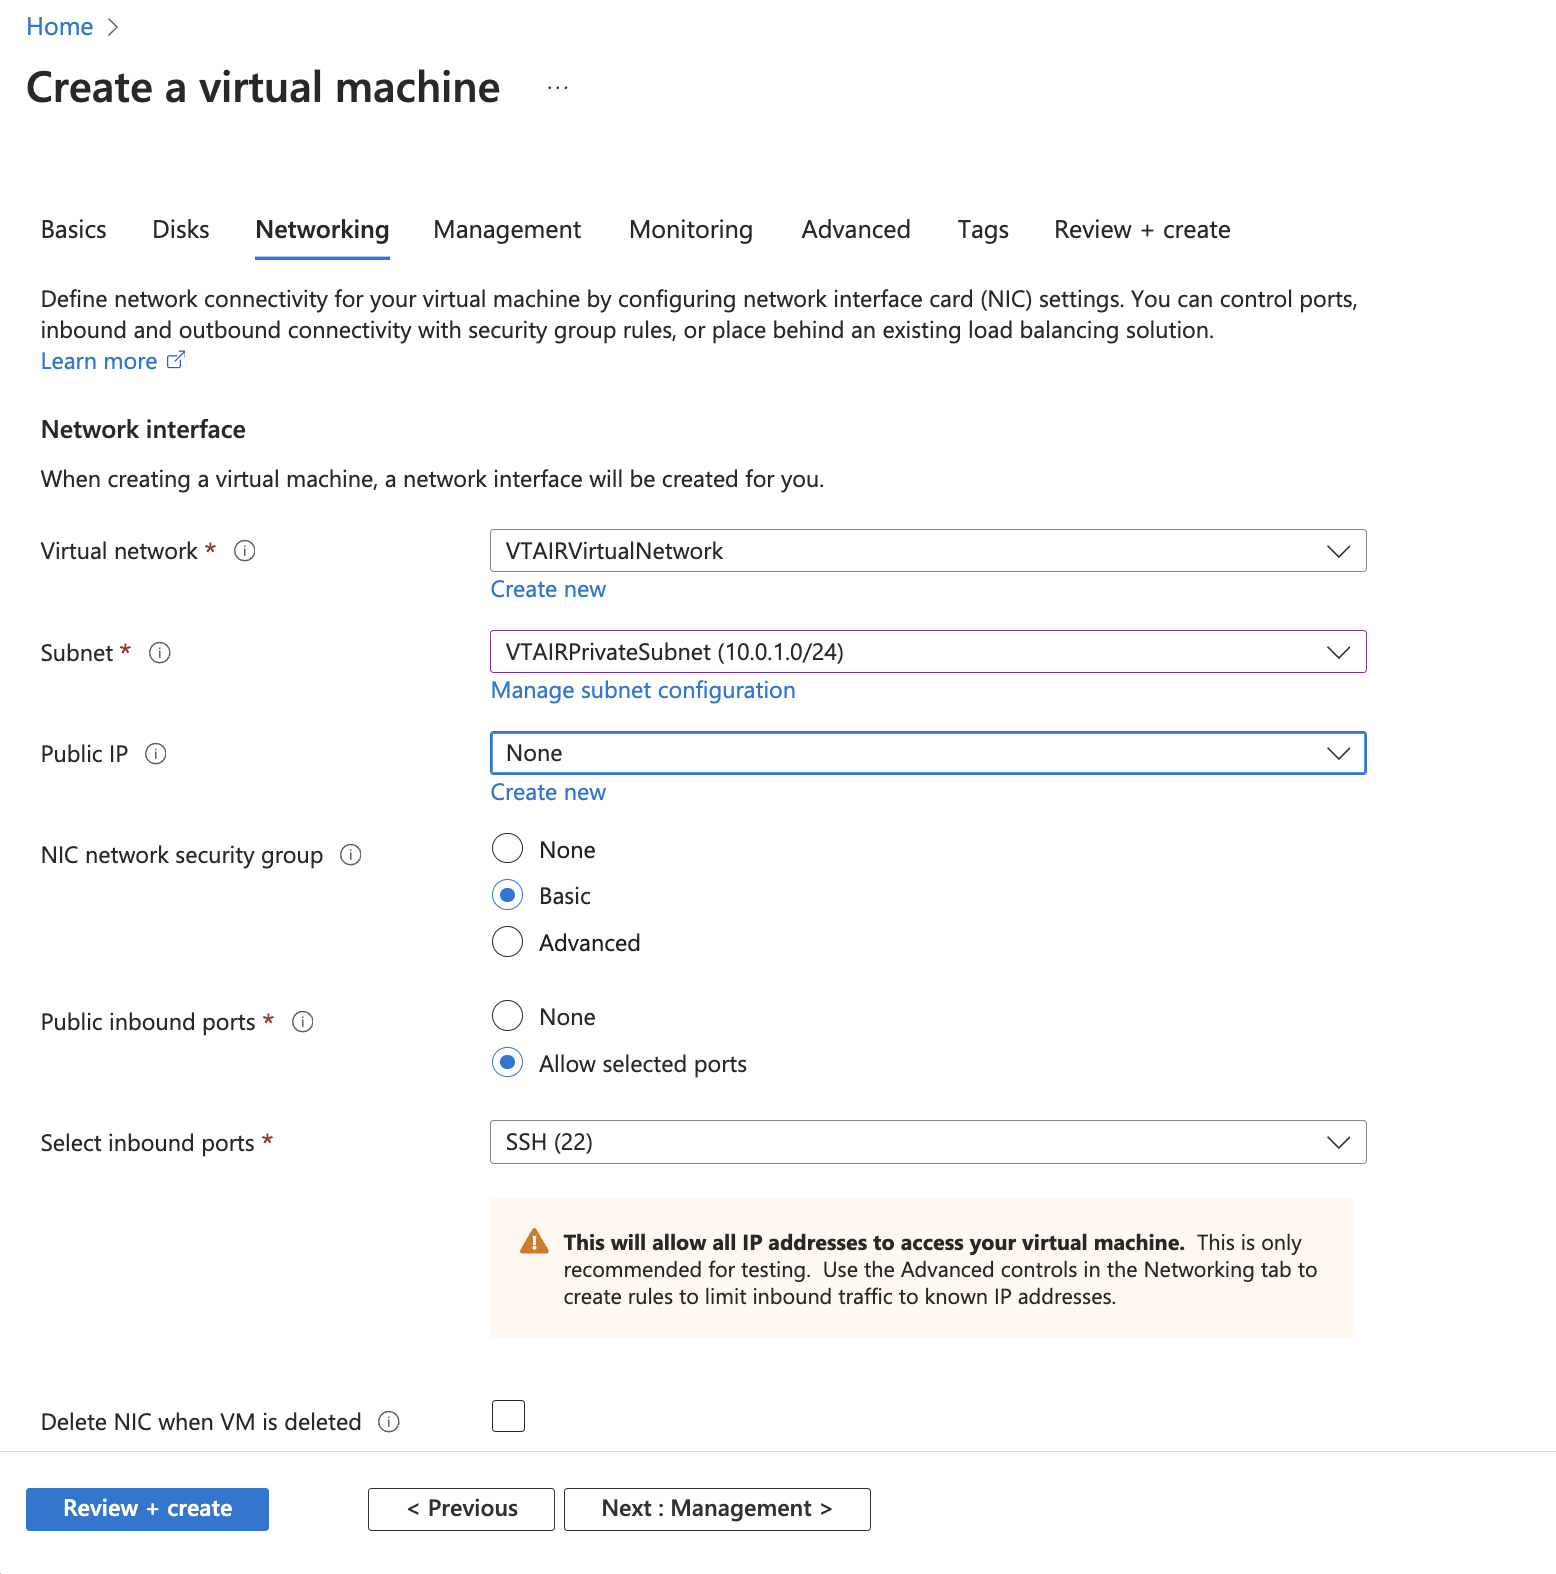
3.9.4.2. Public Network Interface (WAN)
In the network settings choose the create Virtual Network VTAIRVirtualNetwork. Also choose the default subnet.
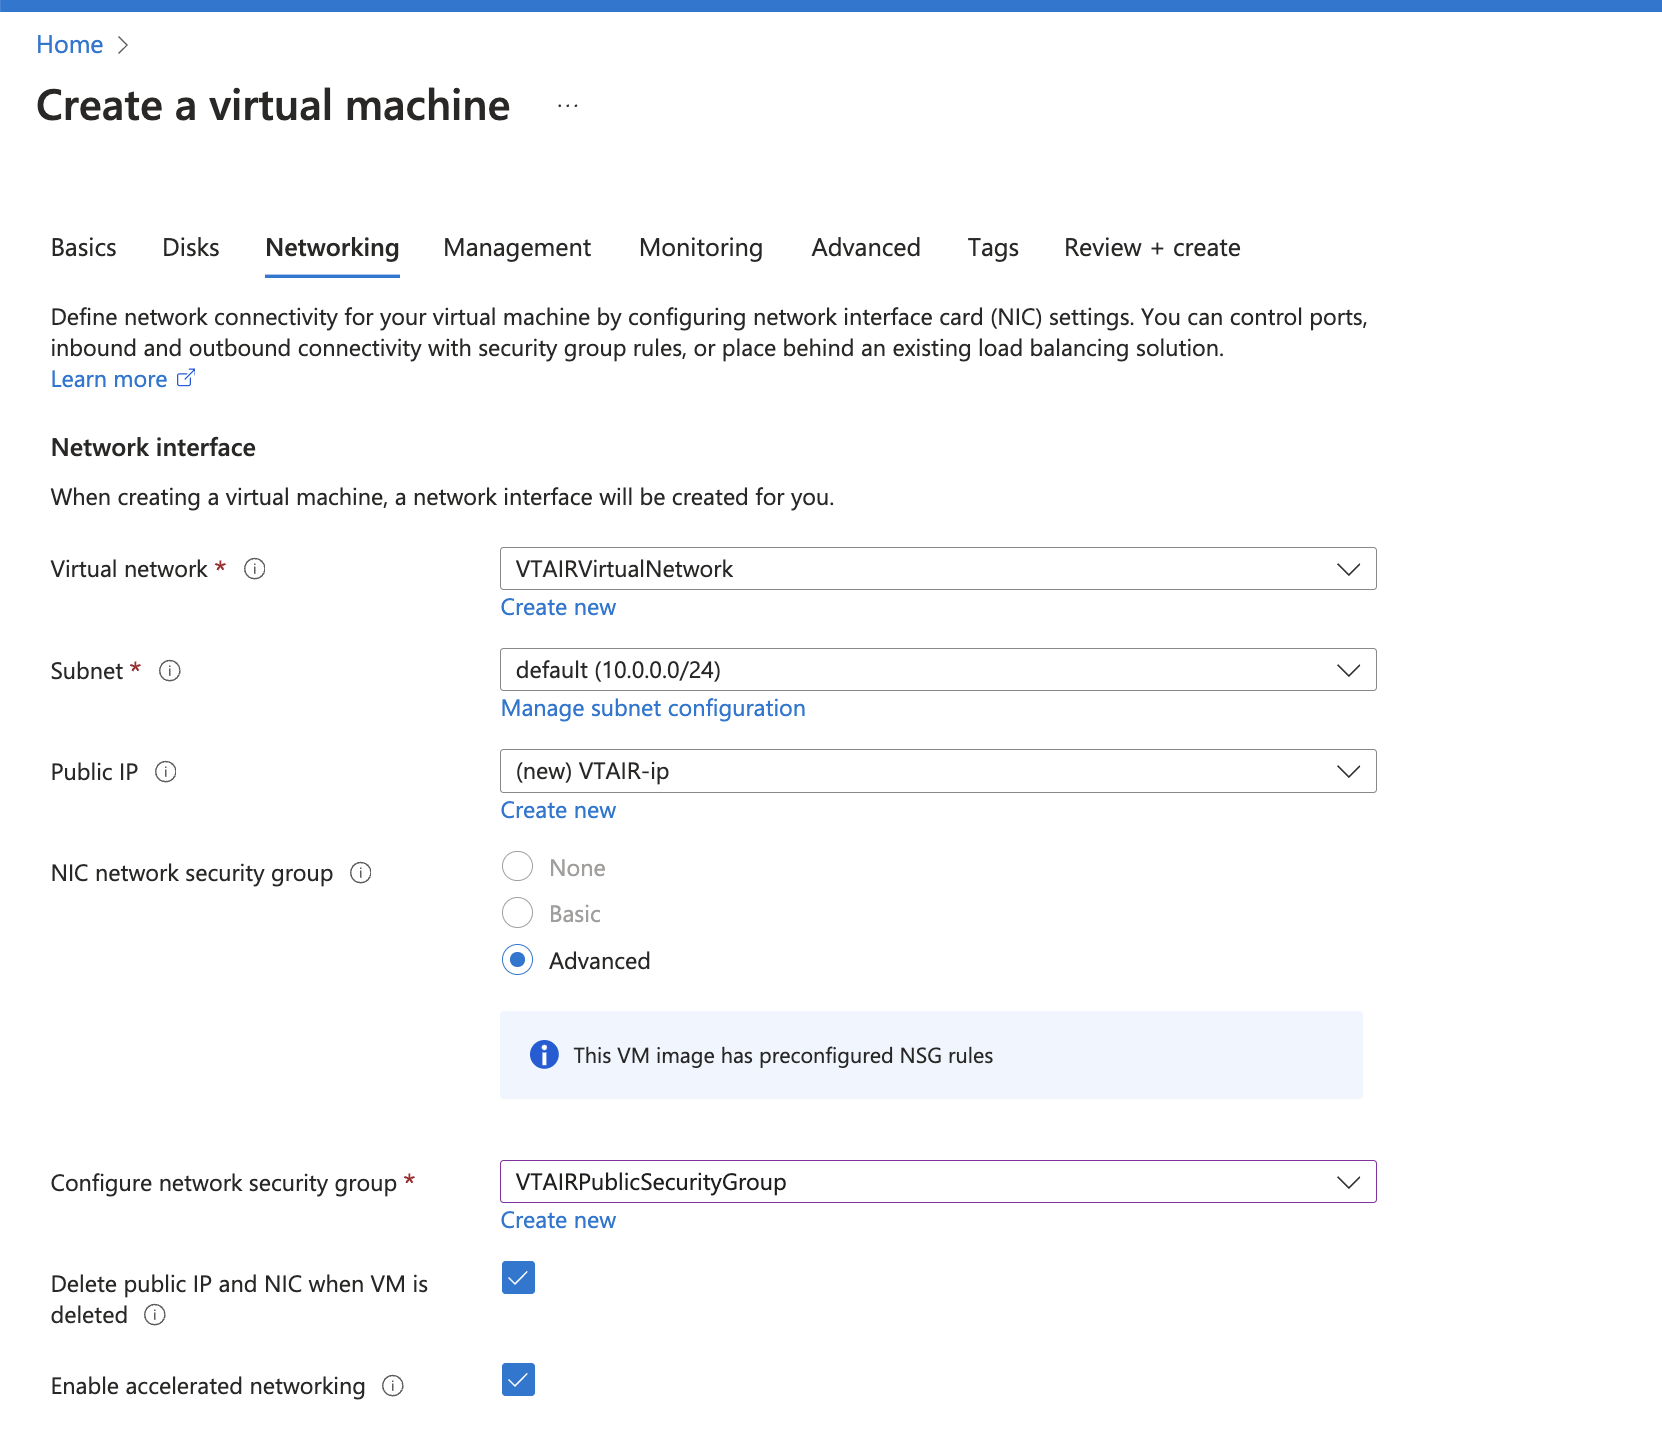
Select advanced in the NIC network security group settings.
For the security group select VTAIRPublicSecurityGroup
Click on Advanced network configuration
Make sure the setting Enable accelerated networking is enabled.
You can finish the creation of the Virtual Machine at this point.
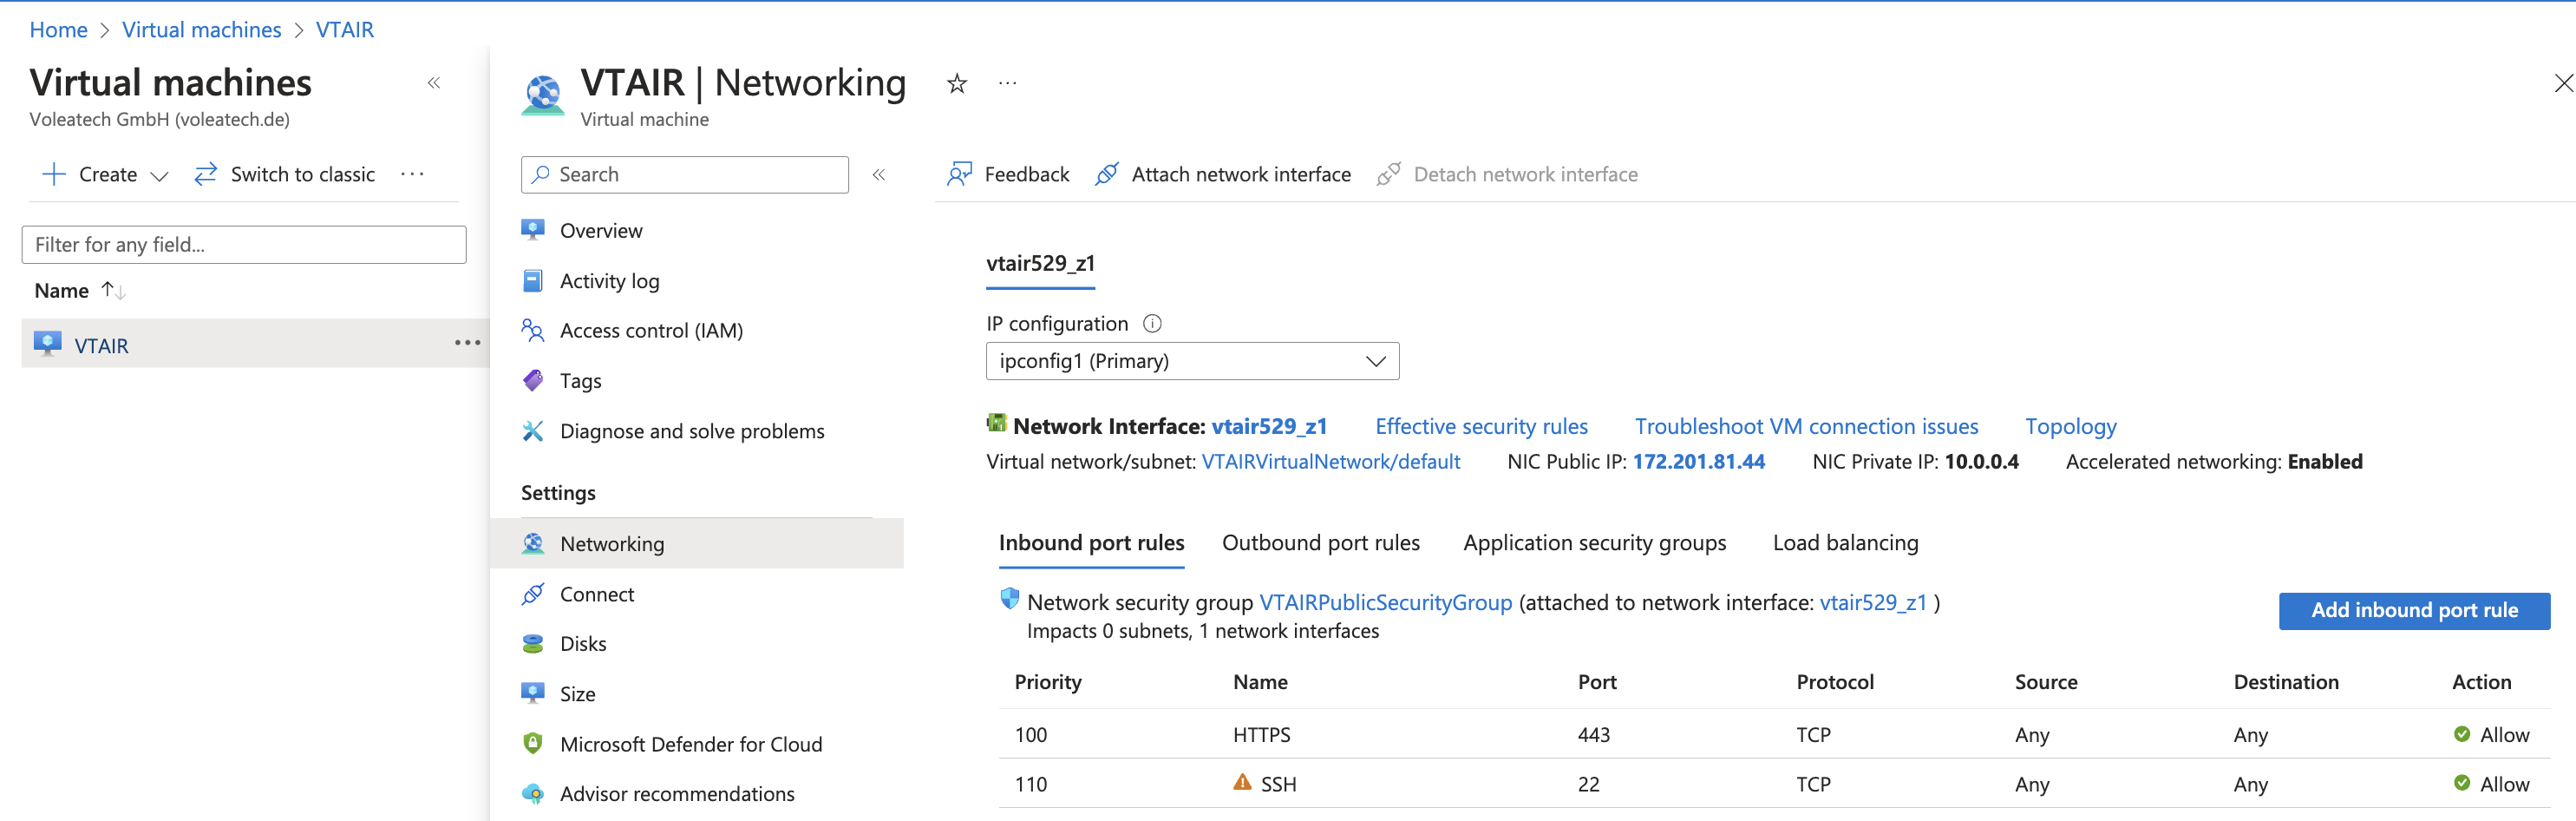
3.9.4.3. Private Network Interface (LAN)
The Private Network Interface must be associated with the Virtual Machine after it is created. Wait until the virtual machine is fully created and running.
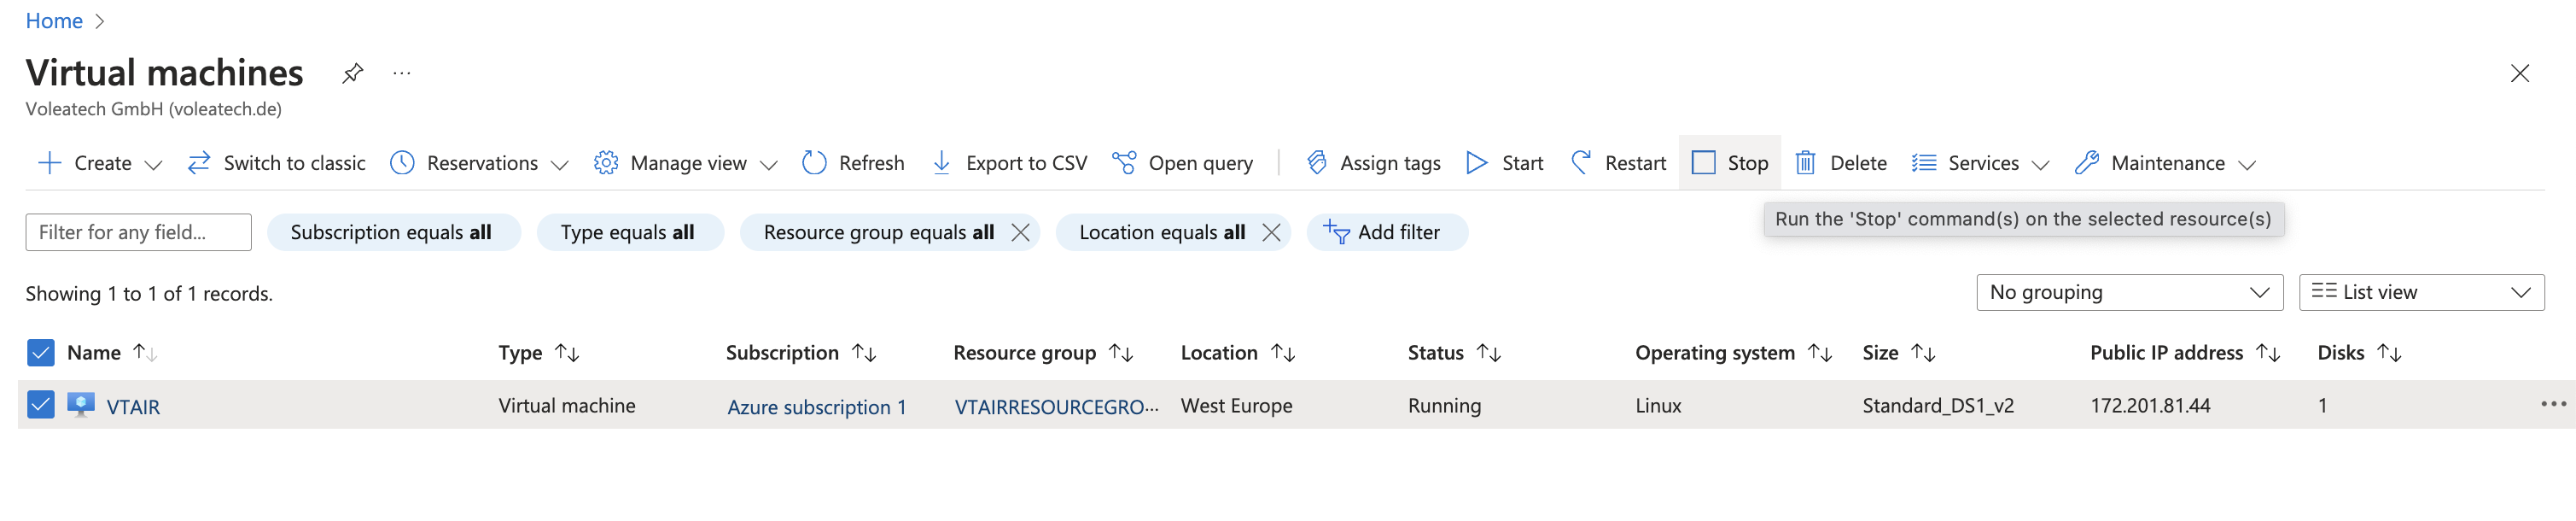
Stop the virtual machine at this point and go to the settings of the VM. Switch to Settings and Networking.
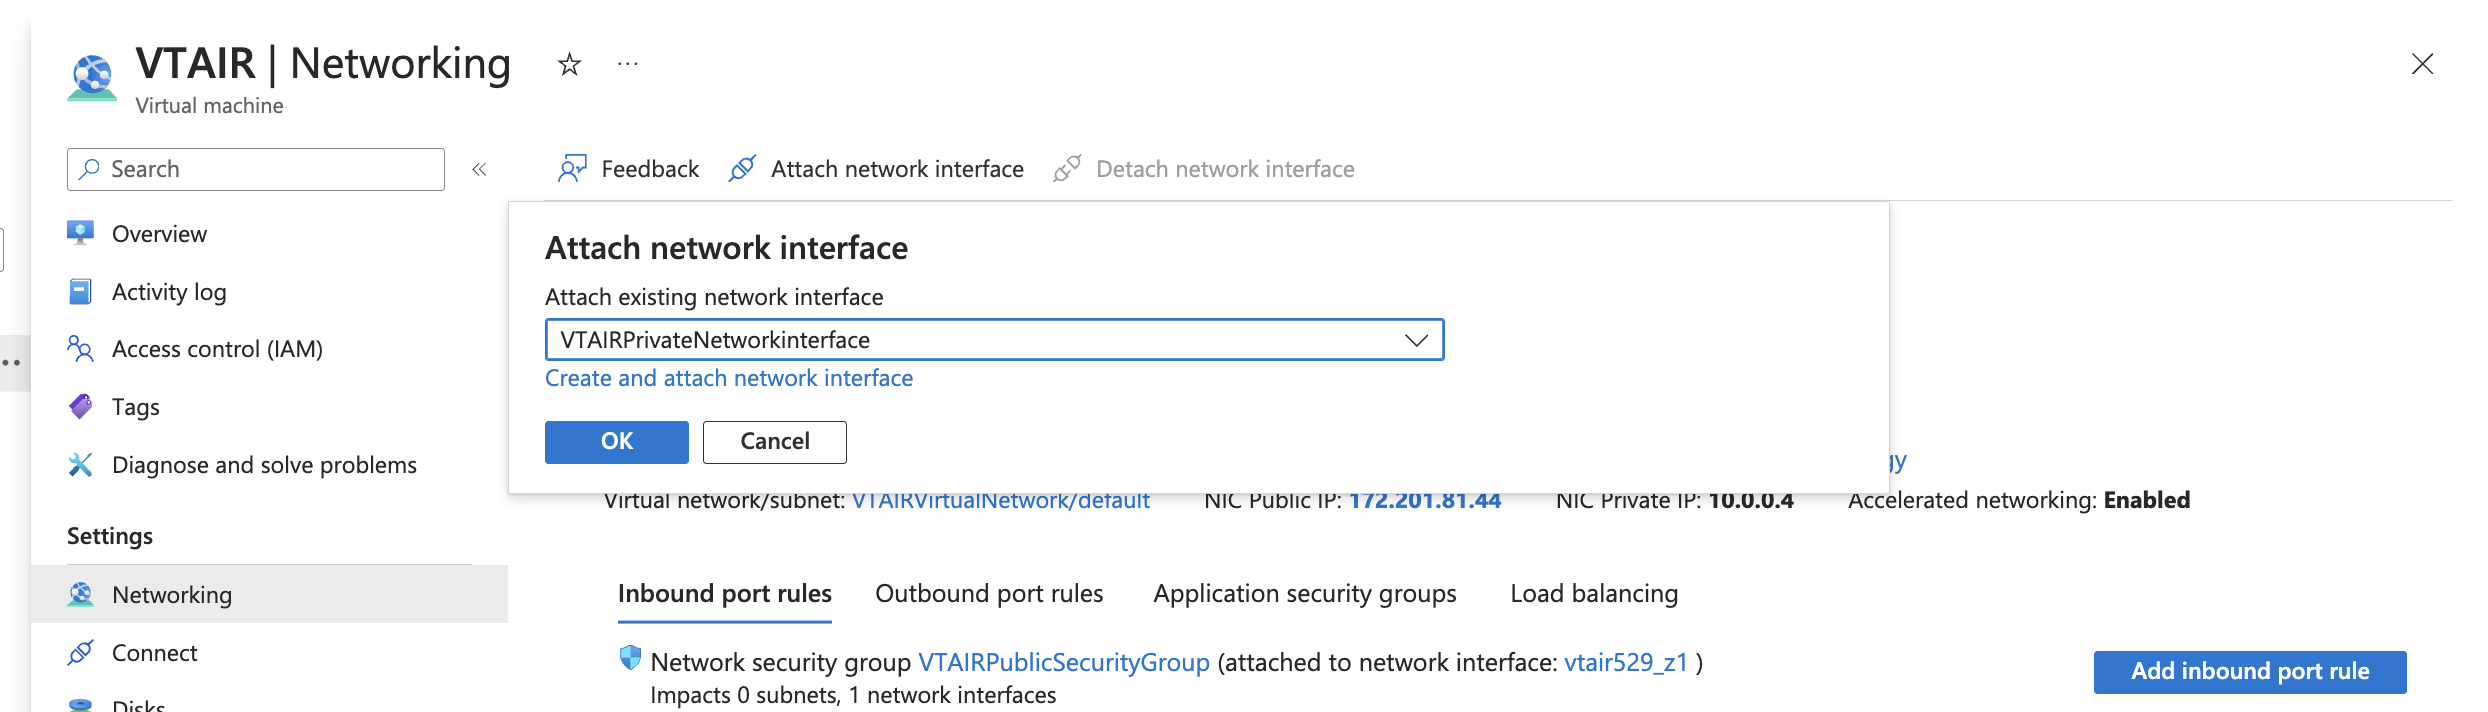
In the top menu click on Attach network interface and look for the VTAIRPrivateNetworkinterface.
Once the interface is associated with the VM, you can start it again. Also write down the IP Address of the new interface, we nede it in the next step to create the default route for the LAN Routing Table. In our case it is 10.0.1.4.
3.9.4.3.1. Default route pointing to VT AIR LAN interface
The next step needs to be completed in the Route tables settings. The Private Network Interface (LAN) needs to be the default gateway for the VTAIRPrivateRoutingTable
Navigate to Routes and click on Add.
Give the route a name VTAIRPublicRoutingTableGateway, the destination type is IP Addresses, the Destination is the network ip range 0.0.0.0/0 and the next hop type Virtual appliance. The next hop address is the IP Address of the LAN Interface of the virtual machine. In our case 10.0.1.4.

3.9.5. VT AIR configuration
We will now need to login to the VT AIR instance webgui to configure the LAN interface and additional settings.
3.9.5.1. Enable and set LAN Interface
In the webgui navigate to Interfaces -> Assign. Select the edit button next to the LAN interface and assign the new interface to it.
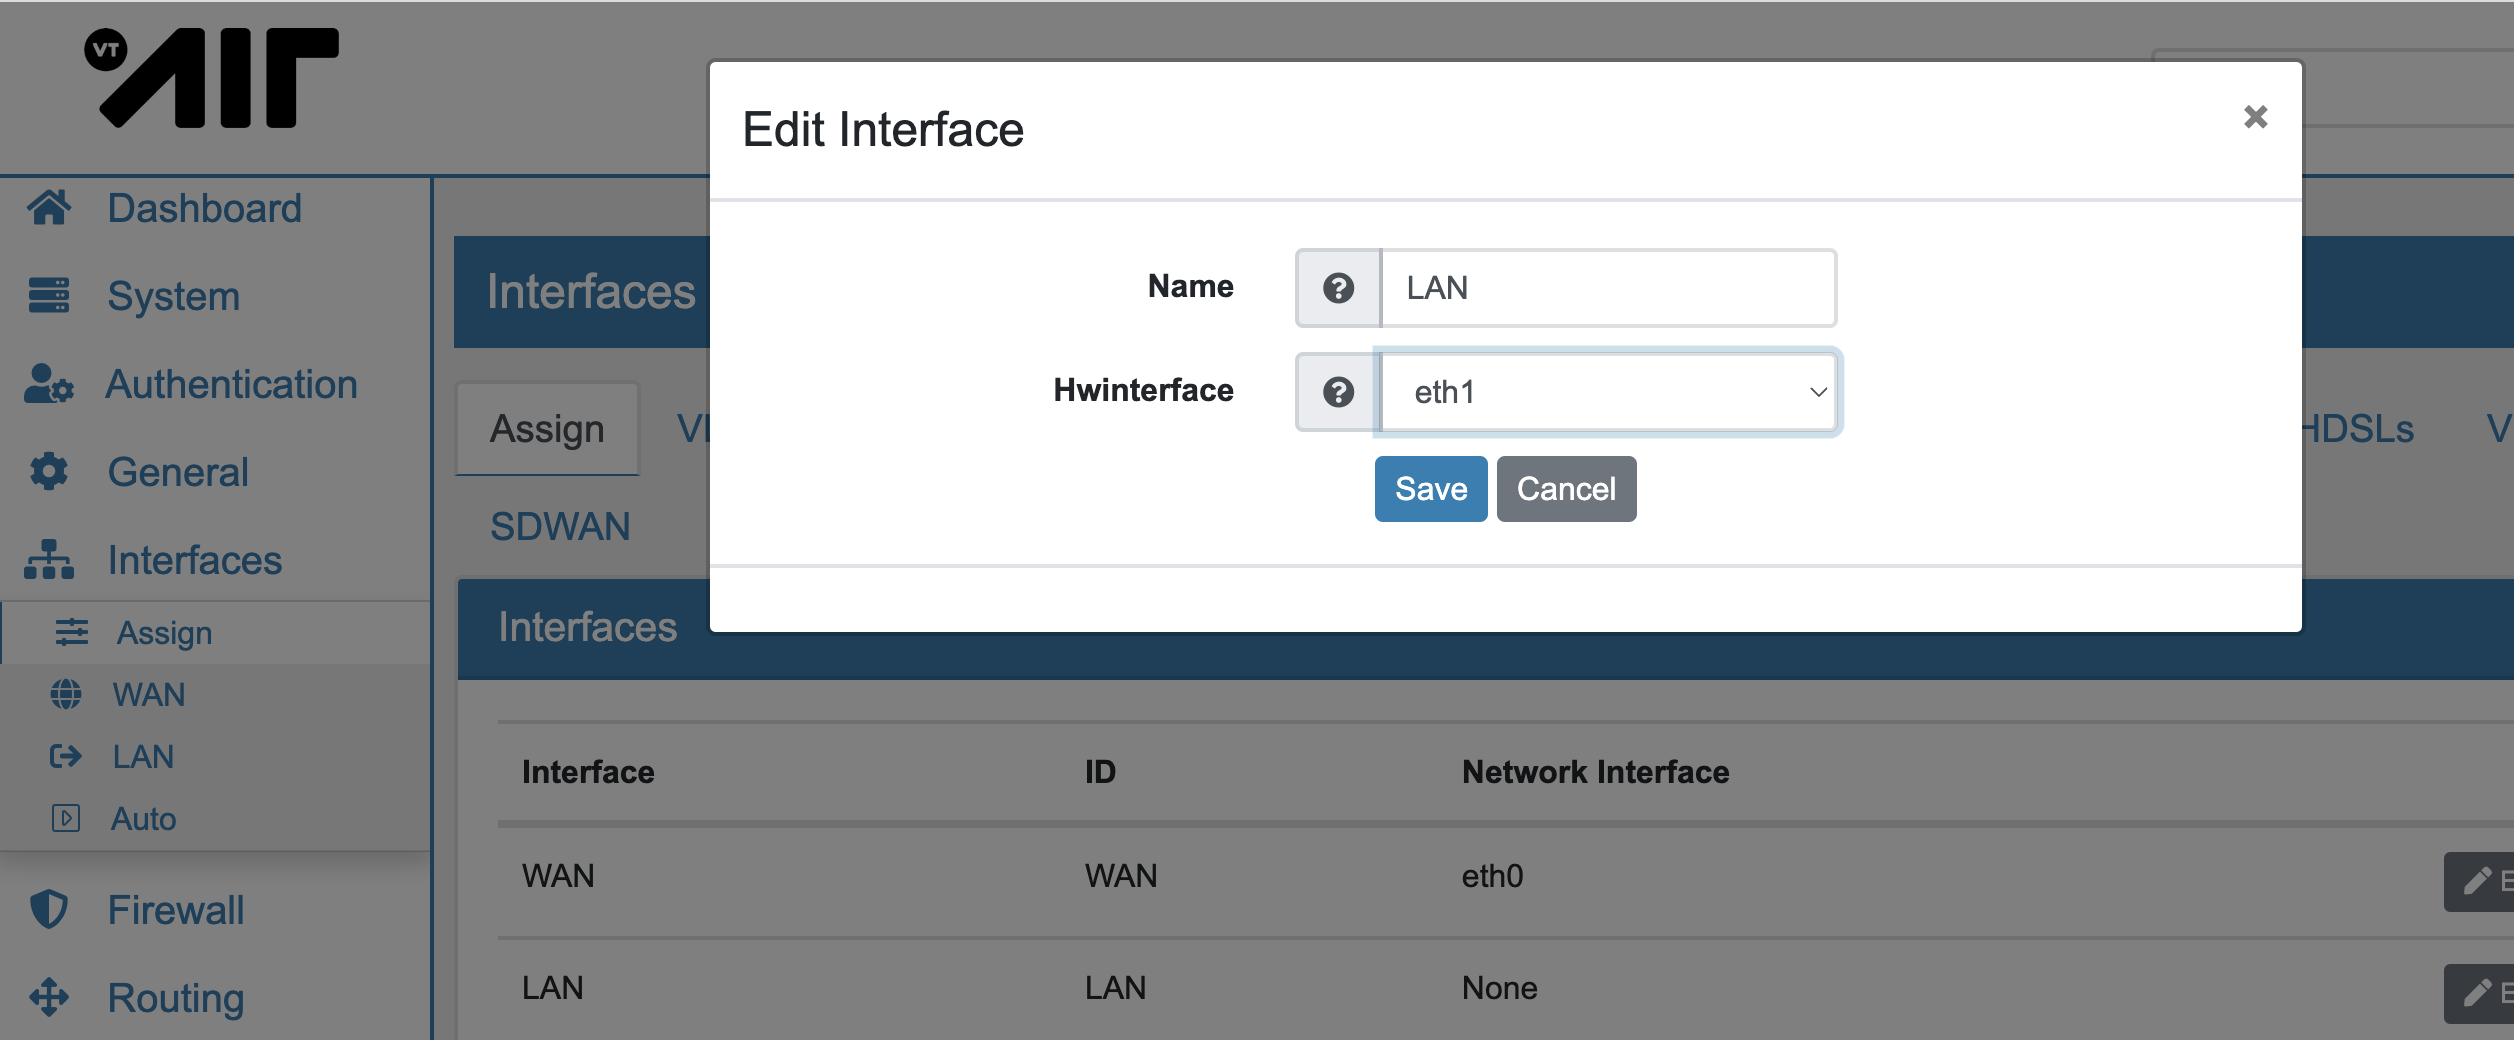
Switch to the LAN interface settings by going to Interfaces -> LAN. Enable the interface and set the IPv4 type to DHCP. Save the settings.
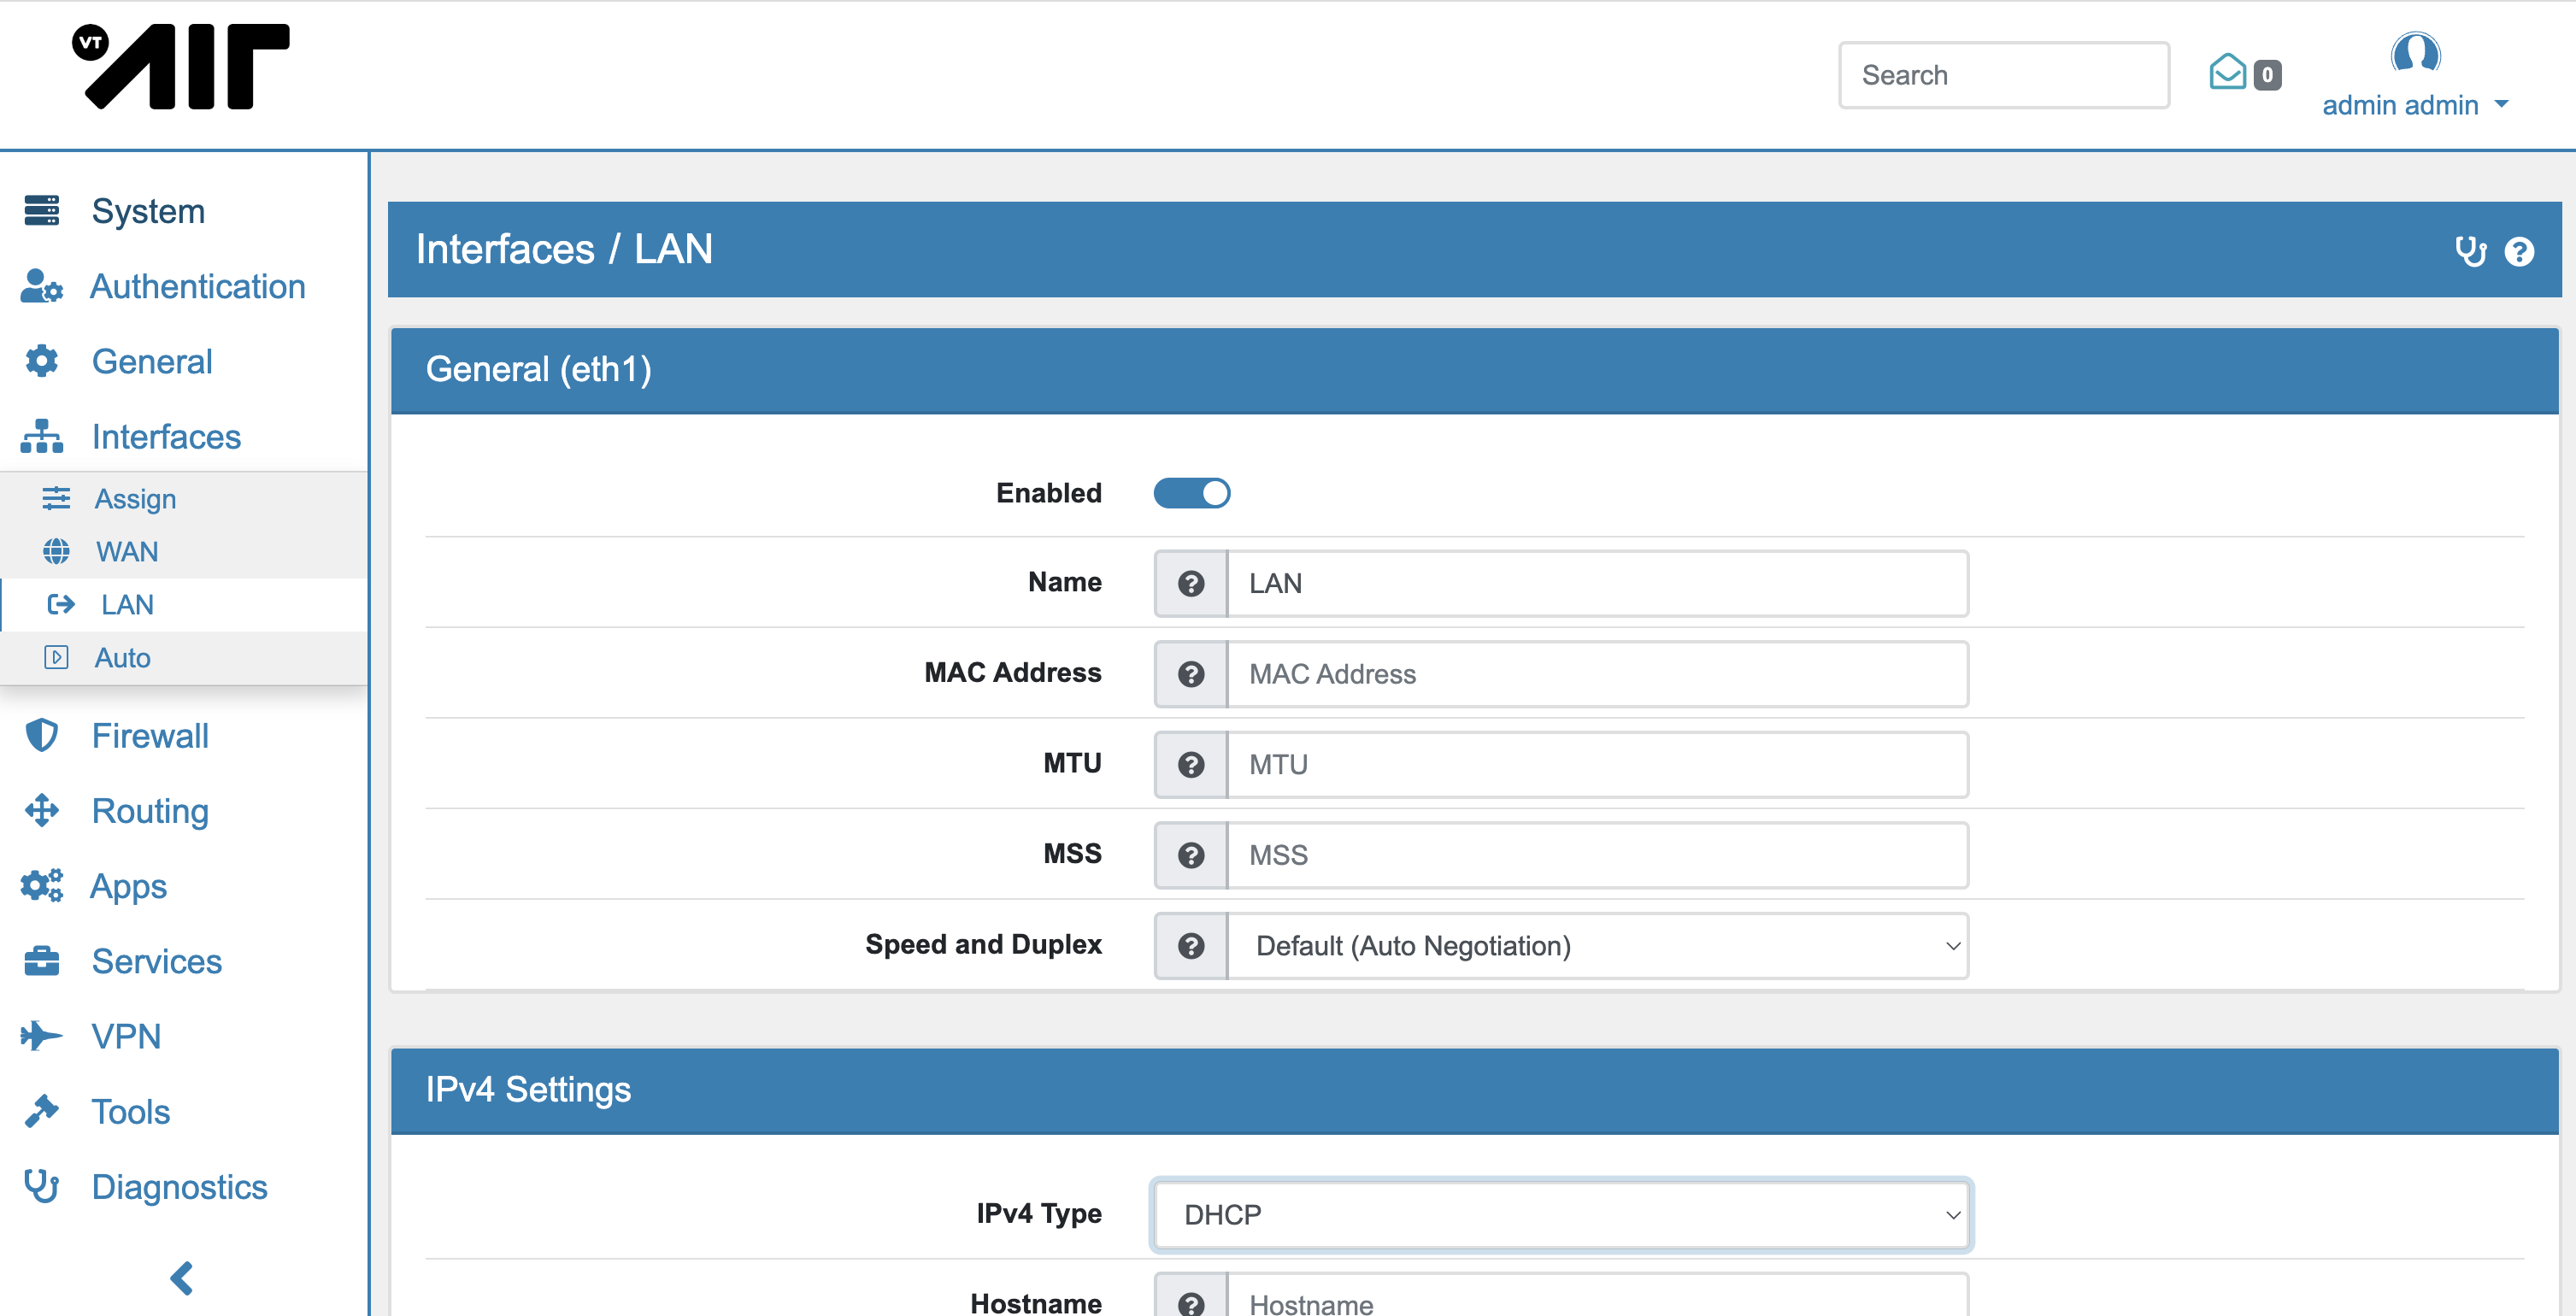
This will enable the LAN interface and the IP 192.168.1.10 will be assigned.
3.9.5.2. Create DNAT Rules and VPN Configuration
You can now create all the different setting you need for your setup. To make instances behind VT AIR available to the elastic IP, configure a DNAT rule.
You can also configure the different VPN options.
3.9.6. Azure VMs
Connect Azure VMs to the private subnet so they are in the LAN network of the VT AIR.
We have created videos to show the entire configurations.
3.9.6.1. Add to the Private Network Subnet
If you have already running instances, you need to create a new Network Interface and change the existing network interface on the VM.
When you create a new VM, you can select the Virtual Network and private subnet in the network settings when you create it.
3.9.6.2. Set Private Network Security Group
Make sure to select an appropriate Network Security Group so the VM can be accessed by the VT AIR.