18.2.2. OpenVPN Settings
You can find the OpenVPN Settings at VPN → OpenVPN.
Prefill from File lets you prefill the fields with an OpenVPN config file.
Authentication Mode is either Certificate, User or Shared Key:

This image was created with icons by Freepik from Flaticon.
- For the Certificate authentication mode the OpenVPN server needs a server certificate and the OpenVPN client needs a client certificate. Both have to be from the same Certificate Authority.
Additionally you can enable the option Additional User Auth. to have a two factor authentication (Certificate + User). The same conditions apply to the additional user authentication then a user only authentication below.
For the User authentication mode both sides need the same Certificate Authority and the client needs to add a Username and Password at the User Authentication setting. This user needs to exist as system user on the VT AIR where the OpenVPN server is running. The user also needs the User permission open vpn - OpenVPN User Login which can be assigned at System → User. Alternatively you can add the user to the Group OpenVPN Access. This will also give them the same user permission.
For the Shared Key authentication mode both sides need a shared key. When you create the OpenVPN server the VT AIR can generate a shared key automatically. This shared key needs just to be copied to the OpenVPN client.
Protocol can be either UDP or TCP and whether it’s only for IPv4, only for IPv6 or for both. Both IPv4 and IPv6 is multihome only, which means the interface can not be specified and only All can be selected.
Device Mode is either tun (Layer 3) or tap (Layer 2).
Interface can be specified or just All selected. If the Interface is a VRRP virtual IP of a HA Setup, only the Master holding the IP has the OpenVPN activated. The Slave will be on standby for the OpenVPN.
Local Port can be definied or if left blank, a random port will be used.
Use TLS Key allows the usage of Transport Layer Security and can only be used in certificate or user authentication mode. The same TLS Key needs to be provided for both sides. The key can be automatically generated when creating an OpenVPN server.
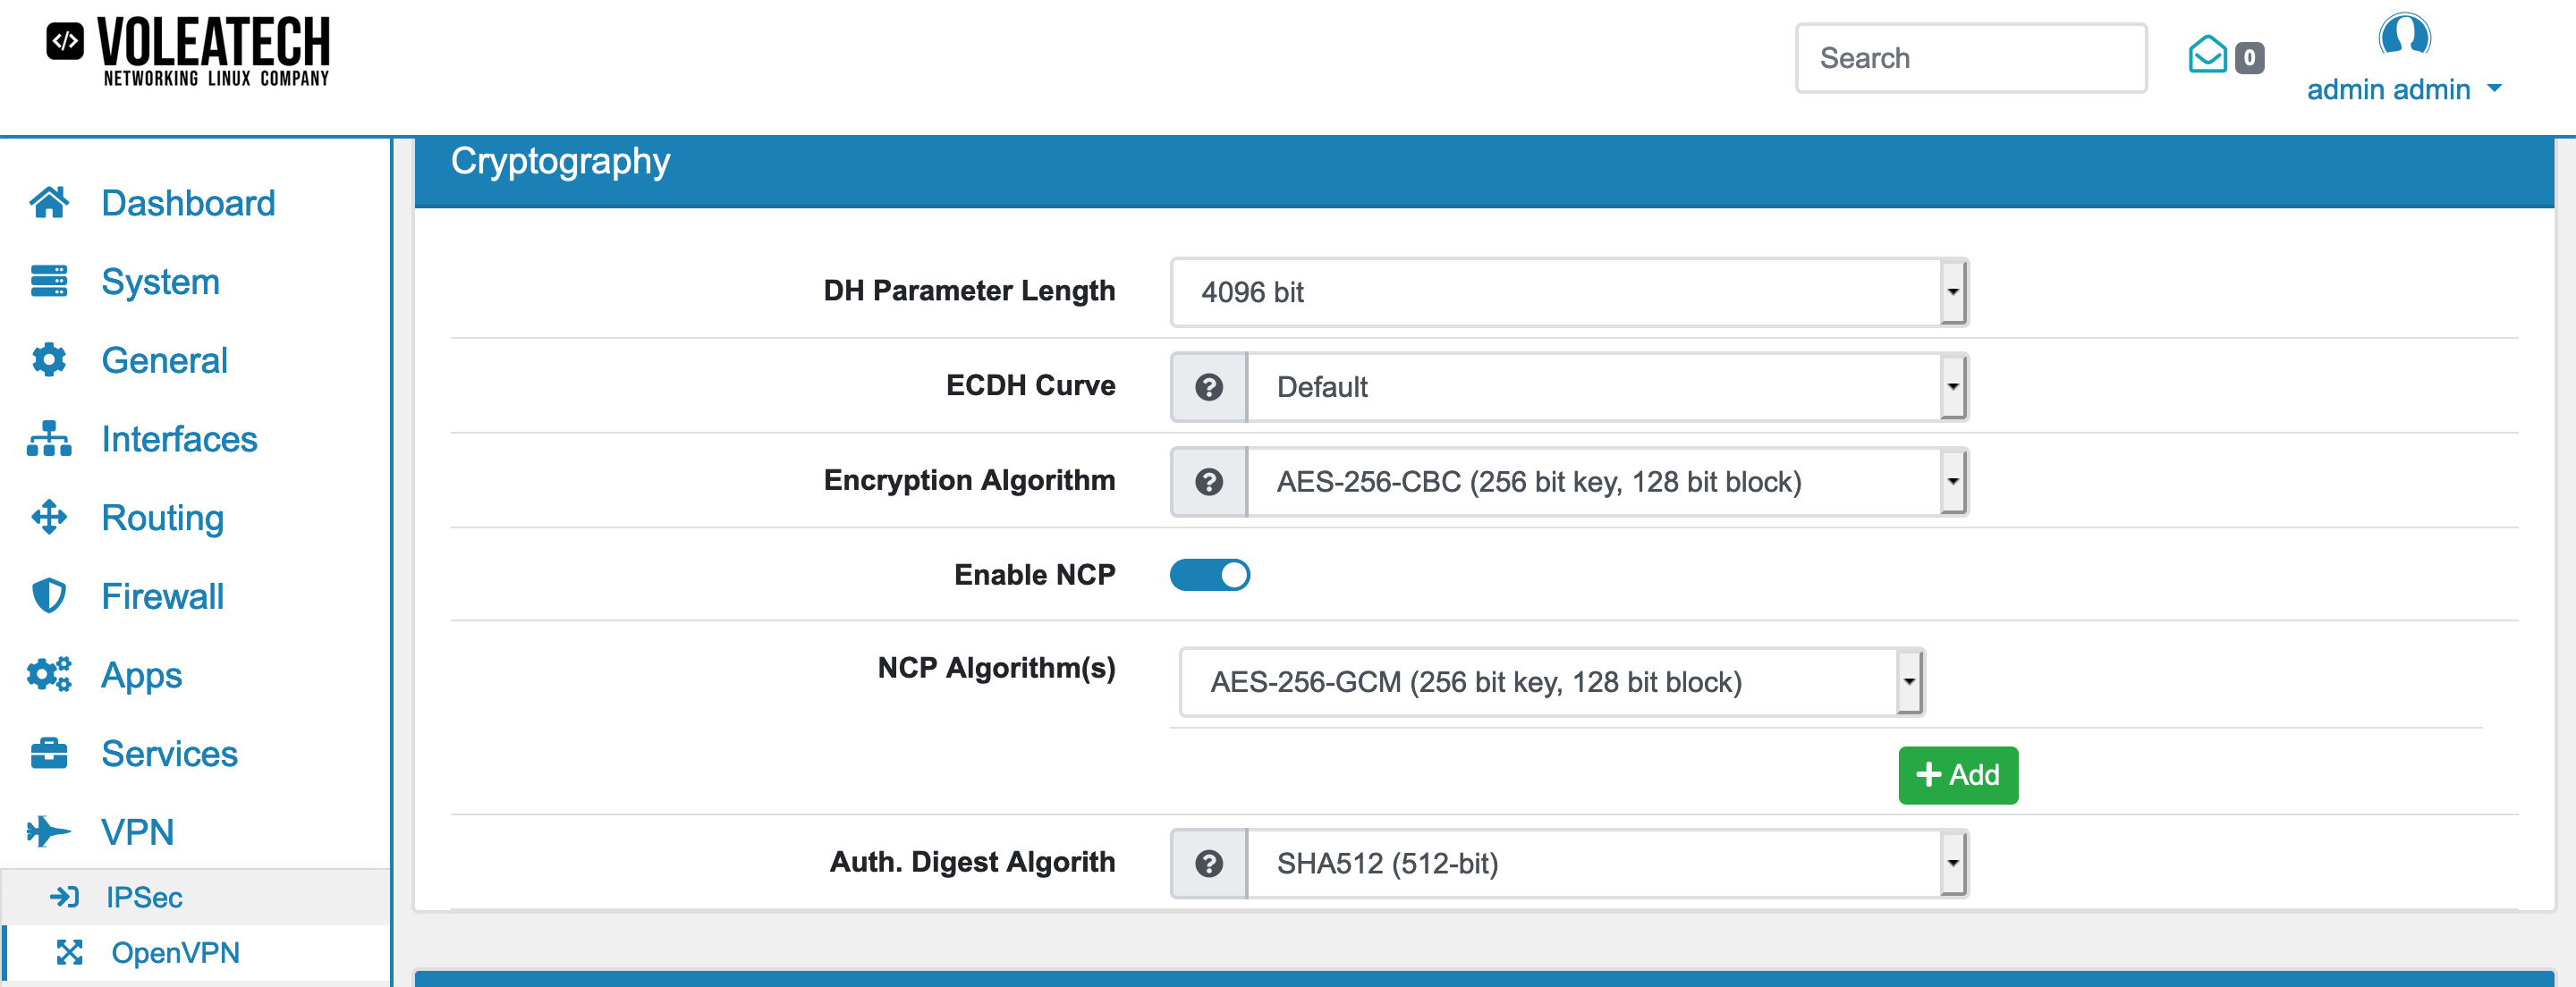
Encryption Algorithm can be one of many algorithms. It’s also possible to select none. It has to be the same on both sides.
Enable NCP allows Negotiable Cryptographic Parameters. At NCP Algorithm(s) multiple algorithms can be selected. The order of the selected algorithms is respected by OpenVPN. It is only available for OpenVPN 2.4 and upwards.
Auth. Digest Algorith can be one of a few algorithms. It has to be the same on both sides. If none is selected, TLS can not be used.
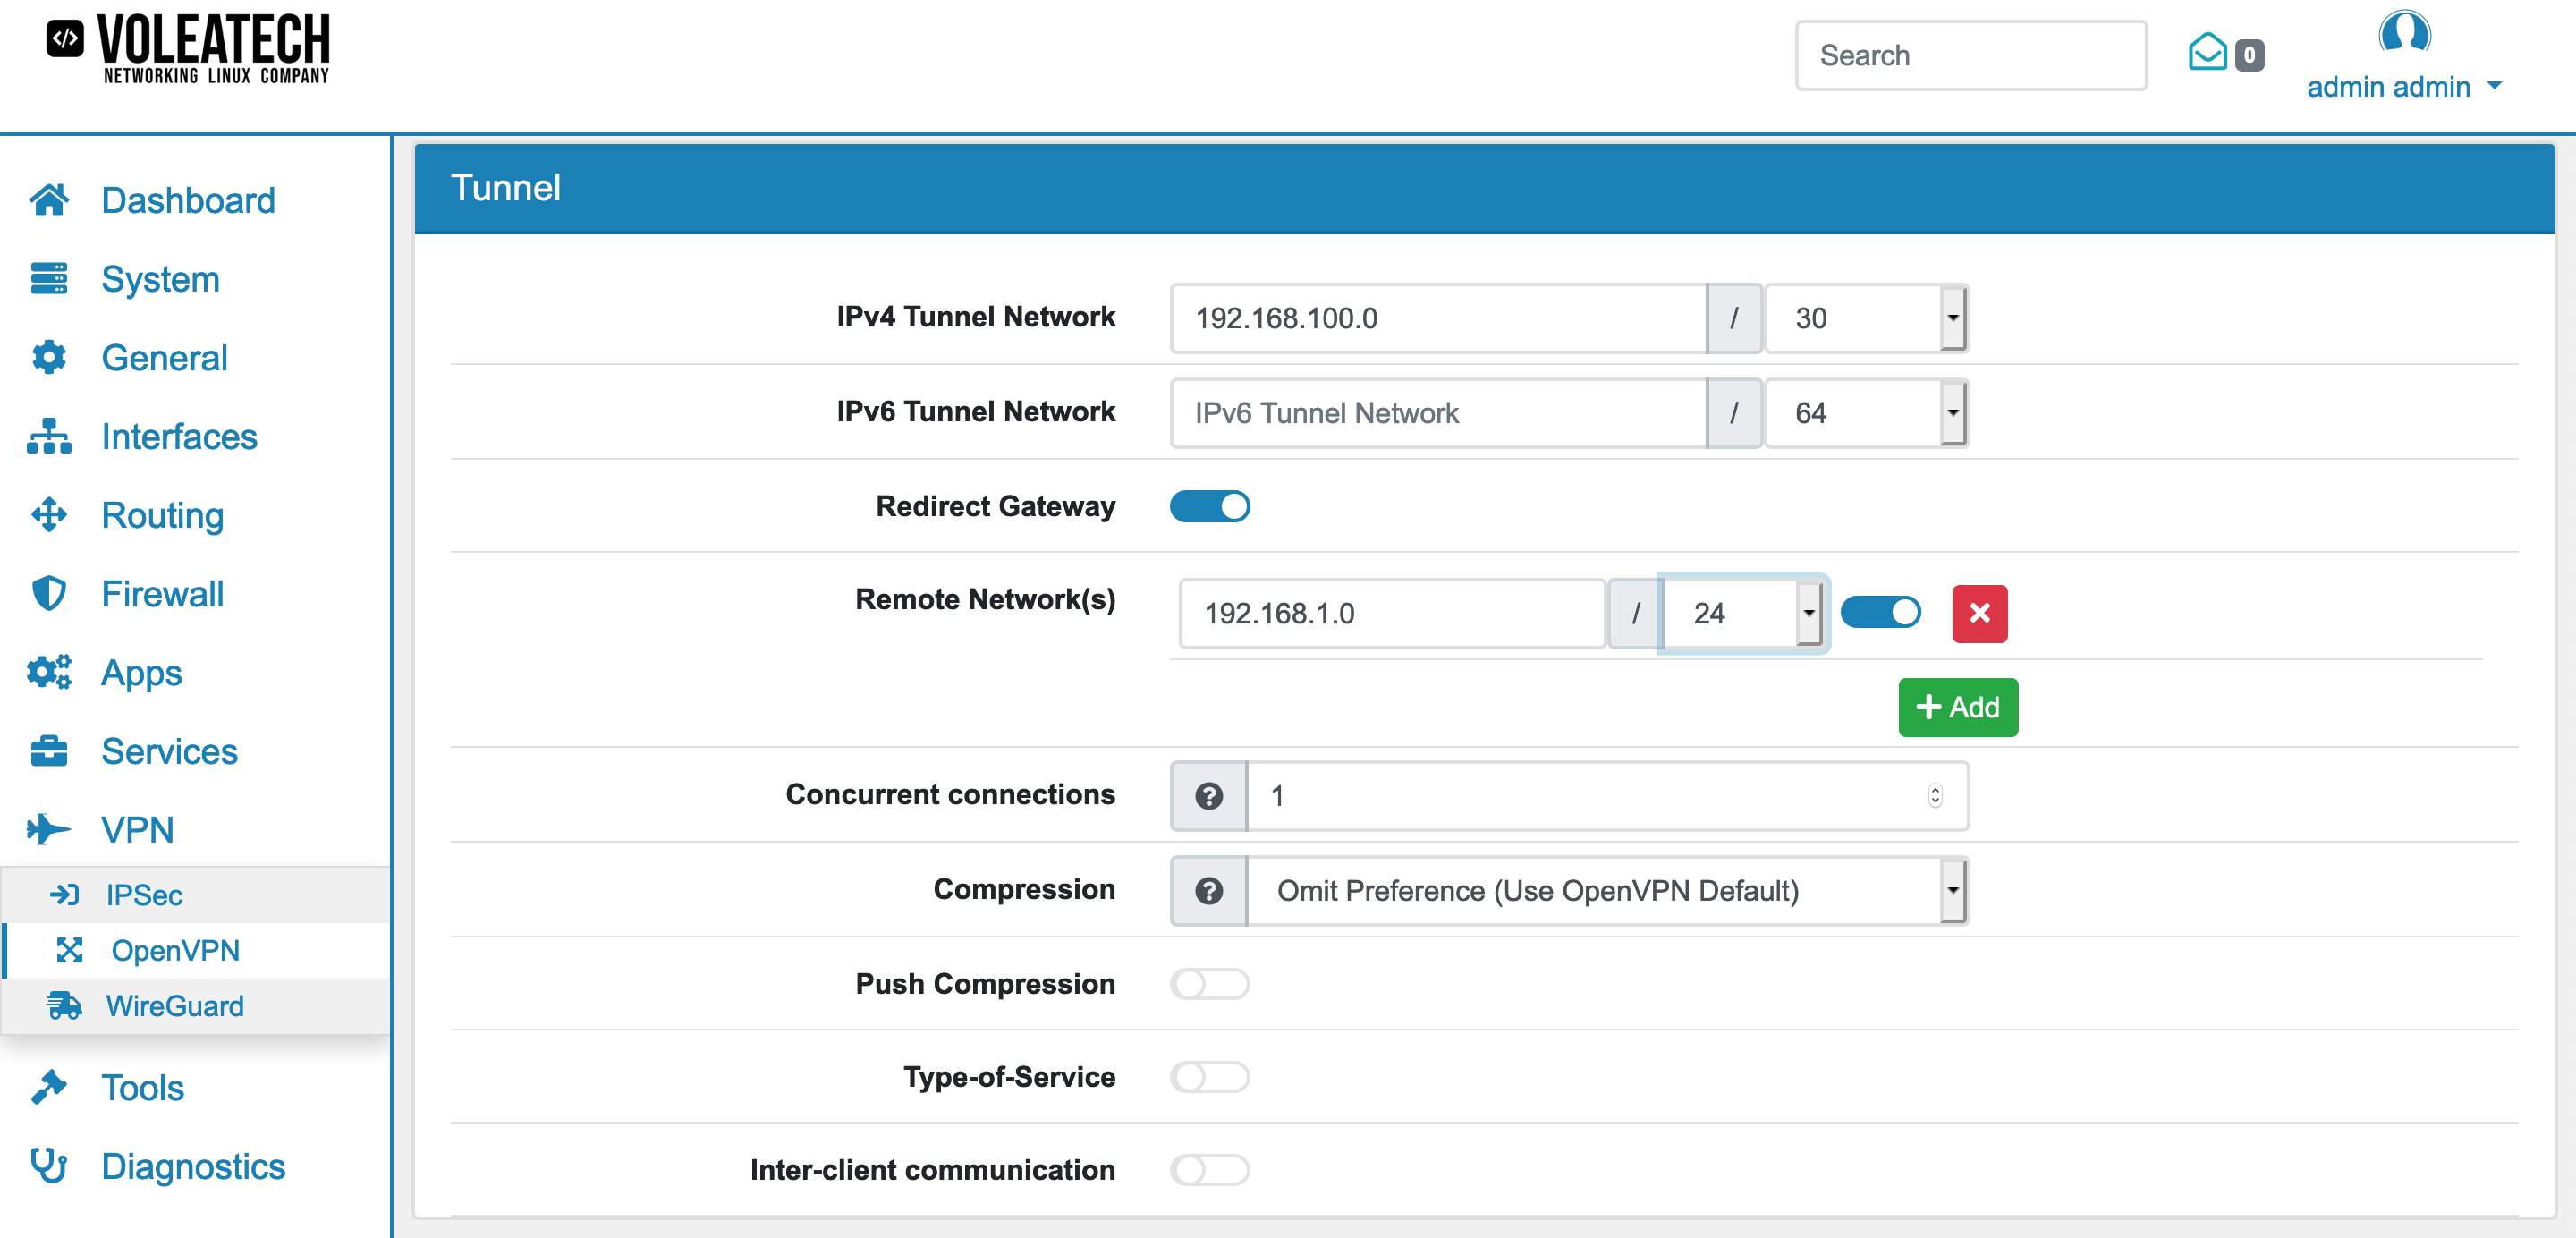
IPv4 Tunnel Network and IPv6 Tunnel Network define the tunnel network for the connection.
Remote Network(s) allows the usage of multiple remote networks.
Compression is the compression for the tunnel packets using the LZO algorithm and can be one of the the following:
Omit Preference (Use OpenVPN Default)
LZ4 Compression [compress lz4]
LZ4 Compression v2 [compress lz4-v2]
LZO Compression [compress lzo, equivalent to comp-lzo yes for compatibility]
Enable Compression (stub) [compress]
Omit Preference, + Disable Adaptive LZO Compression [Legacy style, comp-noadapt]
Adaptive LZO Compression [Legacy style, comp-lzo adaptive]
LZO Compression [Legacy style, comp-lzo yes]
No LZO Compression [Legacy style, comp-lzo no]
Type-of-Service Set the TOS IP header value of tunnel packets to match the encapsulated packet value.
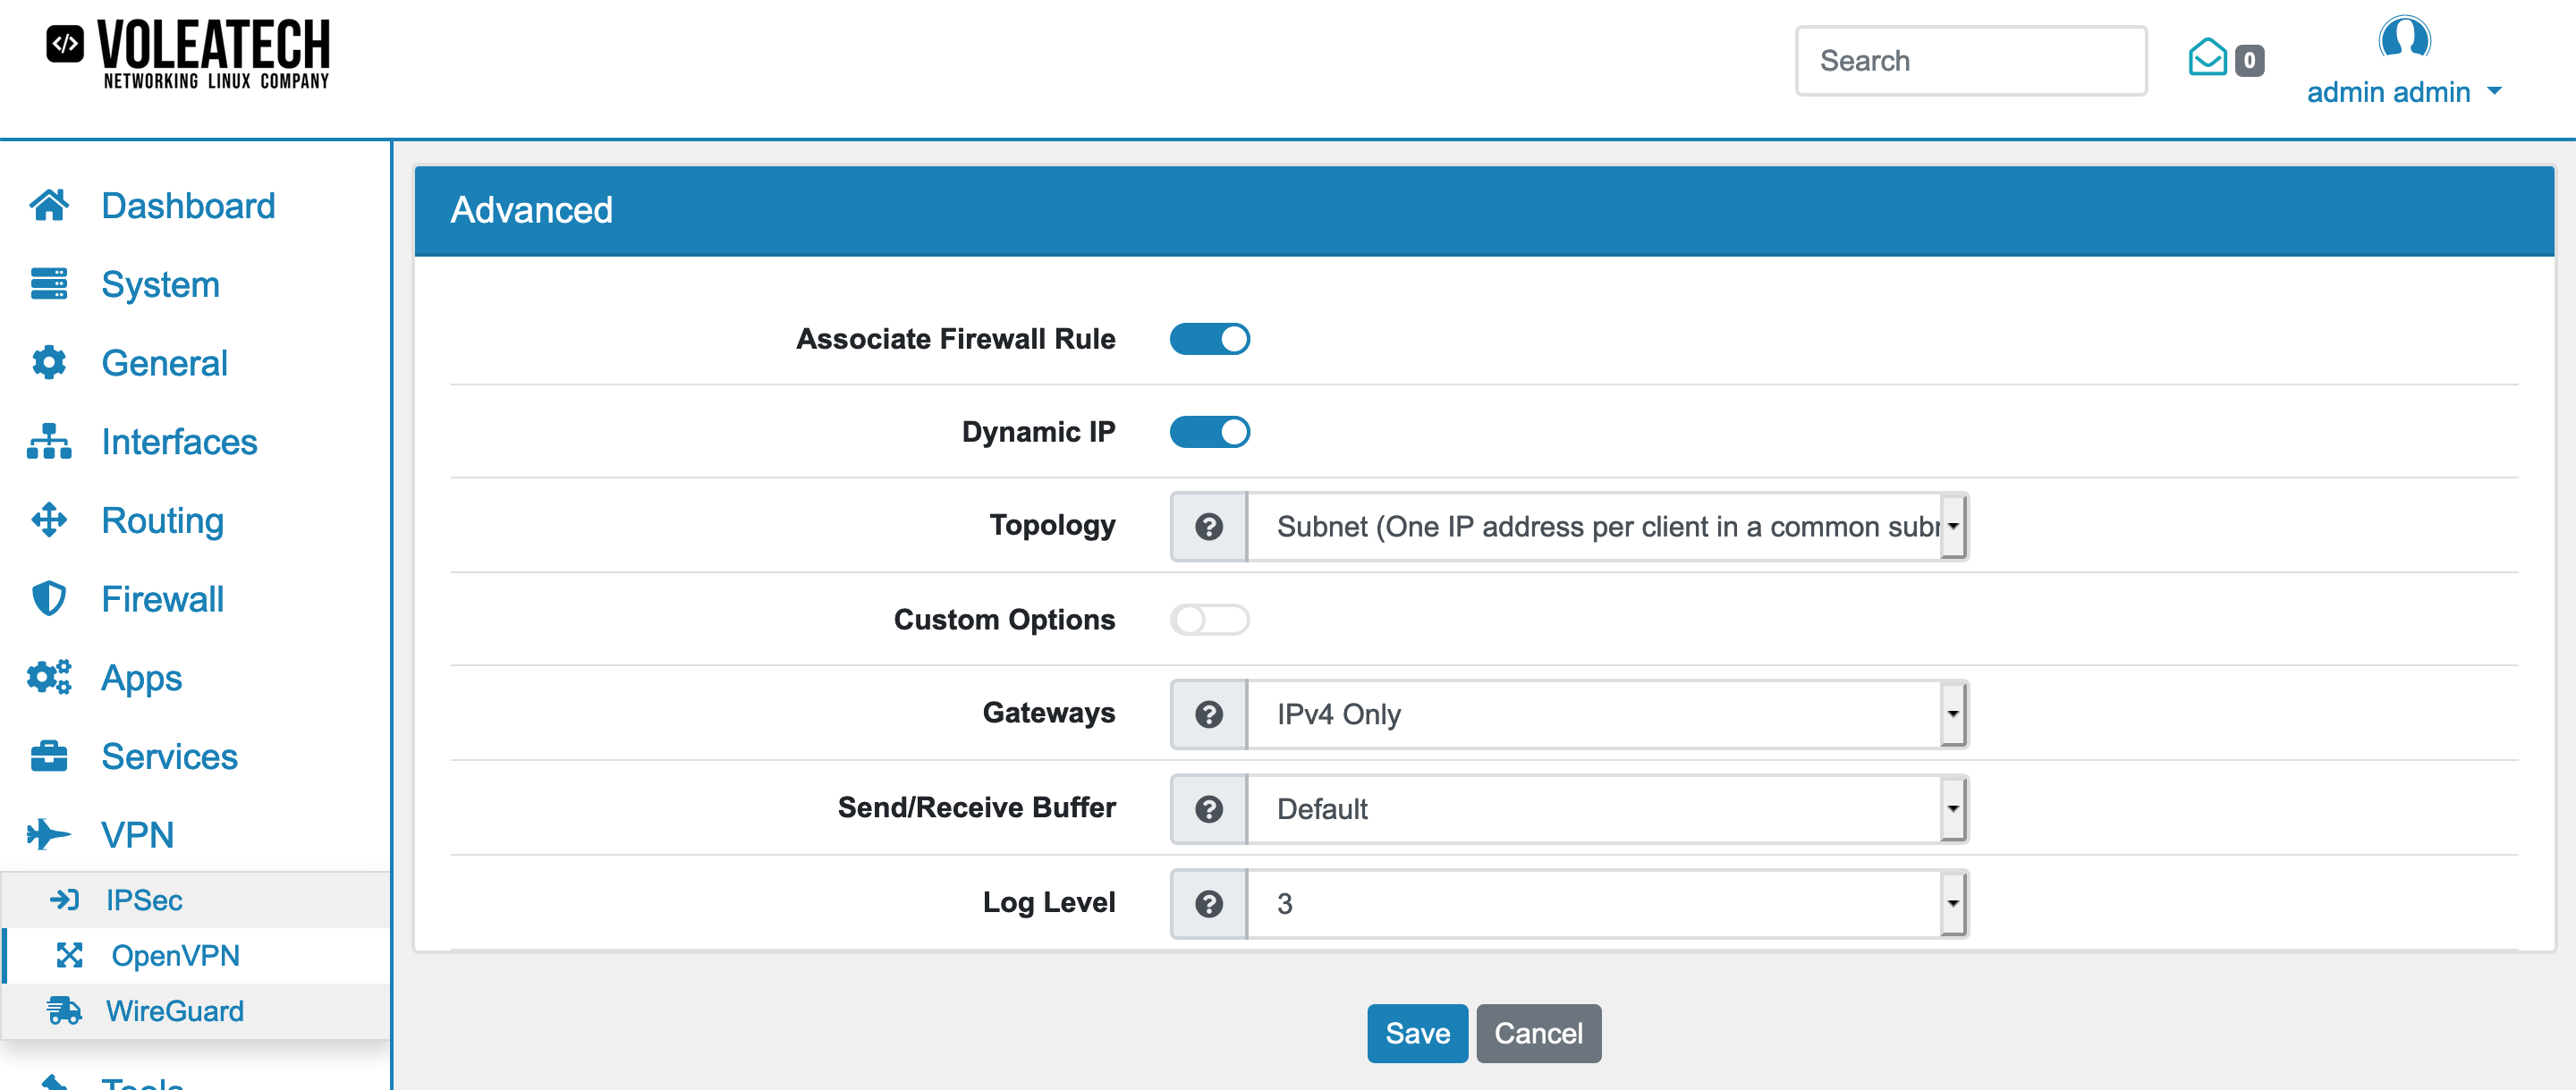
Topology specifies the method used to configure a virtual adapter IP address.
Custom Options is for custom configuration parameters for the config.
Gateways lets you choose which Gateways should be created in the System. Gateways can be used to create additional Routes or Routing Tables.
Send/Receive Buffer is the Send and Receive Buffer size for OpenVPN. The default buffer size can be too small in many cases, depending on hardware and network uplink speeds.
Log Level is the log verbosity level. 0 is silent, except for fatal errors. 4 is reasonable for general usage. 5 and 6 can help to debug connection problems. 9 is extremely verbose.
Keepalive Interval is the keepalive interval in seconds and its default is 10.
Keepalive Timeout is the keepalive timeout in seconds and its default is 60.
Renegotiation specifies after how many seconds the data channel key gets renegotiated. The default is 3600. A value of 0 disables it.
You can export the settings in the top right corner as an Excel spreadsheet.
18.2.2.1. Server Only Settings
Authentication Server if you have user authentication enabled. It allows you to use a predefined authentication server from Authentication Server for authenticaion. The users do not need to be created in VT AIR and the control is only based on the response of the authentication server.
Radius Attributes if your authentication server is a radius server you can use the radius attributes to set client override settings. The following attributes are supported
Framed-IP-Address
Framed-Route
Use CRL enables the usage of the CRL of the selected Peer Certificate Authority.
Two Factor Authentication can be enabled if you use User Authentication. Only the TOTP authentication will be used, no One Time Password. Make sure that all relevant Users have the Two Factor Authentication enabled as they will not be able to login otherwise. It is NOT necessary to enable Two Factor Authentication for the webgui for this to work.
Certificate Depth defines the depth to which certificate-based client logins are accepted.
DH Parameter Length is the Diffie-Hellman parameter set used for key exchange.
ECDH Curve is the Elliptic Curve to use for key exchange.
Redirect Gateway can be enabled to force all client generated traffic through the tunnel.
Concurrent connections specifies the maximum number of clients allowed to concurrently connect to this server.
Push Compression can be enabled to push the selected Compression setting to connecting clients.
Inter-client communication can be enabled to allow communication between clients connected to this server. A Firewall Rule is still needed for this to work.
Duplicate Connection can be enabled to allow multiple concurrent connections from clients using the same Common Name.
Associate Firewall Rule can be enabled so an OpenVPN associated Firewallrule will be created and updated.
Dynamic IP can be enabled to allow connected clients to retain their connections if their IP address changes.
DNS Settings can be enabled to configure several advanced DNS options as well as four DNS Servers.
DNS Default Domain provides a default domain name to clients.
Block Outside DNS make Windows 10 Clients Block access to DNS servers except across OpenVPN while connected, forcing clients to use only VPN DNS servers.
Register DNS kicks Windows into recognizing pushed DNS servers.
NTP Settings can be enabled to configure two NTP Servers.
18.2.2.2. Client Only Settings
Server host or address and Server Port are the IP address or hostname of the OpenVPN server and the port it’s running at.
Limit outgoing bandwidth is the maximum outgoing bandwidth for this tunnel. Can be left empty for no limit. The input value has to be something between 100 bytes/sec and 100 Mbytes/sec.
Do not pull routes can be enabled to bar the server from adding routes to the client’s routing table.
Do not add/remove routes can be enabled to not add or remove routes automatically.
Proxy host or address is the address for an HTTP Proxy this client can use to connect to a remote server.
Proxy Port is the port of the proxy and its default is 1080.
Proxy Authentication can be enabled to use a Username and/or Password.
18.2.2.3. Example Configurations
Site-to-Site connections
To obtain a stable OpenVPN connection between two or more physically separated sites you need to run an OpenVPN server and the associated clients. This chapter shows you how to configure a basic OpenVPN site-to-site connection on your VT AIR device.
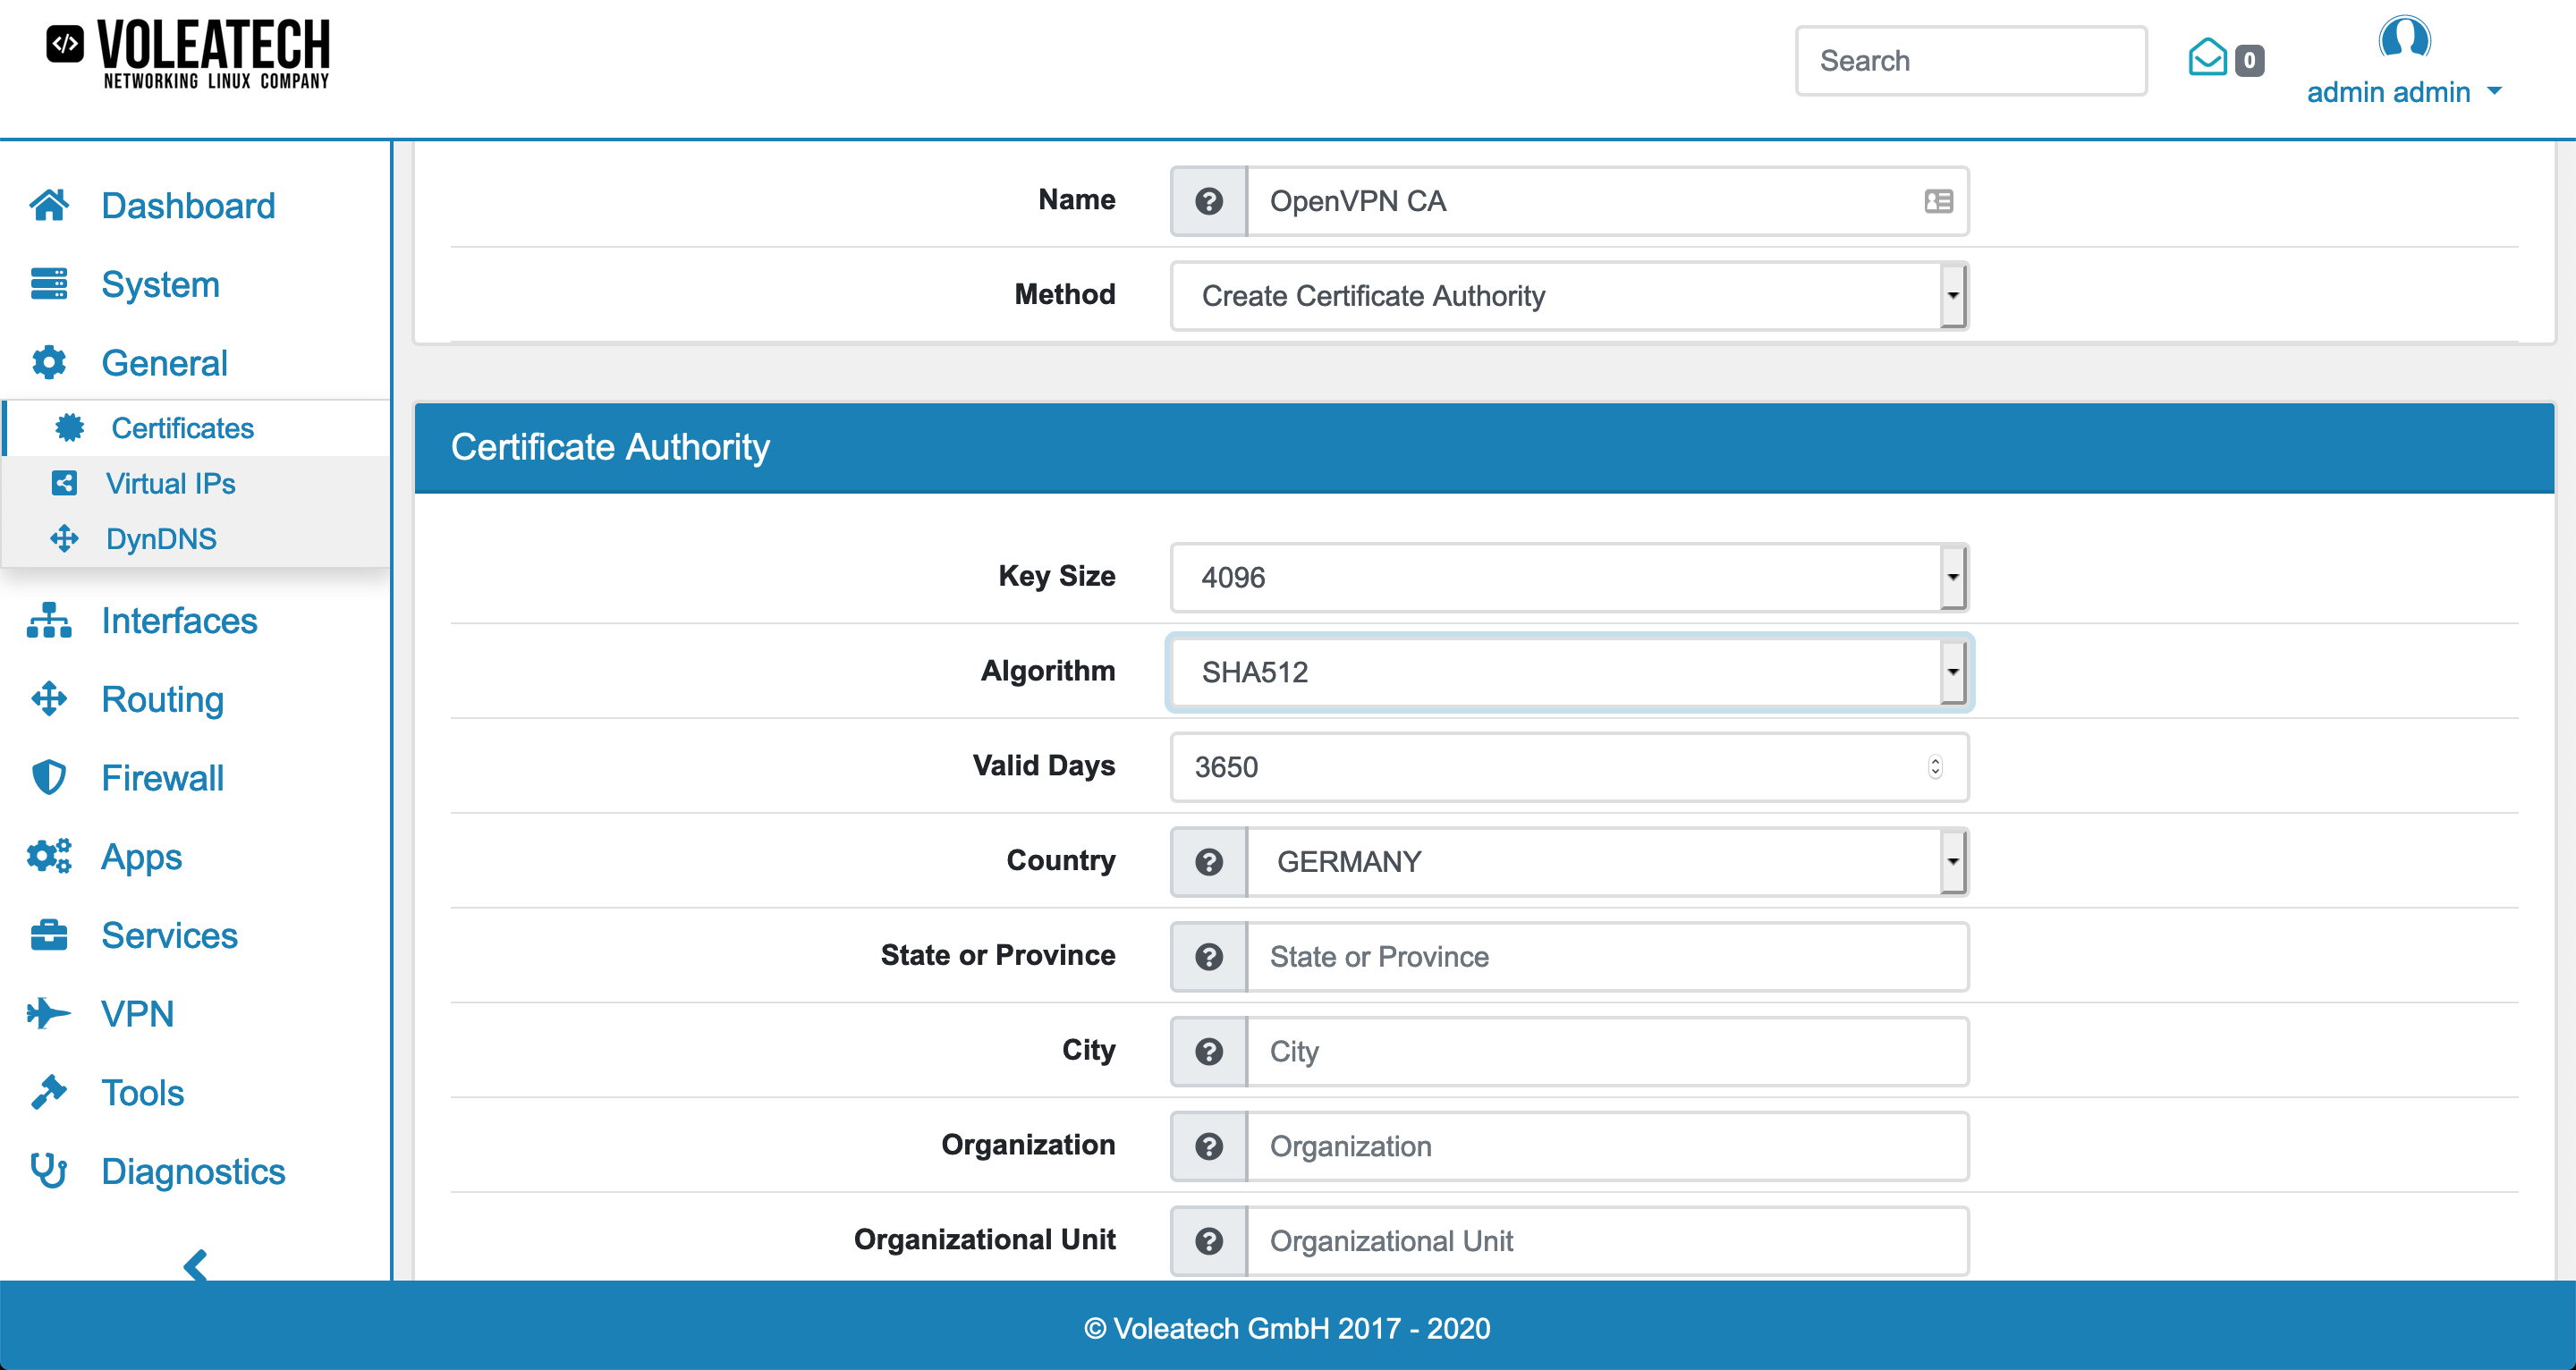
In case you haven’t created a Certificate Authority yet go to General → Certificates → CAs and click Add.
Fill in all the information (Common Name specifies your companies URL) and select a Key Size and an Algorithm. Double check with your client devices that they support the selected key lengths and algorithms since some large values are not supported on all devices. For a connection between two VT AIR devices this is not a problem.
Click Save to create your Certificate Authority.
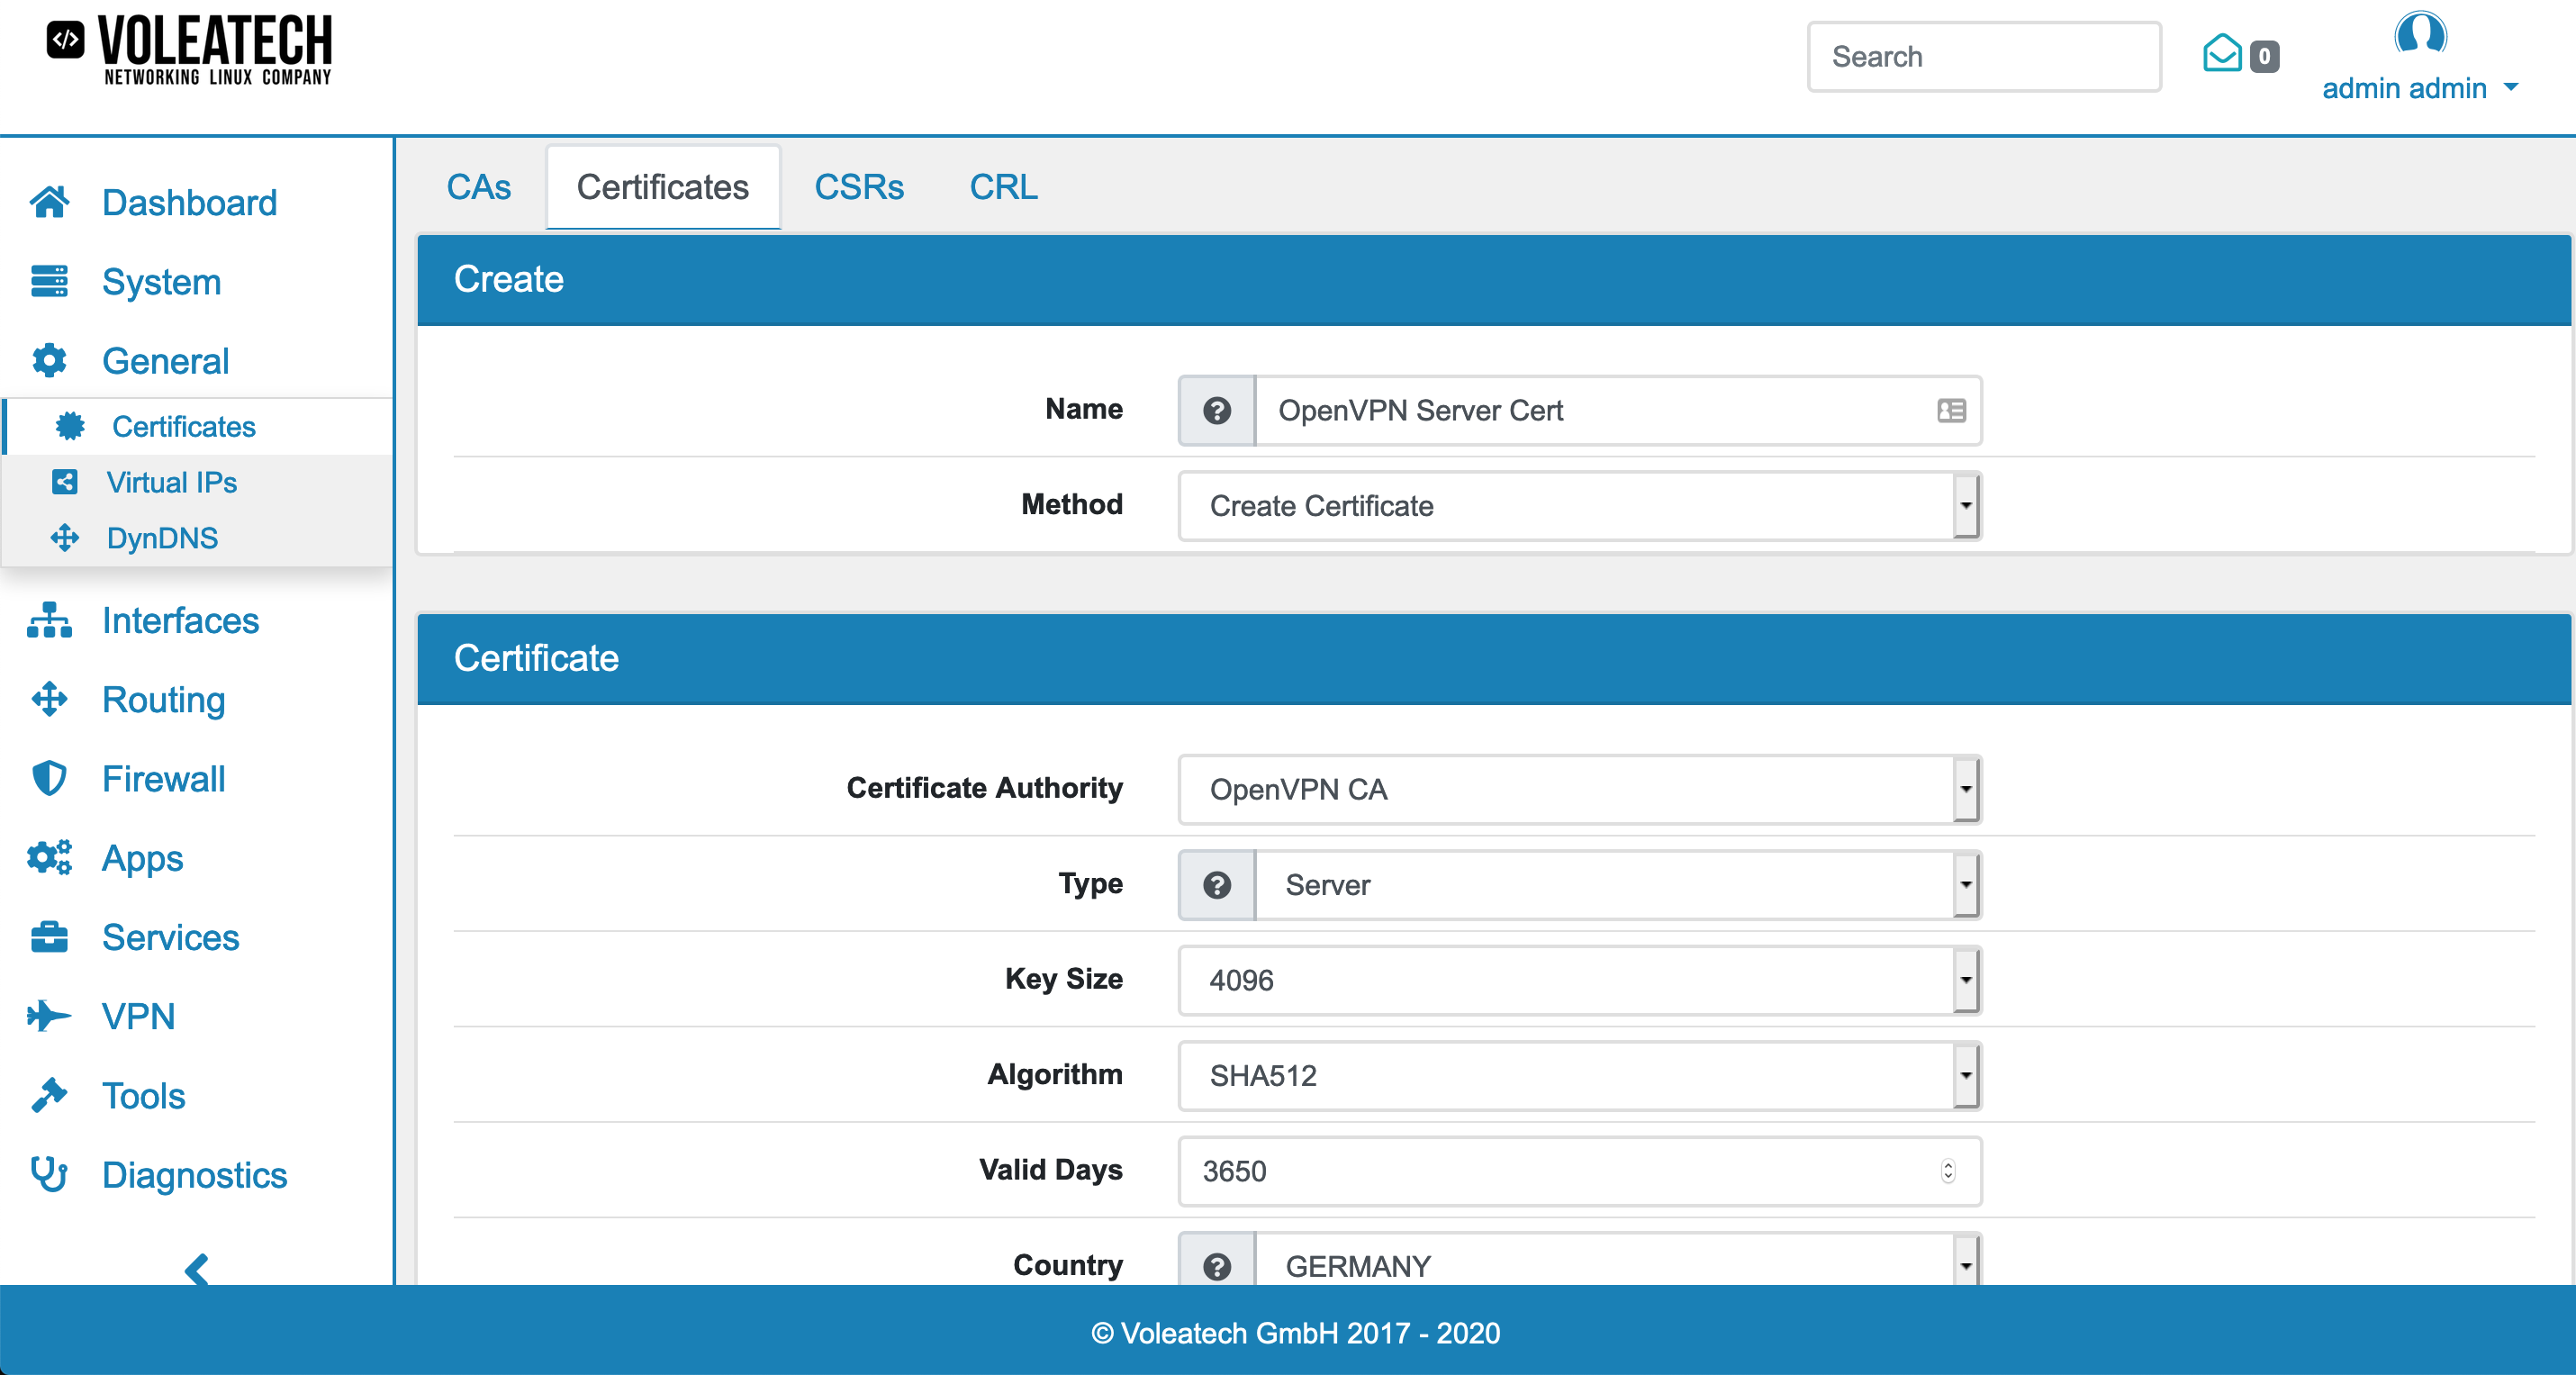
Next, go to General → Certificates → Certificates and click Add. Create a Server Certificate for your OpenVPN server by selecting your new Certificate Authority and Server as the Type.
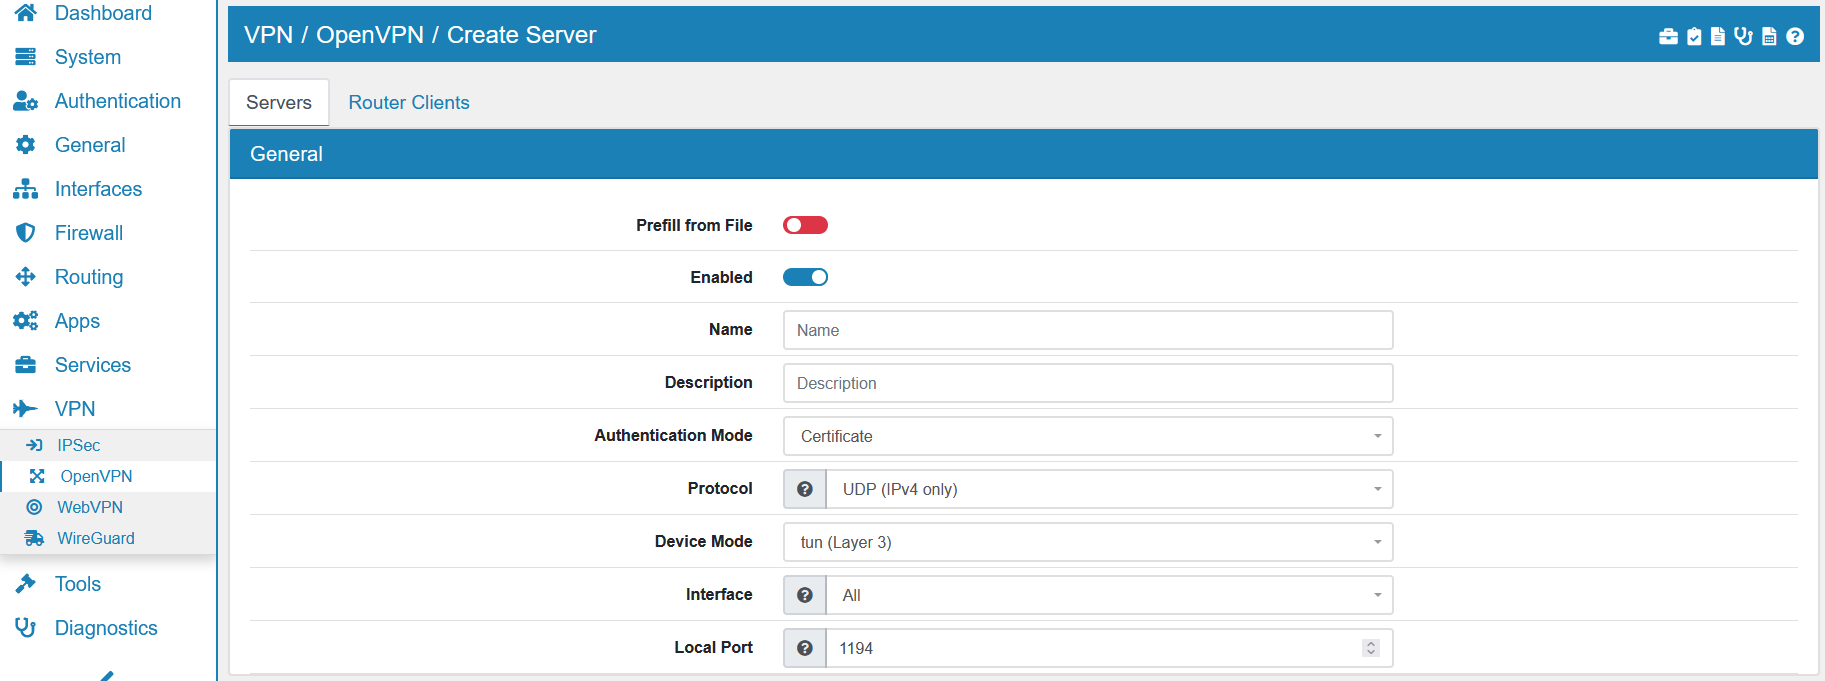
Go to VPN → OpenVPN and click Add.
Select a Name and an Authentication Mode (see description above). This example uses the Certificate + User Authentication Mode. For some authentication modes you’re given the choice to make your connection a peer-to-peer connection that only allows one client. In a site-to-site connection with only one remote location this should be enabled.
Under Protocol you can select the protocol that is being used. Typically UDP is used for OpenVPN as it’s faster and more reliable. If you need an IPv6 connection you can select it here. In most cases IPv4 is sufficient.
Under Device Mode you’re given the choice between tun and tap. Tun is more widely used, compatible with mobile client such as iOS and Android and more stable than tap mode.
The Interface of your server would typically be WAN or Multihome in a site-to-site setup that communicates over the internet. The Port can be left on it’s default value except if that port is already in use on your network.
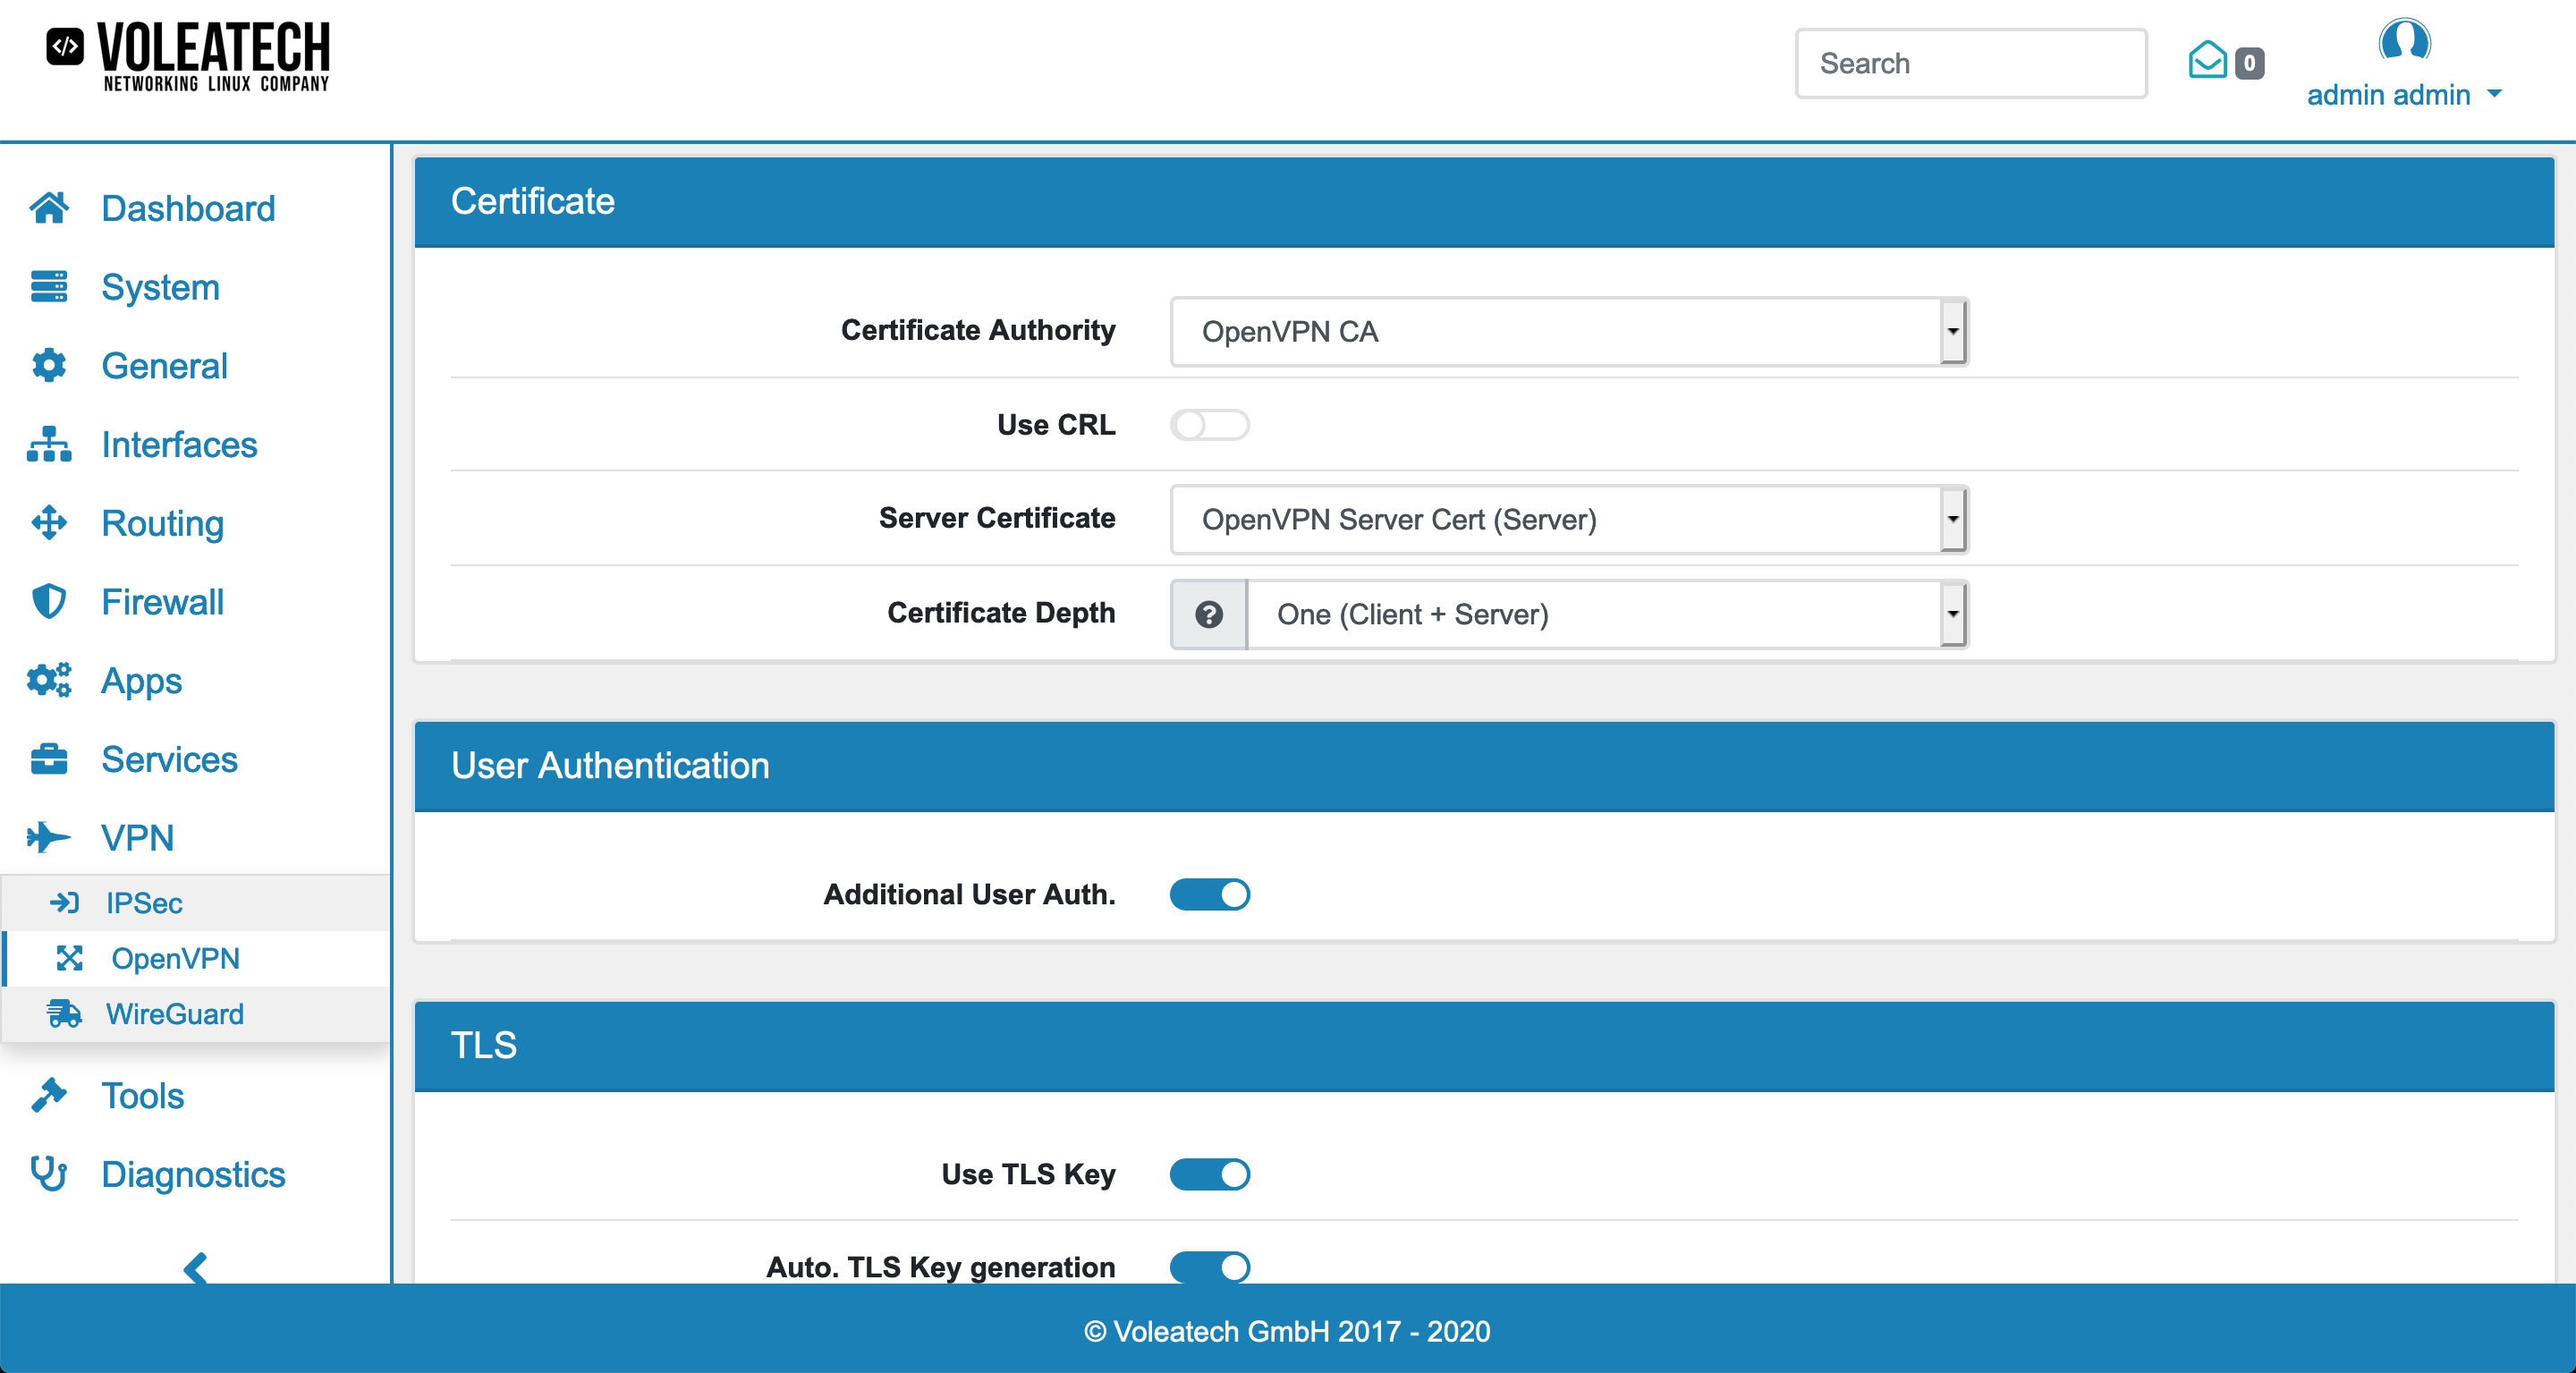
Under Certificate select your Certificate Authority and the newly created OpenVPN Server Certificate. Leave Certificate Depth at one for a basic setup like this. If you want your server to be aware of revoked certificates in the future then enable the Use CRL option. This helps with keeping your VPN connection safe even if a certificate gets stolen and needs to be replaced in the future you can revoke them in the Certificate Manager.
Since this setup uses the Certificate + User Authentication Mode enable User Authentication.
For the cryptography settings pay special attention to your client device’s capabilities again. Some may not support all key lengths or crytographic algorithms. If you enable NCP you can specify that your OpenVPN server can negotiate alternate algorithms with the client in case the primary algorithm is not supported.
The address and address range you define under Tunnel Network are the addresses assigned to the VPN clients. Choose an address range that is unused by the rest of your local network. If you have only a single client connected to your VPN choose single IP address (range 30). The maximum number of concurrent connections is therefore set to one.
If you wish to force all traffic through your VPN tunnel enable the Redirect Gateway option. This forces all traffic through the tunnel no matter its destination. If you leave this disabled only relevant traffic that has a destination on the other side of the tunnel will be forwared through your VPN.
Under Remote Network you can specify the local networks that can be accessed via the VPN connection. When creating a multi-site network that is supposed to work as if it was one common local network you’d enter your local network addresses here.
If you enable compression for your tunnel you will save on bandwith at the cost of an increased amount of needed processing power. For high speed connections this can lead to additional latency though. Refer to the description above for details on compression modes. Via the Push Compression option you can force your clients to use the compression you specify here instead of their own configuration.
Inter-Client communication stays off in this example since the number of clients is limited to one and therefore there is no other client to communicate with.
Should your clients operate on a dynamic IP address you can enable the Dynamic IP option to retain the connection even when the IP address of a client chnages. Otherwise the client would need to re-login every time the IP address changes.
Under Topology you can choose if your server creates a new subnet with only one IP address per client or a common subnet for all clients. Since this configuration has only one client this setting is basically irrelevant. Under Gateways you can choose whether you want to create Gateways for both IPv4 and IPv6 or just one of them. In this IPv4 only configuration set this to IPv4.
Click Save to create your OpenVPN Server.
On the client device(s) you can either go to VPN → OpenVPN → Router Clients and click Add to manually enter your server’s settings.
To export your settings go back to your server device and go to VPN → OpenVPN → Servers click the Edit button of the server you wish to connect your client to and scroll all the way to the bottom. Under Export you’ll find a field Hostname/IP address where you enter the address of your OpenVPN server and the port you chose for it. Click Export and save the file. Unzip the file you just downloaded.

When you click on Advanced Options the following options will show:
Verify Server CN optionally verifies the server certificate Common Name (CN) when the client connects.
Block Outside DNS blocks access to DNS servers except across OpenVPN while connected, forcing clients to use only VPN DNS servers.
Legacy Client does not include OpenVPN 2.5 settings in the client configuration.
Use Random Local Port uses a random local source port (lport) for traffic from the client. Without this set, two clients may not run concurrently.
Auth No Cache lets username and password inputs immediately forgotten after they are used.
P12 Password is the password for the P12 file.
Custom Options are custom configuration parameters for the config.
18.2.2.4. OpenVPN Firewall Rules
Note
You need to create Firewall Rules on the newly create OpenVPN_XXX Interface, in order to allow network traffic from the clients. Please have a look at Firewall Rules (Forward and Input) for a detailed explanation on how to create Firewall Rules for an interface.