10.6. Bridge
You can find the Bridge Settings at Interfaces → Assign → Bridge.

Bridges are VLAN aware meaning that you can define VLANs on them and assign them to ports as either tagged or one of them as untagged.
A VLAN aware Bridge works like a switch.
Bridge can only be configured on top of:
Physical Interfaces
Bond
OpenVPN Interface
You can pick and change the interfaces in a Bridge on the Edit or Add option of the Bridge.
10.6.1. Create New Bridge
In order to create a Bridge between two or more Interfaces, the corresponding Interfaces need to be enabled in their settings page (see Configure Interfaces).
See also
To create a Bridge between an Interface and a GRETAP Tunnel Interface, the Tunnel Interface needs to be configured and activated first. See Tunnel and Bridging Scenarios for reference.
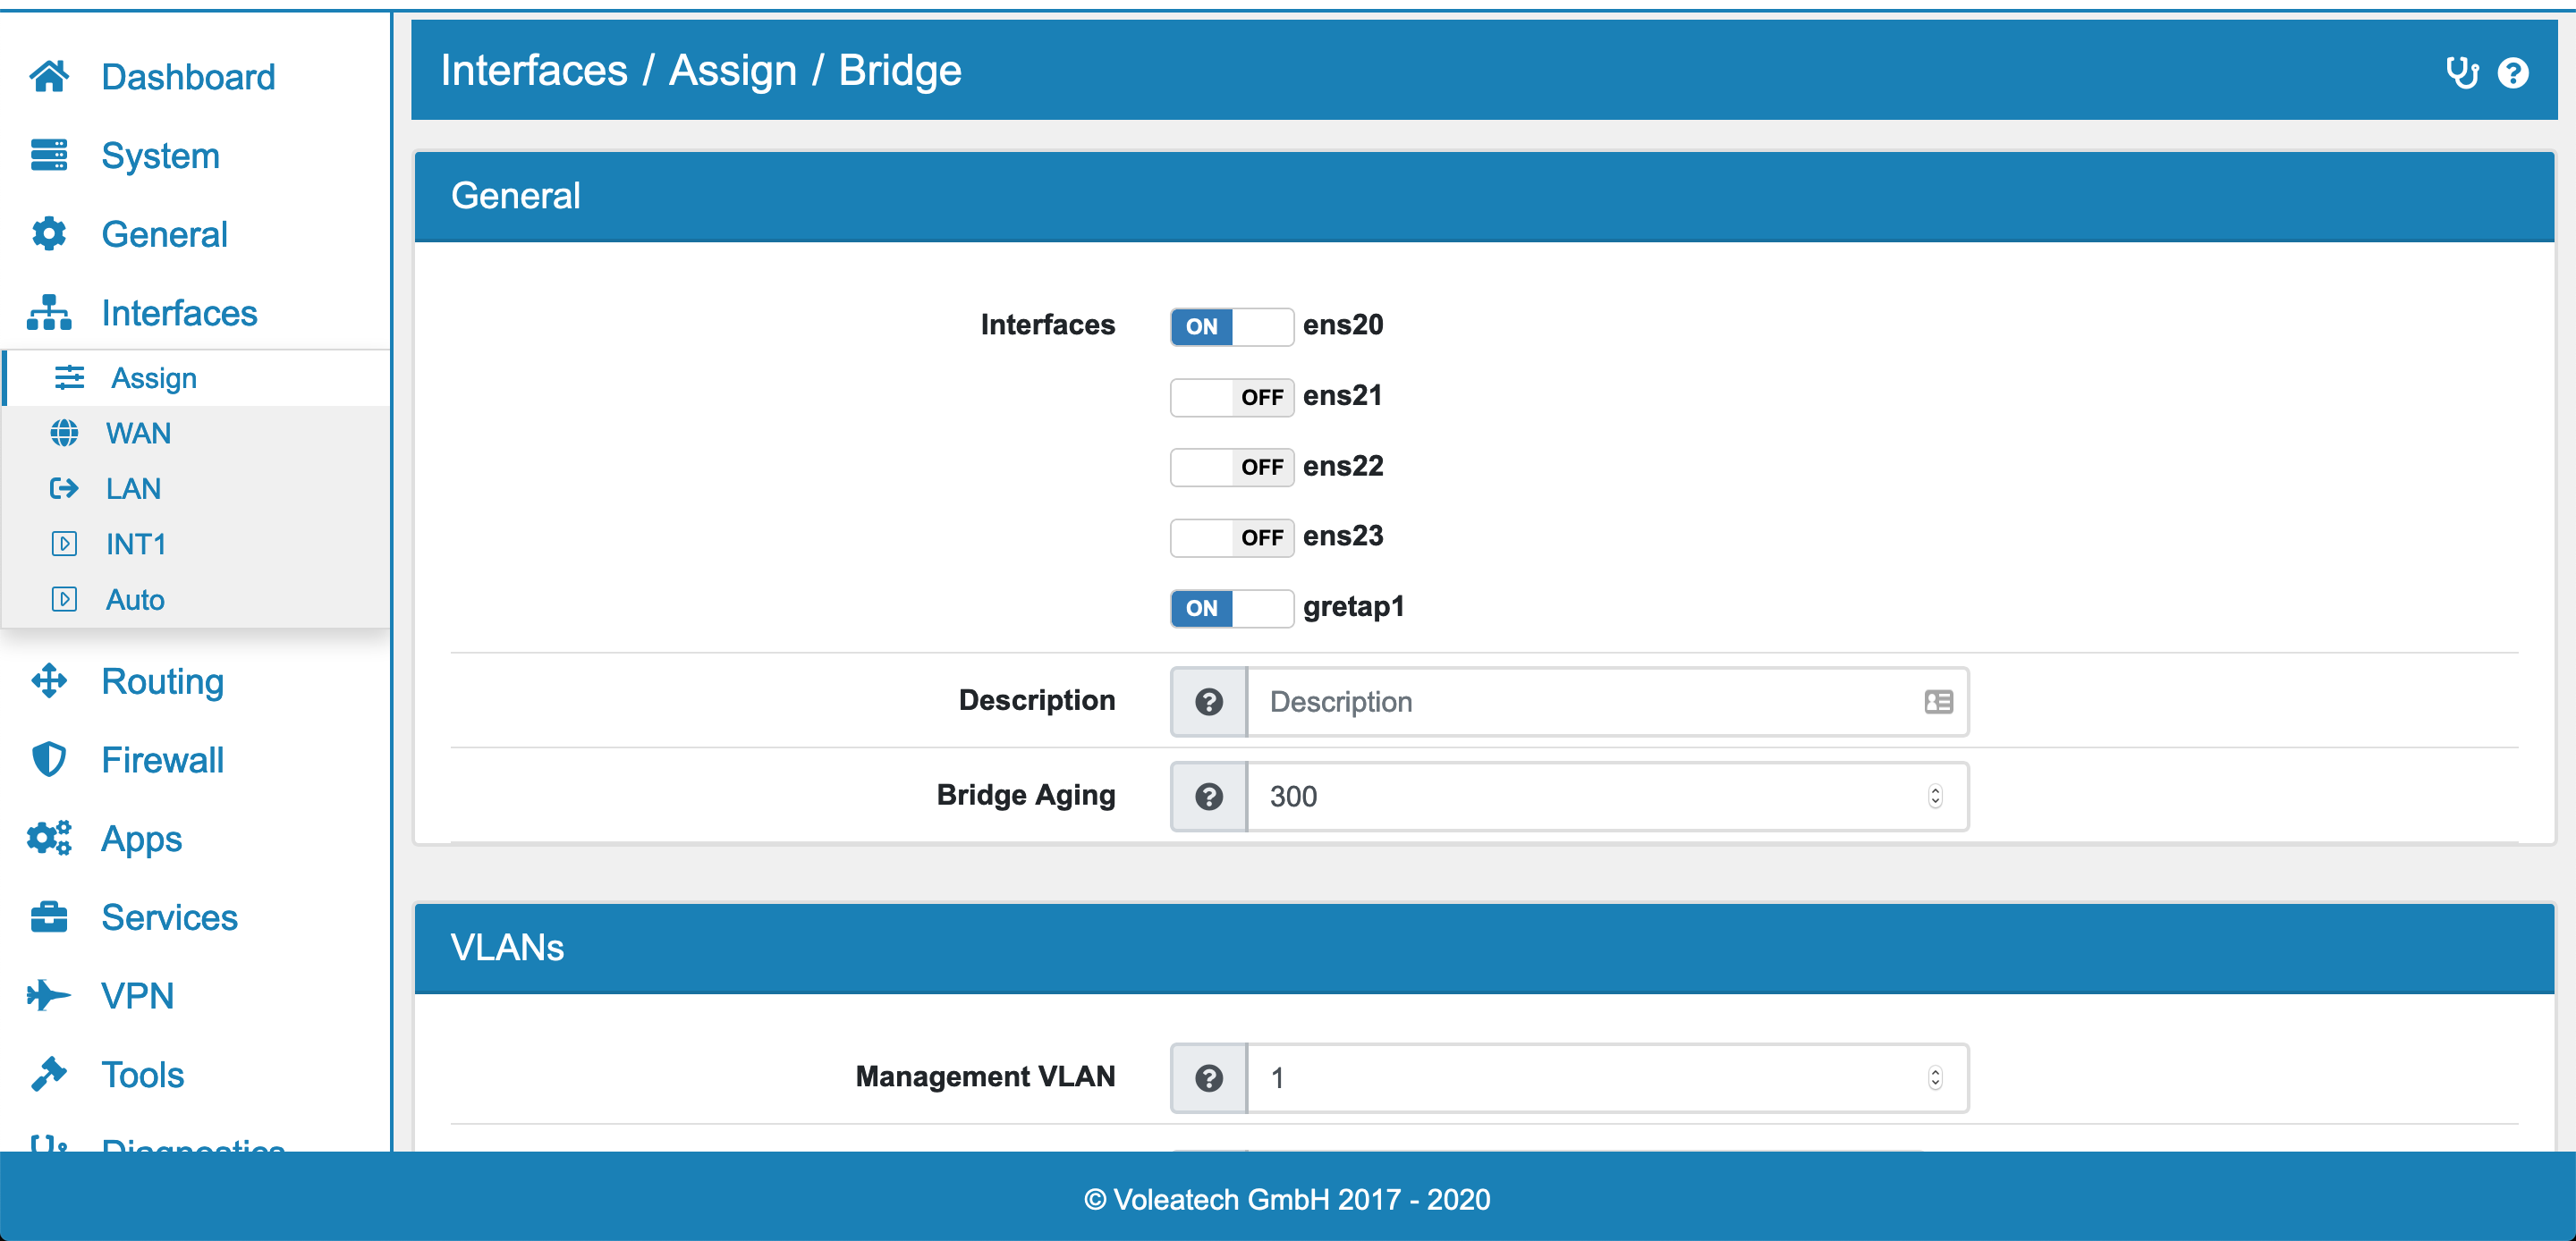
Go to Interfaces → Assign → Bridge and click Add to create a new Bridge and define which Interfaces should be bridged together.
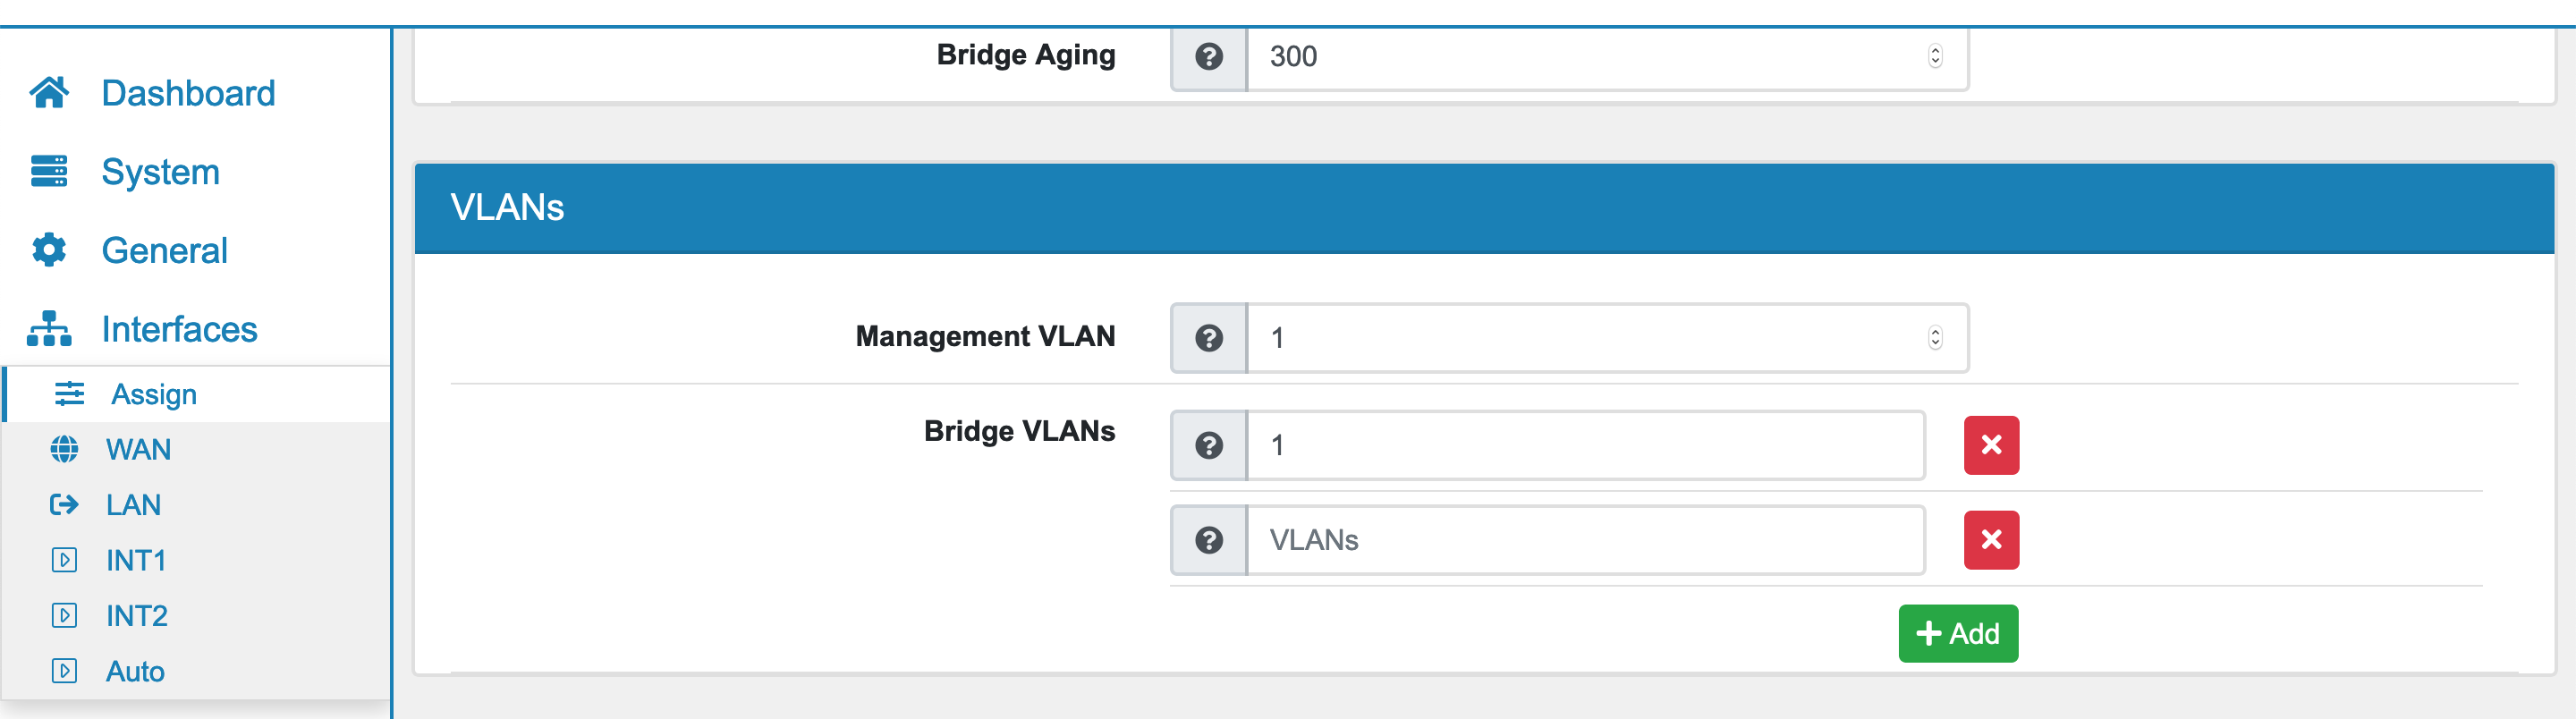
10.6.2. Bridge VLAN
The bridge must have a default (non tagged) VLAN defined. The bridge will not be active and enabled unless you assign the Bridge to an interface and enable it.
You can then define additional VLANs either single VLANs or a range (e.g. 100-200). Only defined VLANs will be forwarded on the Bridge.
In Order to use IP Addresses or firewall rules on the Bridge you have to create a VLAN on the bridge under VLAN and assign it to an Interface.
You can not filter traffic on the bridge itself but only on VLAN interfaces on the bridge. The bridge automatically passes all other traffic through the firewall.
10.6.3. STP/RSTP

VT AIR supports RSTP which works with STP and MSTP. You can enable RSTP and also set the STP Treepriority.
Assign to new Interface is an option shown when you create a new VLAN and it will automatically assign the Interfaces as described in Assign Interfaces.
10.6.4. Bridge Port Settings
After you saved the Bridge, you an also configure settings for each individual bridge port.
MTU can be set on a per port basis
Speed and Duplex can be set on a per port basis
Enable Untagged VLAN if you want an untagged VLAN on the port. You can also have only tagged VLANs by disabling this option.
Untagged Port VLAN sets the untagged VLAN.
Bridgevlans can be enabled individually when they are defined on the Bridge. Be aware that you can not enable a subset of the defined VLANS. You would need to define each VLAN or VLAN range that you want to enable individually and enable them on the corresponding ports.
10.6.5. Bridge Port Settings STP/RSTP
Bridge Ports have different options and settings for STP.
STP Port BPDU Filter Filters out the STP BDPU Packets on this port and basically removes any STP information that come into the port
STP Port BPDU Guard BPDU guard prevents loops by moving a nontrunking port into an errdisable state
STP Port Path Costs The path costs are an important part of STP and give the fastest direction to the root bridge. A lower cost is better. 0 means the speed of the interface is used to automatically set a speed. Be aware that interfaces that have no speed get a high cost. This includes tunnels and vpn ports. In order to obtain the costs of a path to the root bridge, the costs from the received BPDU are taken and the configured port costs of the interface where the BPDU arrived on is added to that cost. The cheapest way to the root brige is taken as the fastest way and those costs are send to the next hop.
STP Port Priority In case ports have the same overall costs the lowest priority is prefered. Allows values from 0 - 15. Default is 7.
STP Restricted Root Port If enabled the port can not take root role of the port.
STP Edge Port Ports directly connected to end device cannot create bridge loops in the network. Therefore, the edge port directly transitions to the forwarding state, and skips the listening and learning stages. It also does not trigger a change notification when going up or down. It is recommended to enable this option for all ports that that are connected to end devices.
The automatic STP Port Path Costs are set the following way
Link Speed |
Costs |
|---|---|
10 Mb/s |
2000000 |
100 Mb/s |
200000 |
1 Gb/s |
20000 |
10 Gb/s |
2000 |
100 Gb/s |
200 |
10.6.6. Compatibility Rapid-PVST/PVST+
Rapid-PVST is creating a RSTP instance per VLAN. Devices with RSTP are only recognized on the VLAN 1, as their RSTP BPDU is send on the untagged VLAN 1. The spanning tree will therefore only be correct on VLAN 1, all other VLANs will have a spanning tree without the RSTP devices information. This can easily lead to problem with the setup, therefore the use of Rapid-PVST is discouraged. MSTP is working alternative for Rapid-PVST.
10.6.7. Compatibility MSTP
MSTP is backward compatible to RSTP and will recognize BPDUs from a RSTP device. MSTP can also create a RSTP instance per VLAN but it will run on RSTP mode on each port that it recognizes a RSTP BPDU.
10.6.8. Bridging Scenarios
Bridging multiple sites together
In order to create a single network out of multiple physical networks, Tunnels and Bridging can be used. First create a GRETAP Tunnel Interface as described in Tunnel.
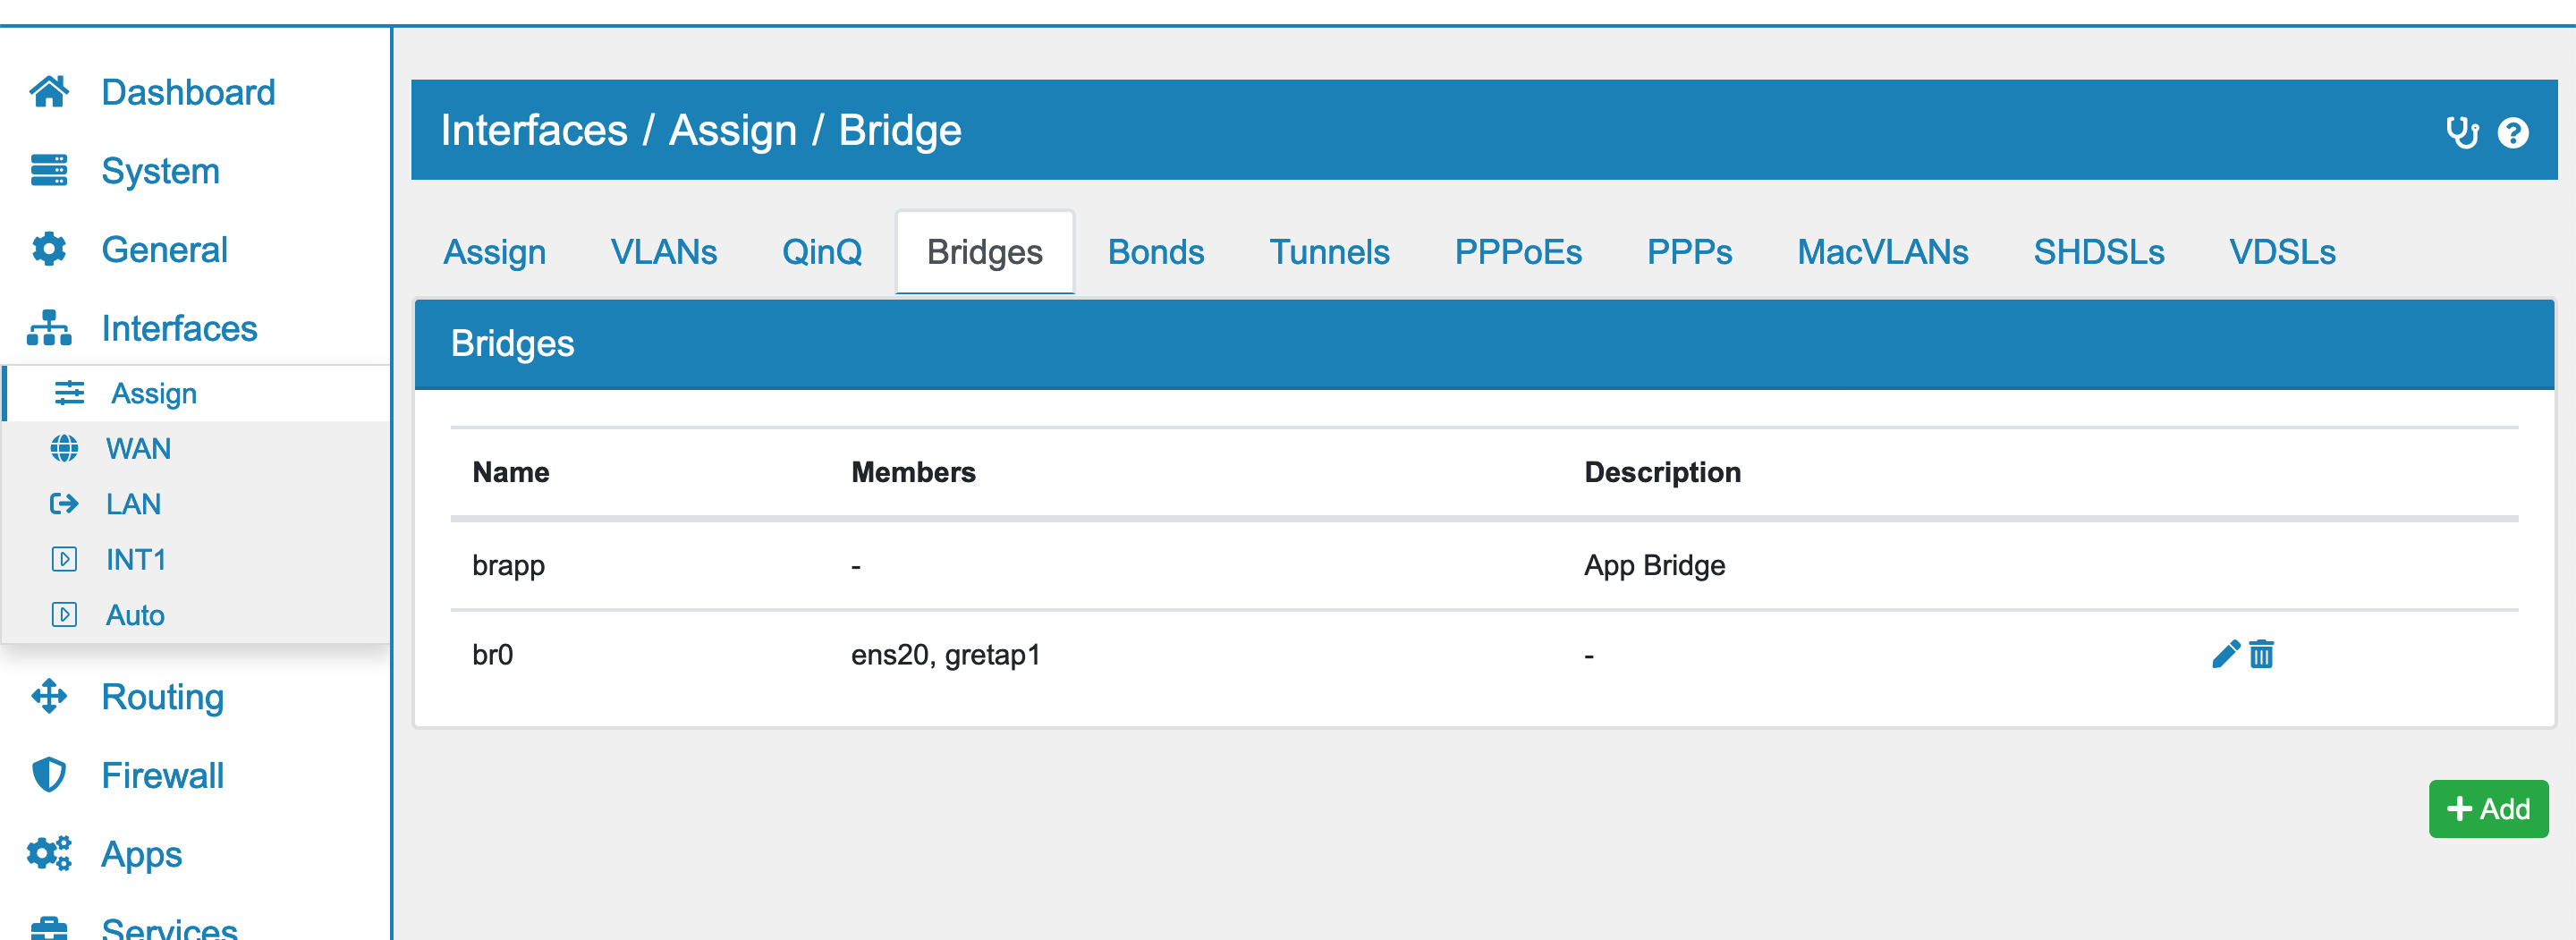
Create a new Bridge (as described above) that bridges the local Interface to the GRETAP Tunnel Interface.
Note
Pay special attention that none of the selected Interfaces has a local IP address assigned to it! For physical Interfaces set the IPvX Type to None. For the GRETAP Tunnel Interface leave the Local Tunnel IP Address empty.
Next, create a VLAN under Interfaces → Assign → VLANs as described in VLAN on the Bidge’s Interface (e.g. br0), and assign an ID.
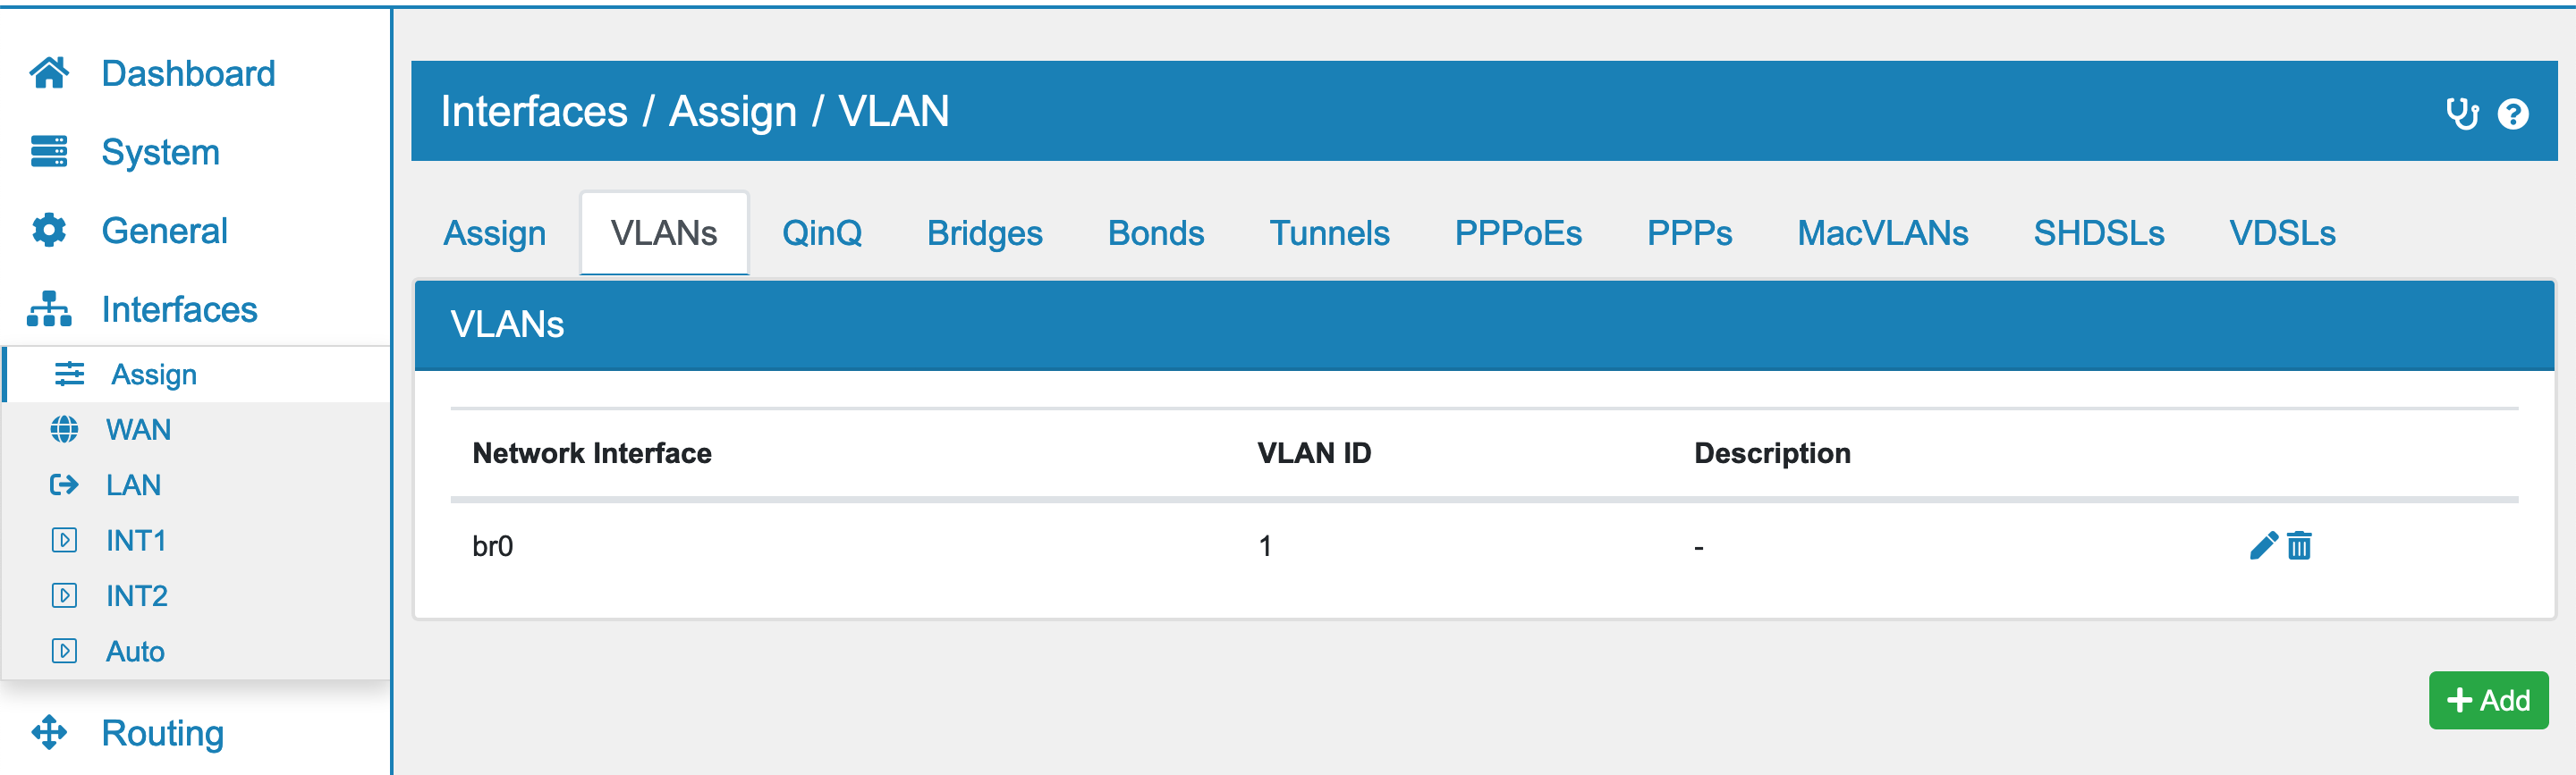
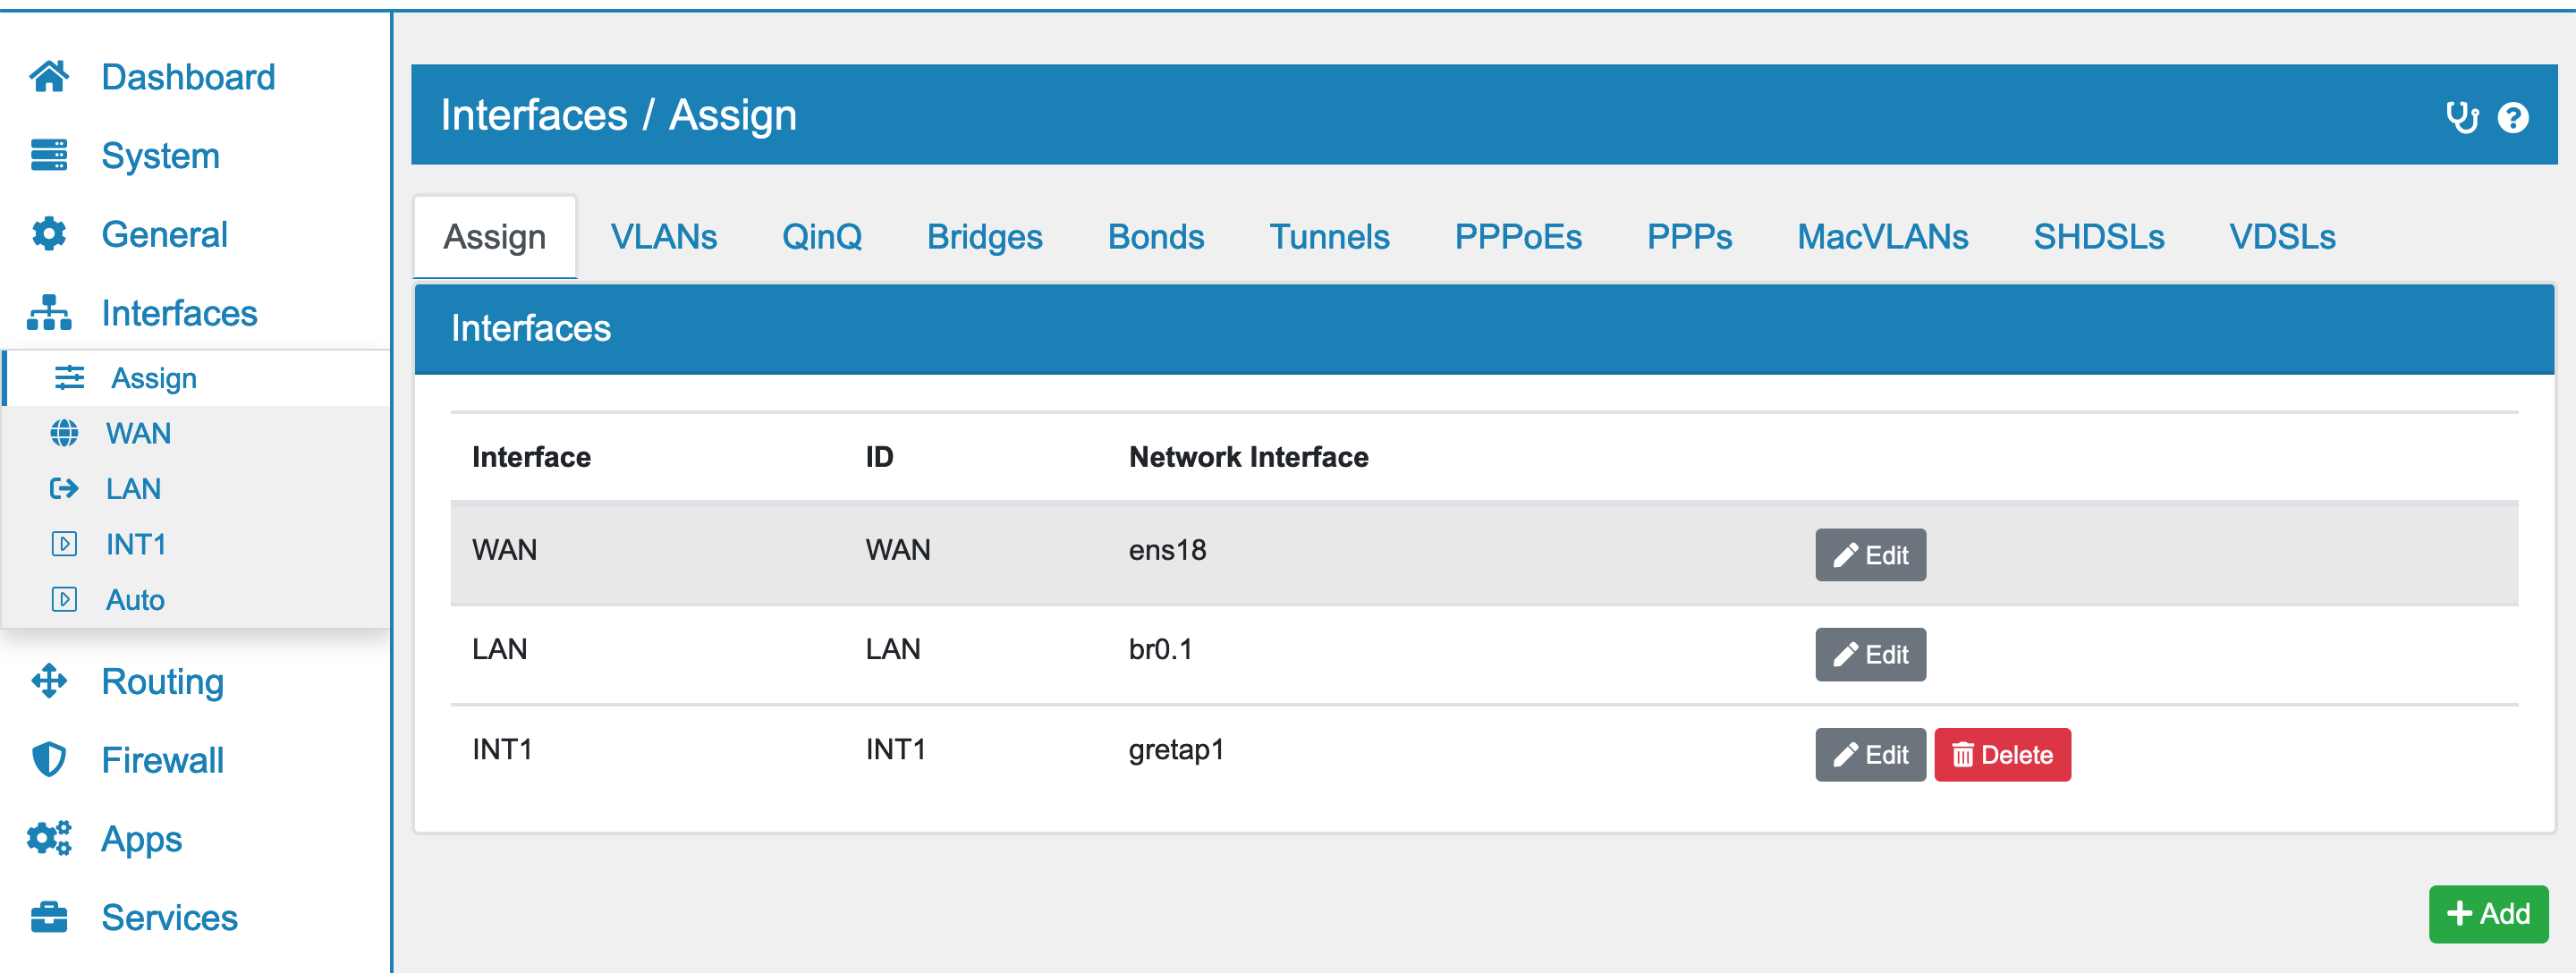
Enter the VLAN’s ID in the VLAN settings of the Bridge under Interfaces → Assign → Bridge.
Go to Interfaces → Assign and change your LAN Interface’s settings to the VLAN on the Bridge’s Interface (e.g. br0.1 for Bridge br0 and VLAN 1). Alternatively you can create a new Interface.
Configure your LAN/Interface with your desired IPvX Type and activate the Interface.
In order for traffic to move through the Tunnel you need to create a set of Firewall rules.
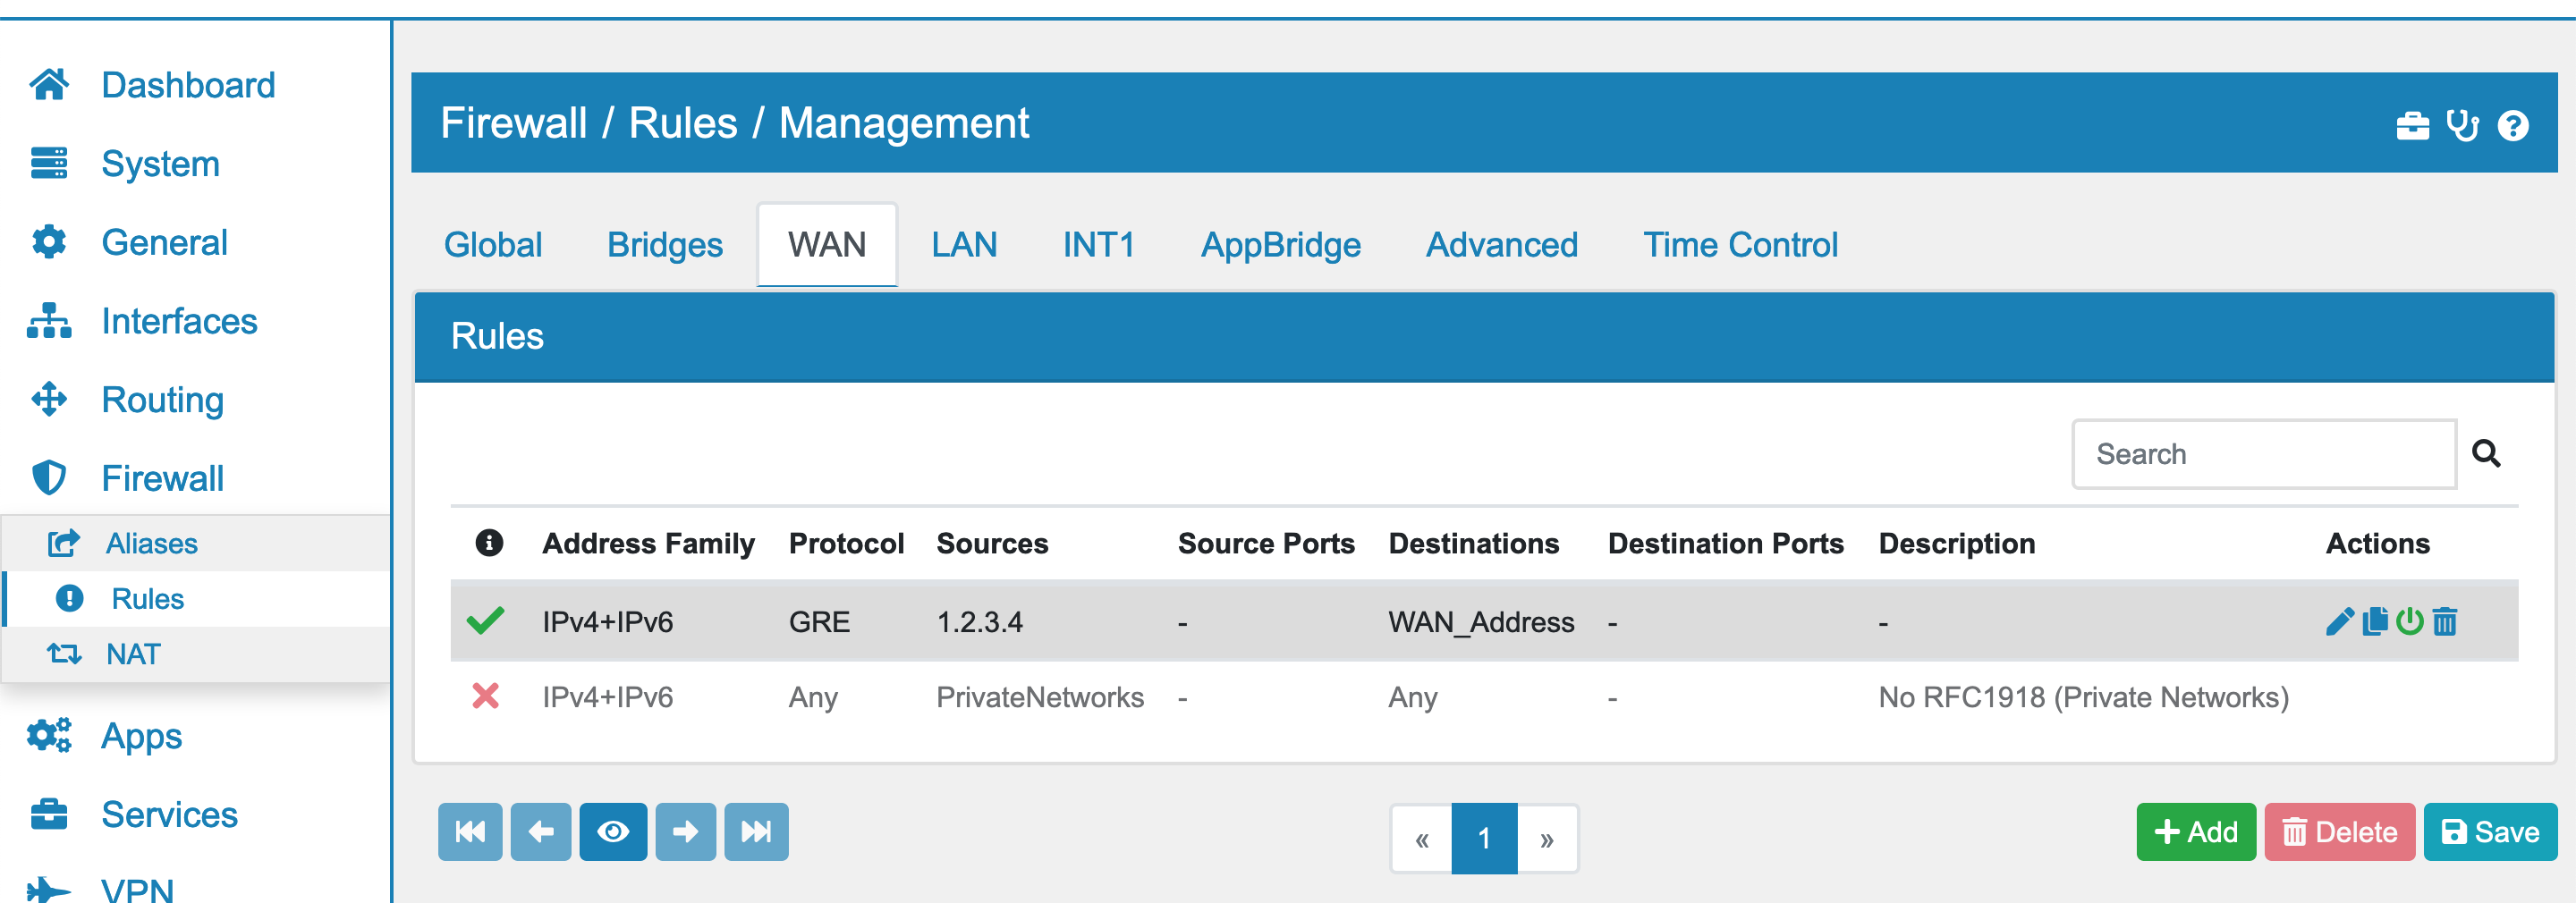
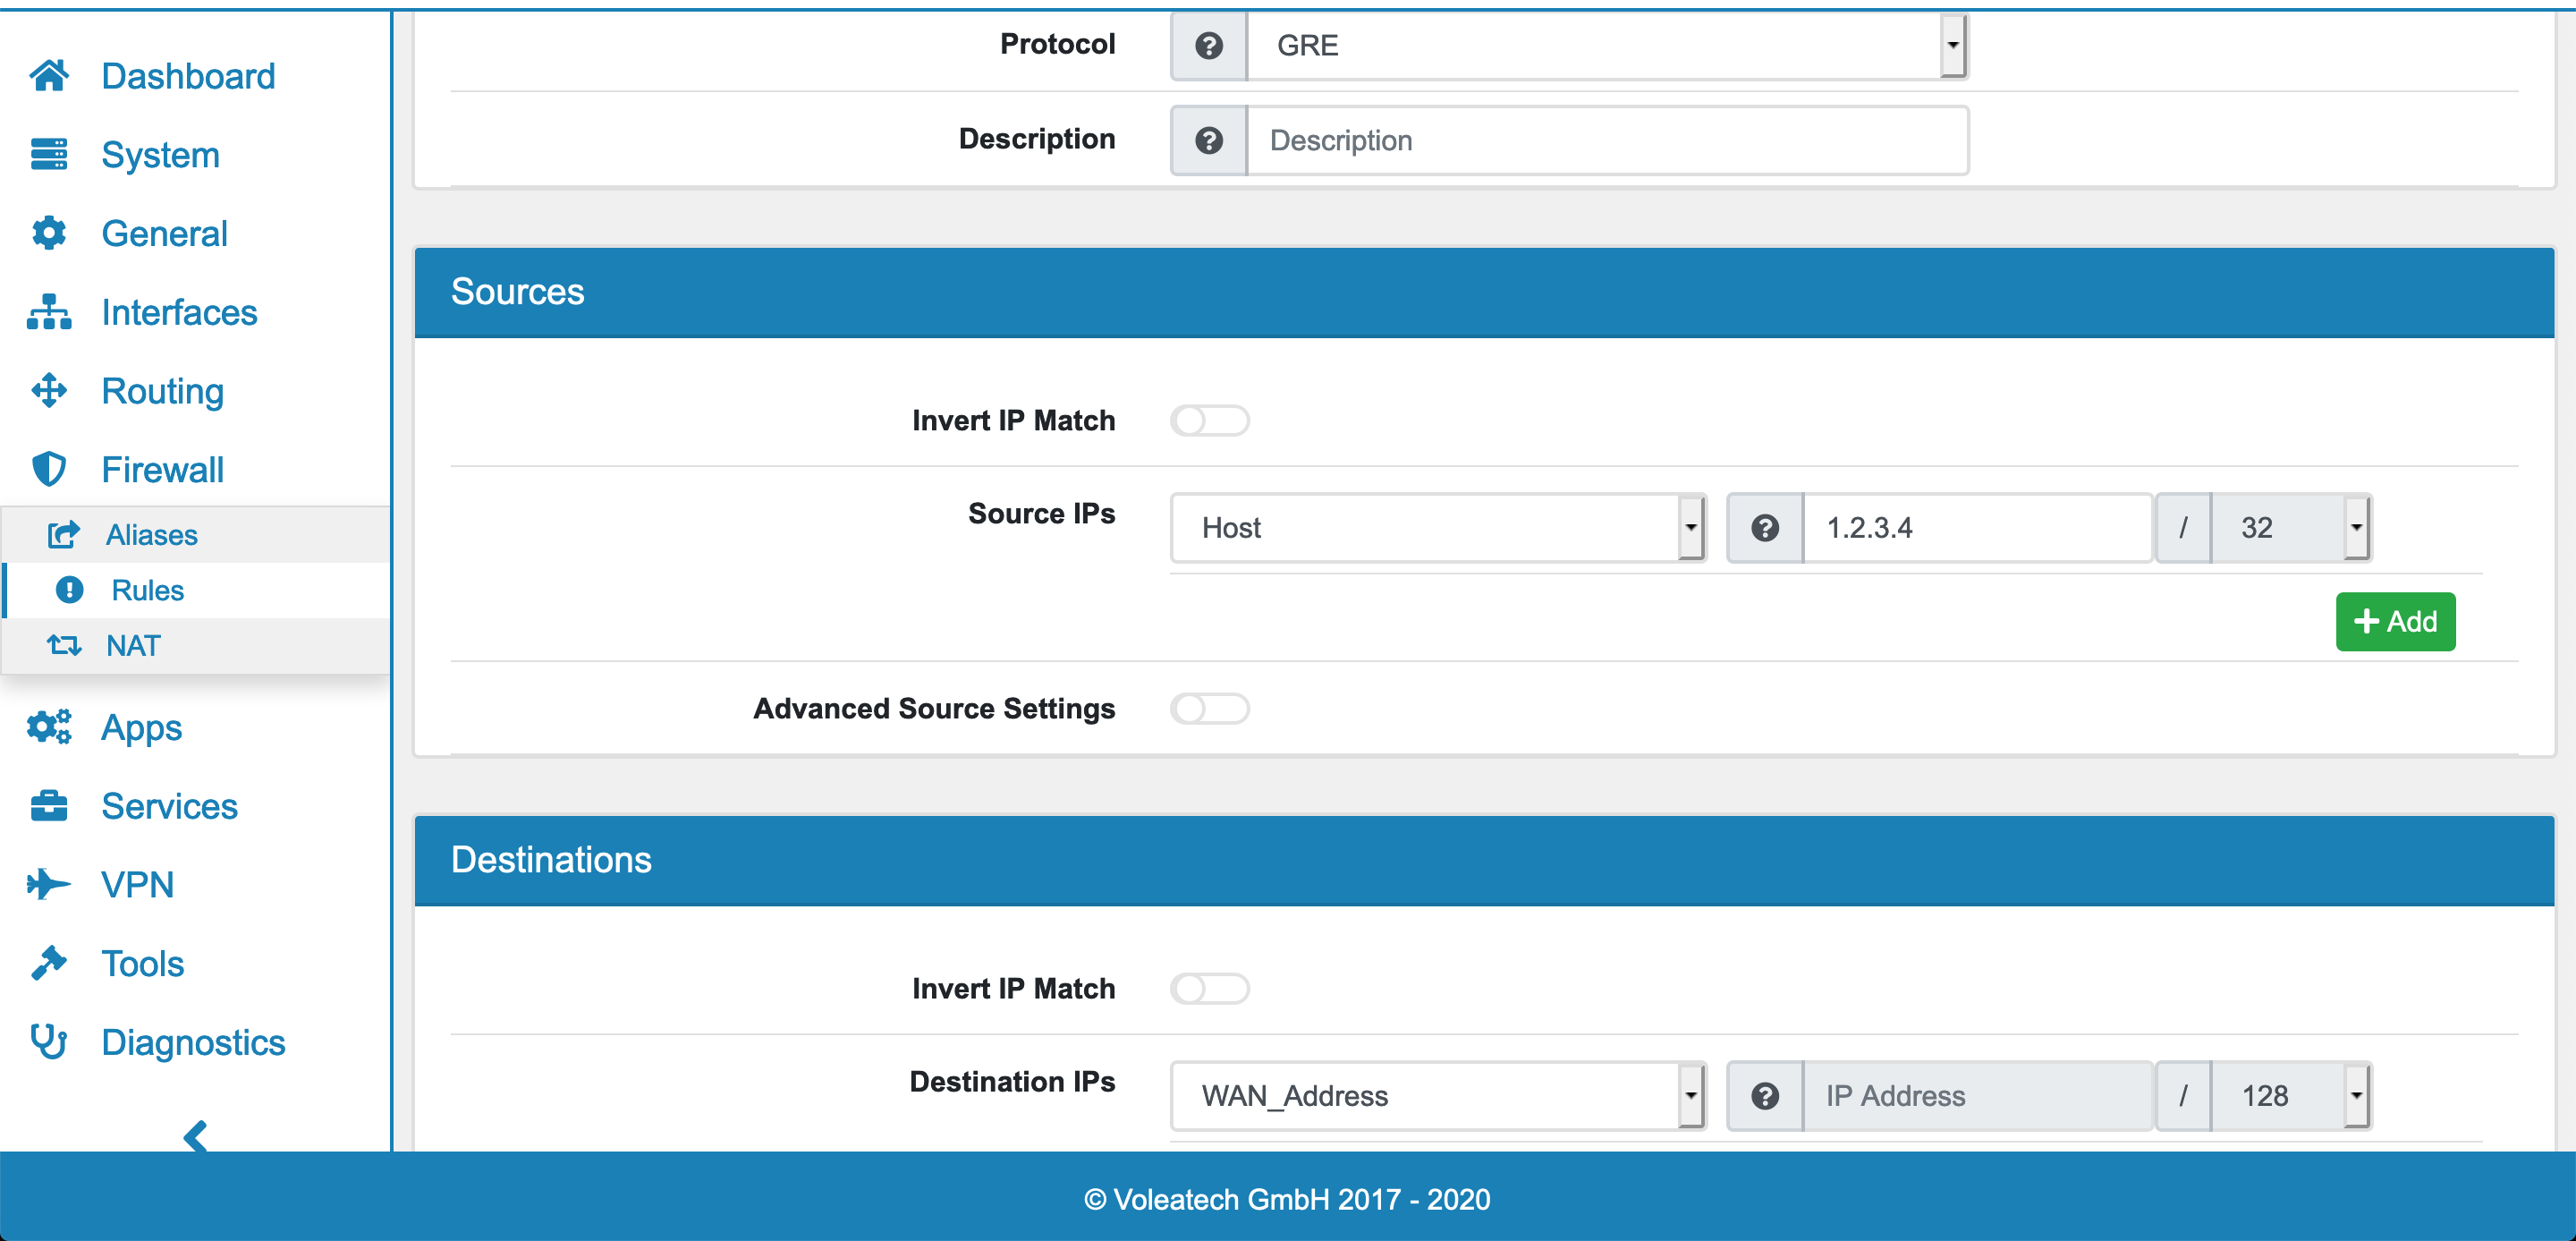
If your GRETAP Tunnel Interface was configured with the WAN address as the Tunnel endpoint go to Firewall → Rules → WAN and click Add.
Select GRE as the Protocol, enter the Remote Public IP address of your GRETAP Tunnel as the Source IP and select WAN address as the destination.
Save the new Firewall Rule. You may wish to encrypt your site-to-site traffic with an IPsec VPN on top of your GRETAP tunnel. See GRE over IPSec for further details.